Category Archives: Game Design

Design Me: Worker Placement

I’m starting a new feature on Boards & Barley called “Design Me.” These features will allow me to let my brain spew words onto this site in an effort to come up with a random game design. The idea here is to “exercise” my game design brain and “flex” my game design muscles. Consider it like practice. Athletes go and work out, lift weights, and other things like that. So as a game designer I think we should do the same thing. Bear in mind that this is an exercise and exercises are not nearly as elegant as actually seeing an athlete perform.

Normally Friday’s are review days here on Boards & Barley, but reviews aren’t very fun to write. So I’m switching to this design feature. Now there will be two review Fridays per month and two Design Me Fridays per month. I tweeted a request for a unique theme on which to apply a worker placement theme. The first person to reply wittingly mentioned castles, farming or railroads. Then they mentioned Smurfs. Then someone else mentioned smurfs. Who knew there was so much love out there for the little blue guys. However, the idea I found most interesting came from Tasty Minstrel and I’ll be going with this:

The Rolling Wort Boil

Not a very rolling boil. Hopefully the design rolls better!

Not a very rolling boil. Hopefully the design rolls better!

First of all, I really enjoy the idea of dice drafting and using dice as workers. It works really well in both Alien Frontiers and The Castles of Burgundy, the latter being one of my favorite games. Granted, they don’t necessarily use dice drafting, but the general concept is there.

So let’s start designing this game…

Brewing beer involves a few different things. You need to gather the right ingredients, gather the right equipment, have a facility, and possess skill in brewing. So let’s break each of those down into different parts of the game.

Here’s the grand concept, a thesis statement of sorts, for the game:

In The Rolling Wort Boil players must utilize the best dice for gathering ingredients and equipment, upgrading your facility, and perfecting the art of craft brewing.

Dice will be used for each of those things. There will be two types of dice. One type will be used to gather the right stuff. The other type will represent people and their skills. Let’s explore the former type first.

The Gathering Dice

Trying to exercise my art skills as well. The top is supposed to be yeast.

Trying to exercise my art skills as well. The top is supposed to be yeast.

I would design the game to be played where each round had a gathering phase and a brewing phase. In the gathering phase each player would roll a number of gathering dice. These dice would have different symbols on them. Those symbols could be grain, water, hops, or yeast.

Each player would roll their gathering dice. Then they would choose one die and pass the rest. They would then choose from the dice that were passed to them. This drafting would continue until all dice were chosen.

These gathering dice then form your team that you can use to go claim ingredients and equipment. What you’re trying to do while drafting is create combinations of dice that you can use. Players could, for example, collect three hops, which would allow them to harvest hops. If someone only gathered two hops, they’d still be allowed to place those on the worker placement spots on the board, but they would go second and get worse hops.

So the way it would work is similar to Alien Frontiers. You need certain combinations of dice to be able to harvest certain things. For hops it could be that you need at least three hops. For Yeast you might need three different symbols, one of which is yeast. Once everyone has drafted, then people could start claiming the worker placement spots with their combinations of dice. As dice are allocated to the board, the players would immediately harvest whatever their dice allow.

So through the dice drafting you are trying to create the best set of dice that will allow you to maximize your combinations, and thus harvest the best/most ingredients. I imagine the gathering of equipment would work the same way.

The Employee Dice

Here’s where things can get a little more interesting. Now we’ve got resources and equipment. We’re homebrewing in our garage. But we have a basic homebrewer with little skill. The employee dice will serve a few different functions. These include increasing skill, increasing quanity, and increasing efficiency. The trick here is that a pool of employee dice are provided by the game based on the locations where people placed their gathering dice.

So the depth of the strategy is not simply in gathering and using resources, but gathering resources so that you can get the employee die into the game that you strongly desire. Turn order would also matter in this case.

Let’s imagine you used three hops dice in the field that provided a “skill” employee die face. If that’s what you really wanted you would have to make sure you go first during the brewing portion of the game so that you can choose the skill die. Perhaps you knew you would not go first when choosing the employee dice. Then maybe you would have put your three hops dice into the fields on the spot that provided a “quantity” employee die. So there’s control over what your gathering, and the resulting employees.

These dice would then be drafted and utilized after the harvest.

How to Play

Each round of The Rolling Wort Boil (tentative name), would include the following phases:

  1. Dice drafting of gathering dice.
  2. Placement of gathering dice combos onto the board.
  3. Harvesting/gathering of ingredients/equipment based on placement.
  4. Pooling of employee dice from those placements.
  5. Drafting of employee dice in turn order.
  6. Usage of employee dice to brew and upgrade your facility.

How to Win

To win The Rolling Wort Boil, players must brew high quality or high quantities of beer. This requires them to maximize their ability to gather as many ingredients as possible, while also increasing their employee’s skills and upgrading their equipment. Each batch of beer they produce would be worth points based on the ingredients used, the skill of the brewer, and the level of the facility. I imagine the game would take 30-45 minutes, have a light-ish feel, and be best played with a Hefeweizen of IPA.

So there’s our first “Design Me” Friday. Any thoughts about the game design? What would you do differently? And most importantly, does the game sound like it’s any fun. Thanks again to Tasty Minstrel for the idea. I’m looking forward to the next Design Me in two weeks.

Monday Brews: GenCon 2013

Conclave Conversation

Are you the next Pope?

Are you the next Pope?

Welcome to Boards & Barley. Last week I mentioned that I’d be posting an article about sourcing components for board game prototypes. Well, with GenCon so nigh I figured that article wouldn’t be of much help to fellow designers anyway. So I’m postponing that article until after GenCon, at a time when many designers will likely be looking to purchase new components for their game designs that require revisions. So today I’m discussing Conclave.

Since Trading Post is my white whale and I doubt I’ll ever actually get it to a playable point I’ve been spending my time making excellent progress on Conclave.

In Conclave players take on the role of a Cardinal who is hoping to become the next pope. For those not familiar with the process of electing a pope I will give a brief background. To elect a new pope the college of cardinals, those of high standing in the Catholic hierarchy, are locked in the Sistine Chapel after the death or resignation of the previous pope. They will perform voting rounds each day until a new pope is elected. Pretty simple.

So today I want to give you an update as to my progress on the game. Let’s start with the cards, and what they do…

The Orders of Catholicism

The game is designed to play from 2 to 4 players. Those players will represent one of four different Catholic Orders: Franciscans, Jesuits (Society of Jesus), Dominicans, or Benedictines. While I’d ultimately like each of these orders to have some sort of special ability, almost like factions, they currently are all equal and are simply a better way to represent the player colors. Here’s a look at the cards (From The Game Crafter) with the icons for the different orders:

These could easily be labeled by their color, but the icons seem more real.

These could easily be labeled by their color, but the icons seem more real.

The cool part is that once I’ve tested the base game it would be relatively easy to add in specific traits for each of the Catholic Orders. That would allow each player to have some special ability that they could try to use to their advantage in the game.

Inside the Sistine Chapel

Sistine Chapel prior to Conclave.

Conclave is a game about area control. The areas are represented by the different tables in the Sistine Chapel. In a real conclave it looks like the setup on the right. That setup has long tables of equal numbers of Cardinals.

In the real conclave each vote counts individually. That’s not much fun from a game design perspective. So as the designer I am utilizing my creative license and splitting the tables up.

So in the game there will be anywhere from 6 to 9 tables that include from 1 to 6 cardinals. Each table will work like an electorate. Basically, whomever holds the majority of votes at any given table earns the full table’s worth of votes.

This is a decent way to mix things up. So players will be attempting to hold the majority at tables rather than focusing on any individual Cardinal’s vote.

Therefore the table with only 1 Cardinal is worth 1 total vote. But a table of 5 Cardinals, though worth 5 votes, can be won with 3 cards in place to win the majority.

So ultimately I’ve designed this to work like an electoral college where tables are worth electoral votes and a certain number of electoral votes are needed to win the Papacy. Perhaps I should switch themes to be a Presidential election in the US.

The Tables

Two nights ago I mocked up some beta artwork for the tables, mostly based on the picture above. My previous prototype had these large, cumbersome boards that were really just too large to be any good. So these new table boards are based on the mini cards from The Game Crafter (1.75″x2.5″).

Here is a mock up of a Five Cardinal table:

Having a majority here is worth 5 votes.

Having a majority here is worth 5 votes.

First, I need to apologize to anyone who enjoys anything about culture. It is almost blasphemous that I am designing a game that basically involves the Sistine Chapel and all I’m showing are the tables at which the Cardinals sit. How can I justify not including any imagery of the beautiful, if not scary, artwork included in one of the most historical rooms in the world?

The red box thingy in my artwork represents the papally awesome swag bags on the tables.

Second, the two spots with the weird angled red box thingy are special spots. At the very start of the game a certain number of cards are randomly drawn from each player’s deck. Those cards are distributed evenly to the spots with the weird red box thing. The red box just denotes which Cardinals receive a face up, randomly drawn card.

Once the randomly drawn cards are placed then players will take turns influencing the Cardinals. On their turn they will place one card face down on any Cardinal of their choosing. Then they will also place one card from their hand face up on that same Cardinal. The thematic idea here is that these Cardinals are voting for the face-up player, but could be persuaded to vote for the face-down player.

Play continues in this psuedo-setup phase until all the Cardinals have cards on them.

Manipulating the College of Cardinals

After all the Cardinals have cards to represent their votes then the real game begins. This phase of the game is all about manipulating the Cardinals to get them to vote for you. There are four actions you can choose and you can perform any two of them on your turn. These actions are represented by these hastily produced icons here:

ActionsFLIP: This action allows a player to flip any one Cardinals cards over. The result is that this Cardinal will now be voting for whichever card had previously been the face-down card.

SWAP: This action allows a player to swap the locations of two different face-up cards of any two Cardinals.

LOOK: This action allows a player to investigate the Cardinals by looking at three different face-down cards for any three Cardinals of their choosing.

LOCK: This action allows a player to lock any one Cardinal’s vote into place for the rest of the game. Each player will have four locking cubes and can thus lock four Cardinals over the course of the game.

So on your turn you can perform two actions. They can be the same action if you so choose. The goal is to try and manipulate the tables so that you earn the majority, and thus their votes.

***

So I’ve described the game in a nutshell. This is the basic concept of the game and it is currently playable. My disclaimer is that I have no idea if it is any fun. All the fun so far has been in designing the game. While I think there is a nice strategic component to the game, only time will tell. And by time I mean playtesting. Thanks for reading!

Prototyping Tools of the Trade

Tools of the Trade

Tools of the Trade

One topic that seems to come up a lot is how to make board game prototypes. I’m not talking about coming up with a design. I’m talking about physically creating prototype game components. Game designers are constantly trying to make their components so that they can get right to the playtesting phase of game design.

Today I want to discuss the tools I use to create my prototypes. At this point you should already have your prototype artwork created if you’re going to be printing anything. Let’s assume it’s already been printed. Now it’s time to make it awesome!

Chits…

One common component that is particularly easy to make for prototypes are chits. These are typically just printed artwork glued onto matte board. But matte board can prove to be difficult to cut.

There’s two ways that I’ll cut my chits out of the matte board.

  1. Straight edge and utility or X-acto knife (not ideal)
  2. Rotary cutter (ideal)

What we are doing here is separating the chits from one another. When creating your artwork you should line up the edges of the components so that you only need to make one cut between them.

This will help you keep your fingertips!

The straight edge and knife approach is definitely NOT my approved method and I would never recommend it. However, a lot of people use that approach so I needed to mention it. One recommendation is to use a safety straightedge like the one shown here. You only have 10 fingertips so why not spend a few extra dollars and get a straightedge like this and make sure to not lose any fingertips!

I don’t like this method for a few reasons. The first is that you need a cutting mat to go underneath so you don’t scratch your table. The second is that the blade doesn’t always stay straight as you are cutting the matte board. And that can be really annoying.

Just get this thing instead!

My preferred method is to use a rotary cutter like this Fiskars 12″ Scrapbooking version. It is super easy to use, relatively cheap (especially compared to the $40 safety straightedge), and very reliable. And since most of us don’t have printers that print on anything other than 8.5×11 paper anyway, the 12″ Fiskars tool is perfect!

So I will print my prototype artwork on photo paper, adhere it to matte board, and then cut out the individual components using the rotary cutter. Just a heads up when using matte board though: you’ll likely have to roll the cutter back and forth a few times to cut all the way through. That’s still an easier process than trying to run a blade along the straightedge.

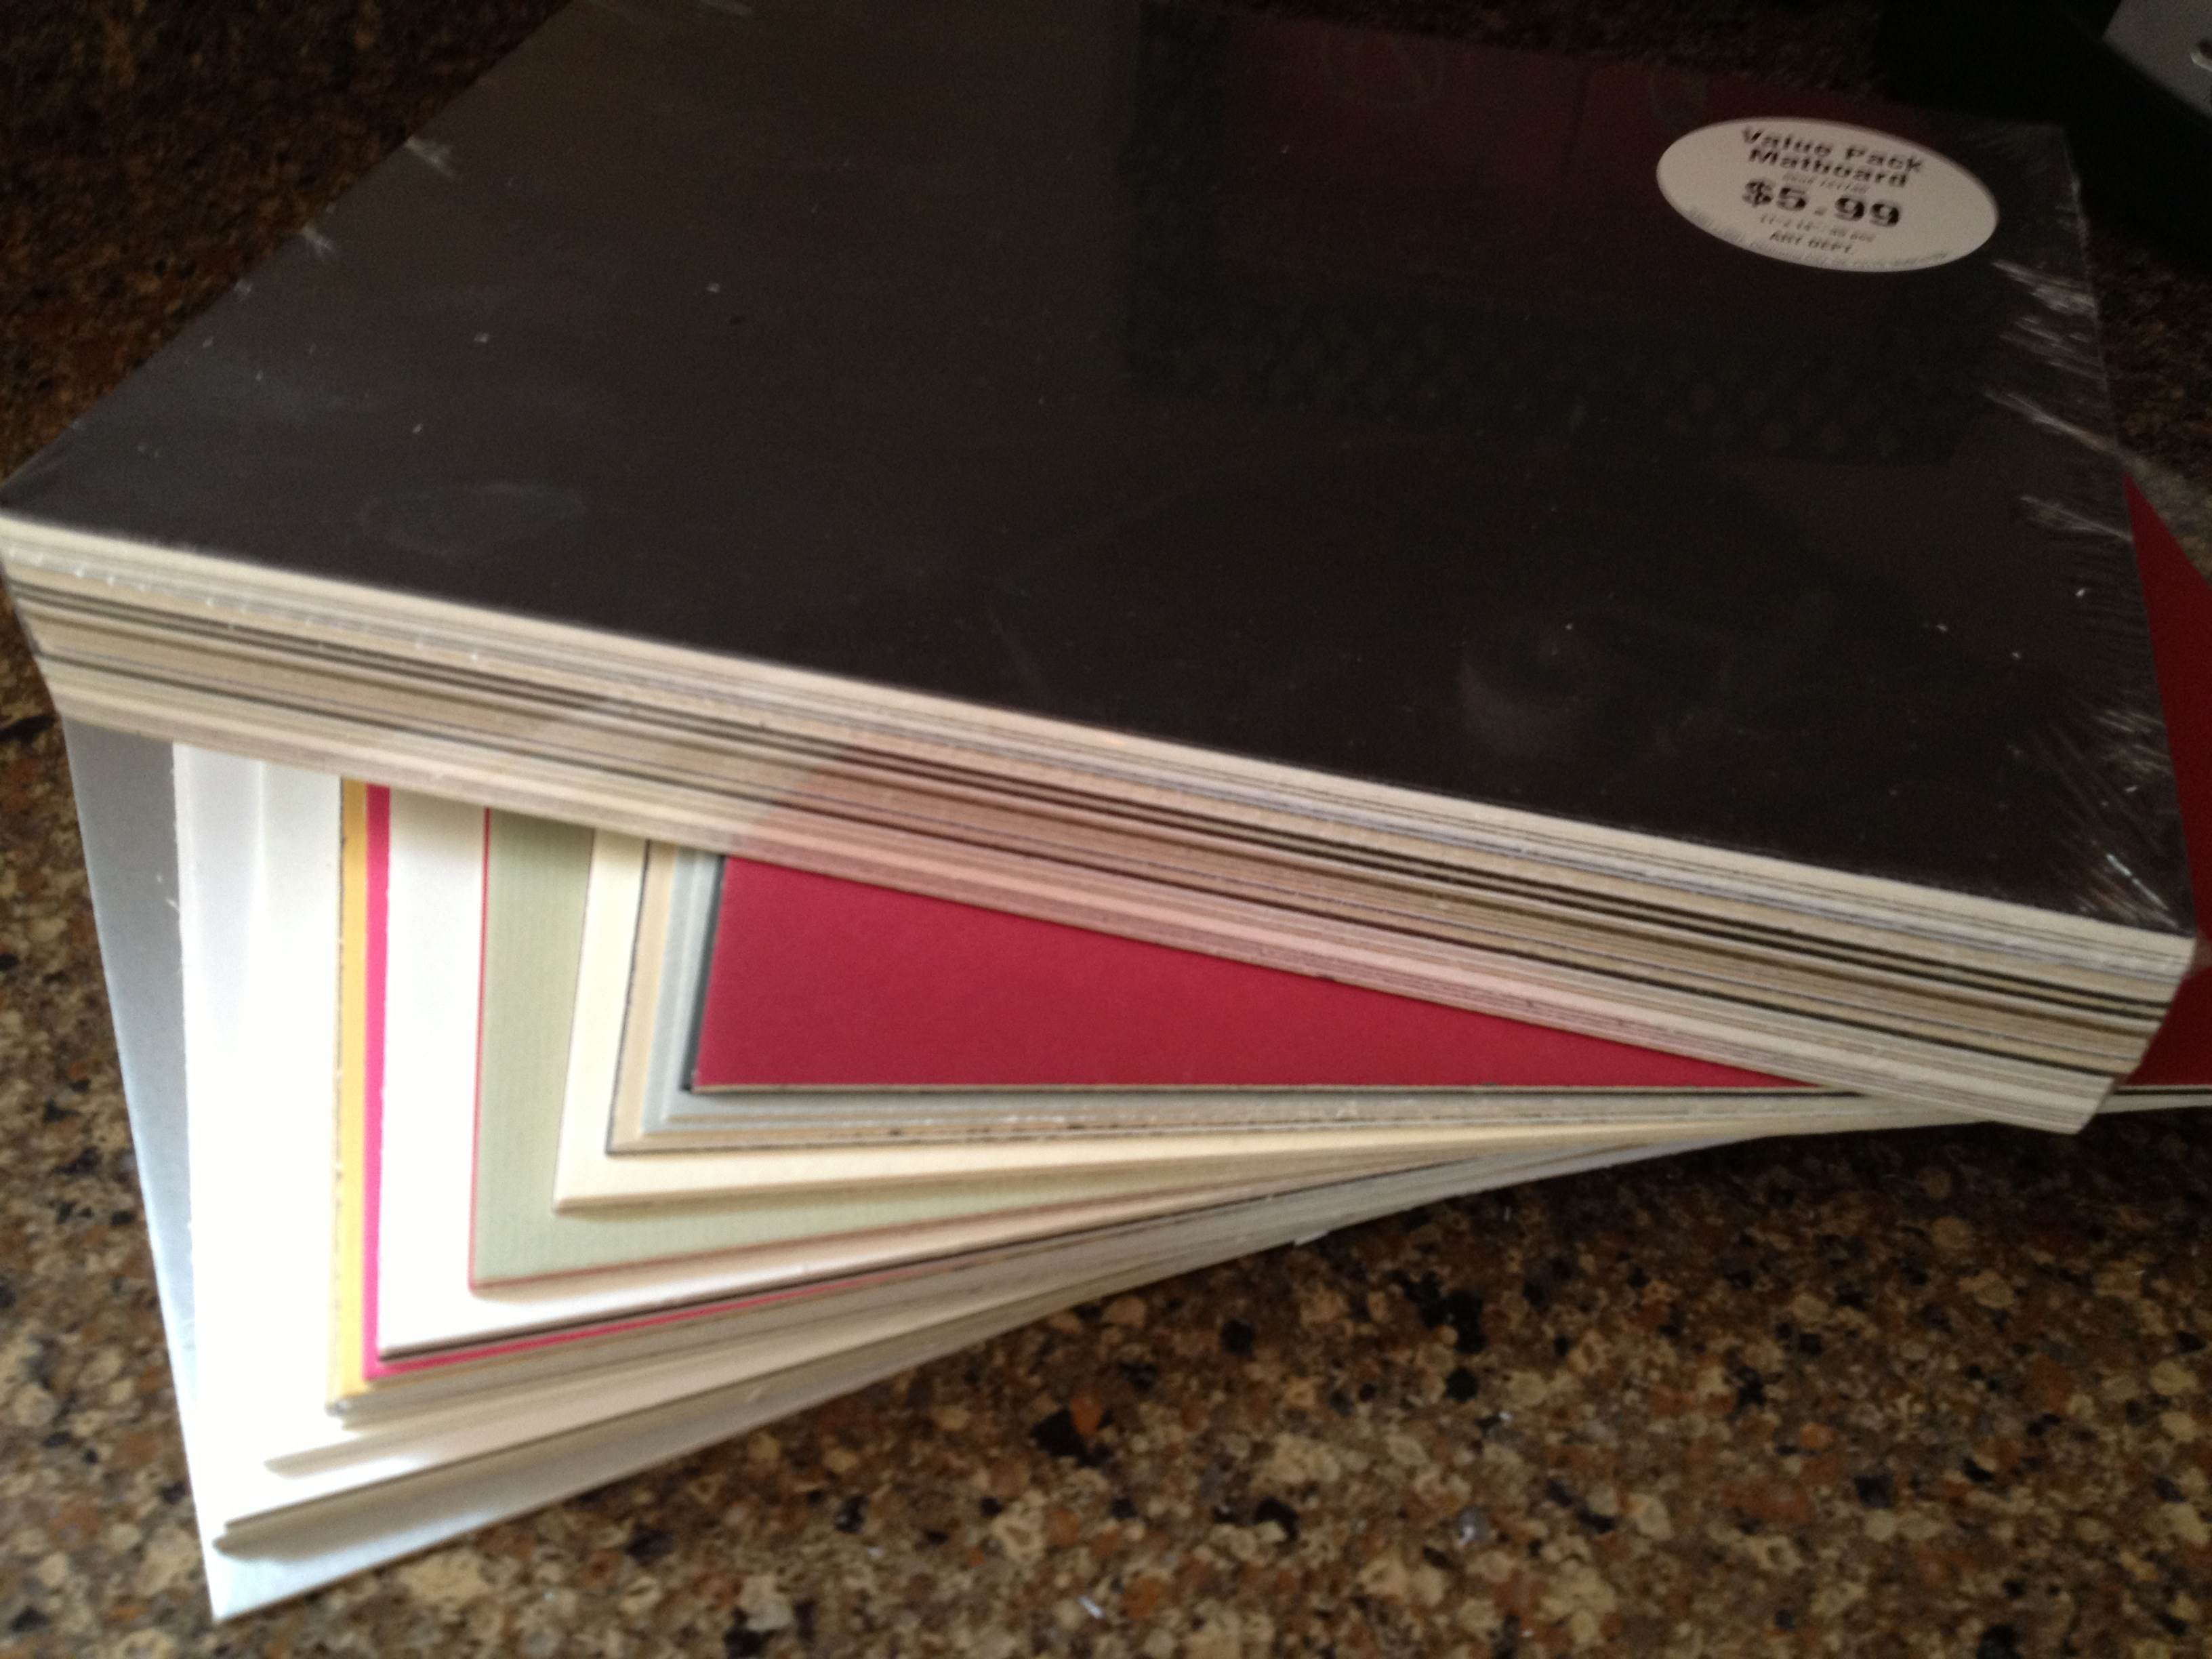
On the topic of matte board, I recently went to Hobby Lobby and purchase two huge packs of “matboard” for $6 each. I got a pack of 12″x12″ and a pack of 11″x14″. These are so cheap that I almost felt like I was stealing. They are just the leftovers from the framing department that were cut out from the boards used to mat pictures/paintings for customers. What a great way for Hobby Lobby to reduce their waste and provide a useful product. Here’s what I got for $12:

So cheap!

So cheap!

The other key tool of my trade is a glue stick. Some people will use standard glue, some will use spray adhesive. I prefer the glue stick to standard glue since it is simple to apply evenly. This is very helpful when trying to make sure that your components are completely glued down.

Now you know a great method for producing chits. If possible, keep them as rectangles rather than circles of hexes. But since we’re on the topic of circles and hexes let’s move on to another excellent tool…

Punches…

There are times when you don’t want rectangular components. Perhaps your game is a map building game with hex tiles. Or perhaps you require special discs for your game. If that’s the case, then I strongly urge you consider purchasing a punch.

The hex punches from Fiskars work great!

One thing to keep in mind when purchasing a punch is how thick of paper/board are you wanting to punch. Often these sorts of punches are used by scrapbookers who are only punching paper. That means they may not be able to punch through matte board. Sometimes you can only find out after you’ve bought the punch. Bummer.

Here are some recommendations, keeping in mind that I don’t know specifically how thick they can punch. OR you can just do a search for “hobby punch” and find one you’d like.

These can come in really handy. I use a circle punch when creating prototype coins. I have used a hex punch to create stickers for hex tiles. And here is my little tip for punching, which I mentioned in a prototyping article a long while back, but which is worth repeating.

When punching, flip the punch over so you can visually align the part that you want cut.

So now you’ve got the tools to cut out chits and punch out little bits of awesomeness! What about cards?

Sleeves…

Many game designers come across the need for cards in their game designs. I have made cards numerous times. Early on I would buy 60lb. paper and just cut out rectangles. But there is a problem with that. The edges of the rectangles can be slightly bent from cutting, which leads to great difficulty in shuffling the cards.

Mayday sleeves are convenient and cost effective!

The way to prevent that while also protecting the cards is to purchase card sleeves. These inexpensive beauties will be a little lifesaver by removing anguish from your prototypes. Plus, you can get awesome one’s like the one shown here with a kitten running through a field!

If you want a good go-to source for sleeves then look no further than Mayday Games. Here is a series of links to the sizes you may be looking for:

Those should offer some help. They definitely help with being able to shuffle your cards. The only downside is that when stacked they can be really slippery and your stack may tumble over.

Speaking of tumbling…

Dice…

Sometimes it becomes necessary for a game designer to create their own set of dice. Sure, you could always just make a cheat-sheet conversion table, but that can be a huge burden for your playtesters who would constantly have to recheck the sheet. So one of the tools of the trade is to purchase blank, sticker-able dice.

Just think of the potential here!

Look no further than Indented Blank Dice. The best part of their site is that they have labels that you can purchase and print on rather than having to buy blank label paper and try to cut/punch out your own labels and then peel them off.

Don’t buy blank label paper. Don’t cut/punch out stickers. Don’t try to peel them.

Just buy the sticker label paper and save yourself from the frustration.

So this concludes my little article about Prototyping Tools of the Trade. Next week I will be posting a follow-up article on Sourcing Components for Prototyping. It will cover where to purchase boards, bits, and more. So stay tuned!

Symmetry in Board Game Design

My recent design, Conclave, initially suffered from a lack of symmetry. After a great playtest session with Jeremy Van Maanen, Adam Buckingham, Corey Young, and Brett Myers I received some great feedback that pointed out how the initial round could greatly influence the game due to the asymmetry. So I balanced the player decks to eliminate that asymmetry. What followed was a nice conversation on Twitter about symmetry versus asymmetry. So I though I’d write a brief guide about putting symmetry into your game design, and where it might be appropriate.

My Definition of Symmetry:

Before discussing where symmetry or asymmetry is important it is necessary for me to define the terms so that you understand what I mean throughout the rest of this article.

SYMMETRY: when conditions within a game are equal for all players.

This could be that all players have the same options on a turn or that they all start with the same cards or they all have the same opportunity to progress. Symmetry is typically only present at the beginning of a game. Once one player has taken a turn, then the game is different for the next player. So games where all players have an equal opportunity to be the first player inherently are symmetric at the start. Games where a random player goes first are not inherently symmetric since by the time the second player goes, the game conditions for that player are different than they were for the first player.

An example of a symmetric game starting condition is one where players simultaneously bid for turn order. Another example is when all players simultaneously make their first move in a game.

ASYMMETRY: when conditions within a game are unequal for all players.

I think of asymmetry as the situations where players have differing decks of cards, or different options on their turn, or different opportunities in the game. But asymmetry also applies to when games change from turn to turn and thus no two players ever face identical game conditions. There are many examples of asymmetry within games. And to provide examples could take a long time. Instead, check out Lewis Pulsipher‘s thread on BoardGameGeek: Looking at Game Design as Ways of Introducing Asymmetry.

Where to design for Symmetry:

There are definitely places within game designs for symmetry. If conditions within a game ever put a game out of balance, where one player has a distinct advantage toward victory through no means of their own, then the design calls for symmetry to remove that lack of balance.

My example, from Conclave, fits perfectly here. The original design provided each player with a 30 card deck. However, during the game not all of the cards were used. This caused a problem with probability. There was a chance that one player may end up only getting cards of their own color to place on the table while another player would only end up getting cards of the other player’s colors. This would then cause the game to be very much in favor of that first player despite them not earning that opportunity. This lack of balance called for adding symmetry to the game.

In this case symmetry refers to all players having the same amount of opportunity on the table. With balanced decks where all players play all of their cards it means all players will have the same opportunity within the remainder of the game.

This is my recommendation:

Apply symmetry where a game could otherwise randomly favor any single player.

This will not only make sure the game is fair, but it will also make sure that players can enjoy the game without feeling like they never had a chance.

Where to design for Asymmetry:

I would recommend designing for asymmetry anywhere and everywhere, as long as it does not conflict with my recommendation above.

Asymmetry for Conclave would mean adding different abilities based on the person you are representing.

Asymmetry can refer to players having unique abilities or different ways to move forward in the game or different cards and thus different opportunities. Examples of asymmetry in games are plentiful. The Settlers of Catan has a beautiful level of asymmetry that depends where players place their initial settlements. Ticket to Ride has asymmetry with the destination tickets, which determine each players individual path to victory.

Asymmetry in a game can add to the variability and replayability of games. And often it can add to the tension of a game as well. One example that comes to mind is Shipyard. In that game there is a great asymmetry in players options on their turn. This is simply due to limiting the options that a player can take on their turn. No two players turns in a row are the same. Yet the asymmetry in player options add a lot of tension and strategy.

I am definitely an advocate for asymmetry in game design.

My Bottom Line:

Now that we’ve briefly discussed symmetry versus asymmetry in game design I want to make my point one more time. When a game design creates an unfair advantage for a player that is not based on the choices of any player, the game requires symmetry and balance. Apply symmetry to a game to balance the game and make it fair. In all other circumstances, feel free to apply asymmetry to your design. It will be harder to design and require more playtesting to balance, but it adds so much to the game.

What are your thoughts about symmetry versus asymmetry in game design? Do you prefer one over the other? How would you define the two? I would love to hear your thoughts. Thanks.