Blog Archives

3D Printing for Game Prototypes
When I got started in game design I hunted all over the internet forums to find the best deals on game design components. I searched for meeples, cubes, blank cards, and more. And I ended up paying a bunch of money for those things. I wished I could afford a MakerBot or other 3D printer but I wasn’t willing to spend $1,500+ at the time.
Times have changed and huge advancements in 3D printing technology has allowed the prices to drop. This has opened the door for many designers to be able to purchase their own 3D printer for game design purposes.
Which 3D Printer?
This is probably the most common question that potential consumers have when it comes to 3D printers. There are so many printers on the market and so many ways to modify those 3D printers.
My recommendation for people getting into the 3D printing world is to start cheap and simple. Some thoughts are here:
- Stay at or below $250.
- Purchase one that is ready to use out of the box.
- Start with simple prints.
My Printer – Monoprice Select Mini
 For my birthday last year I was gifted a Monoprice Select Mini 3D printer. It runs around $190. It also works right out of the box. The only adjustment required would be to level the bed. That just means that every part of the printing bed is equally distant from the nozzle when the nozzle is over that part of the bed.
This printer has been really great for me. I am currently using it to print some game design pieces for a vertical system in a game.
This printer is great for small game design components. The print volume is 12cm x 12cm x 12 cm. I have four different filaments so I can currently make components for games up to 4 players. With more filaments I could add more players.
What Filament to Use?
Most 3D printers use PLA, which is a plastic. PLA stands for Polyactic Acid. But don’t let the “acid” part scare you. This is just a common plastic material.
Other printers and some of the 3D Pens use ABS. ABS is Acrylonitrile Butadiene Styrene.
My printer uses the PLA. I purchase PLA on 1kg spools in whichever color I desire. I prefer the 3D Solutech brand but the Hatchbox products are also nice. Be careful when you purchase filament. They often list a +/- value of 0.05 or 0.03. Anything over these values may lead to poor print quality as it means the filament is not consistently thick.
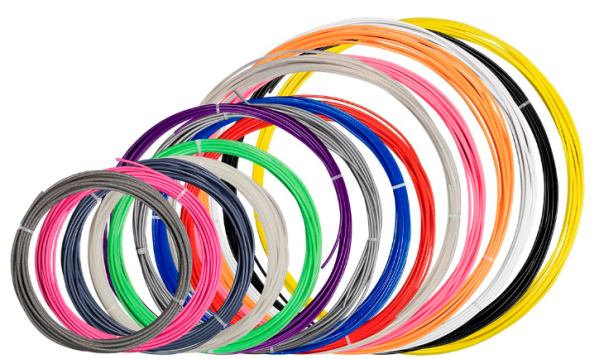
One thing I recommend for getting started is to purchase a filament sample pack. Monoprice sells one but it is currently out of stock. I’m sure you could find an appropriate sample pack at your favorite online retailer.
What about the 3D Models?
I am an engineer so I happen to have access to 3D solid modeling software. But if you’re not an engineer and don’t have access, do not fear! There are numerous 3D modeling tools out there that are free to use. Unfortunately I cannot speak for any of then.
Ultimately, to print in 3D you will need a .STL or .gcode file. You can make your own 3D geometry and save in this format or you can visit some of the following websites with loads of 3D files readily available!
- Thingiverse – Free.
- MyMiniFactory – Free and Paid models available.
- Shapeways – Upload your model and someone will print it and mail it to you.
- YouMagine – Free.
What about Slicing Software?
3D printed models are printed one layer at a time. To be able to tell the 3D printer what to do you will need to utilize a 3D printing software that can generate a .gcode file from your .STL file. You can pay for software like Simplify3D ($149) or you can use a free one.
The software I prefer, because it is relatively easy to use and understand, is Ultimaker’s Cura software. When you install the software you tell it which printer you have. It then knows how large of a print area you have available and other settings specific to your printer.
Bits for Board Gamers
There is a great thread on BoardGameGeek about 3D printers. They share a lot of the same links that I’ve compiled on this page. On the thread you can see prints available for a lot of your favorite board games.
Now that you’ve got a great framework to get started in 3D printing, what are you waiting for? Please feel free to comment with your experiences in 3D printing for board games.
2016 Recap, The List, Looking Ahead
 At the start of 2016 I posted an article called “The List.” The article was a list of games that my gaming group owns but had not yet played. It was a pretty good sized list that grew throughout 2016. For the first half of the year I was regularly posting updates to The List and providing brief reviews of the games we crossed off. That tailed off a bit later in the year when I gamed less and lost a little interest in gaming due to life.
But here we are at the end of 2016 so I am providing one final recap to The List. Let’s take a look at how we did. Go back and visit the original article: The List.
The Final Tally
There are 57 games on The List, which does not include games like Great Western Trail, SeaFall, Grand Austria Hotel, and many more that were purchased along the way. I’ll leave those out for now since that’s too much to try and remember (I should have stuck with the regular updates).
Of those 57, 28 were played.
So 28/57 means we played less than half of the games. Ouch.
Some games got traded before we played them. Others were just not interesting enough. Mistakes were made. Excuses rose to the surface. For one reason or another we didn’t do that great with The List.
This is kind of a downer and I don’t want downers to drown out the joy that I had through board gaming in 2016. So here are my top games from the year:
Top 5 Games of 2016
 Orleans: This was/is my favorite. I love how it all works together. I love how every decision seems like a good one and that everything you are doing moves you forward rather than backward. It works really well and flows smoothly. I think I might get the expansion for 2017.
- Pandemic: Legacy: I’m not a huge Pandemic fan. But this makes the list because of the great group of people I am playing it with. We’ve had a lot of fun trying to work through the ups and (mostly) downs that the game presents. We’ve come up with creative names, like Eko “Flavor-Crystal” Farts. Overall it has provided hours of great gaming time with great friends.
- Karuba: It’s so simple to teach and play. I’ve introduced it to a bunch of people and now my family collectively owns three copies between me and my brothers-in-law.
- Scythe: I only played once and I played poorly. However, it is obvious that this game has great depth and a truly immersive experience. It takes a special game to make you feel like you are in the game. This one succeeds at that.
- The Voyages of Marco Polo: True, classic, solid Euro. Really hit the mark for me. I LOVE the variable player powers. The dice placement works really well. Overall this is a game I can’t wait to play again.
Best Expansion of 2016
 A little shameless self-promotion never hurt anyone, right? My favorite expansion from 2016 was Scoville: Labs!
What I love most about this expansion is that it adds a great layer of control to the game.
One of the things people griped about with the base game was that it was too tactical and they didn’t have enough control with what they were getting and when they would get it. That’s why i designed the personal pepper lab.
With the lab you can control exactly what you get and when you get it. This allows for a greater level of strategy rather than the more tactical base game.
Plus, as a bonus it comes with a bunch of extra peppers, which helps with the other common gripe from the base game that players would run out of peppers.
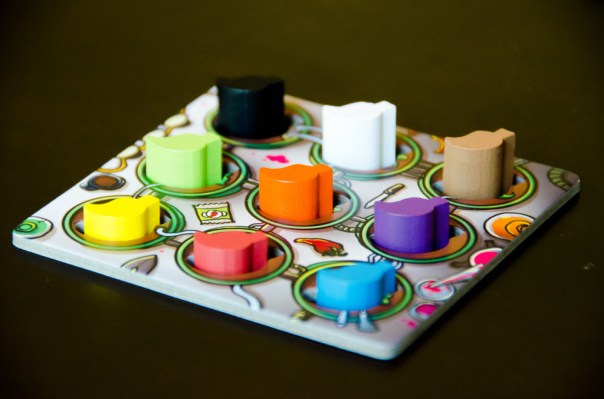
Image via BoardGameGeek.com user mpalframan (link)
Check out Scoville: Labs from your favorite local game store or your favorite online game store.
Honorable Mention Games of 2016
There are a bunch of other games I really enjoyed from 2016. My list above was capped at 5 to really highlight those games, but these games also deserve some attention.
- Covert: The highlight of this spy-themed cold war Euro is how you can create fantastic combinations of cards, which allow you to pull of some really great moves. The gameplay works well and the artwork is amazing.
- Potion Explosion: This was a hit with some of our wives, which means it’s a winner. I didn’t have high expectations for this game, but once I played it I realized that I wanted to keep playing. The part that sells it to me was the special abilities of the potions.
- Quadropolis: So clever and tight and unique. Decisions are interesting and the placement of your tiles matters SO MUCH! I really like trying to figure out the best placement for tiles relative to how other players are playing. There’s actually quite a bit of interaction here as well.
- SeaFall: I’m not sure yet whether I enjoy this game. However, the experience is really what you are paying for when you buy this one. This presents a fantastically immersive experience for gamers. Now all I have to do is try to figure out how to get out of last place before we are done with the campaign.
- Terraforming Mars: Use the Draft Variant. This is a really enjoyable engine building game (using “engine building” lightly). Players use cards and can create combinations that will help them get ahead. Without the draft variant this game wouldn’t make the list.
Looking Ahead to 2017
I’m not doing another “The List” type thing. That was too much effort to track and bother over.
Another mistake from 2016 was that my gaming group switched to once-a-month rather than twice a month. We will be going back to twice a month.
As for design efforts I have one solo design that I believe has great potential and one co-design that I believe has even greater potential. Development on these two games will be at the forefront of my efforts. It would be great if I could get another game signed, but that’s something that is outside of my control and, as such, is not a reasonable goal.
My 2017 convention schedule is sparse at this point. I’ll probably go to Protospiel-Milwaukee in the spring and Protospiel-Madison in the fall. I’ll definitely be going to Gen Con in August. I’d love to go back to Grand Con in September or BGG.Con in November. Those are both enjoyable gaming-focused cons. Maybe 2017 will be the year I finally get to Origins.
As for this website, I’d like to hear from you. Let me know what sorts of articles you are interested in reading. What would you like to see on this site? Do you want more random design efforts like the Design Me articles? Would you like more tutorials like the “How To Teach Games” type stuff? Or maybe more game design related content like blank card templates or usable vector icons? Please feel free to comment here or on Twitter and let me know what sort of content you would be the most interested in.
Thanks for reading! I wish you a great 2017.
Different Approaches to Game Design
I’ve been messing around with half a dozen designs lately and I seem to be stuck on each and every one of them. The only design that is making progress is a co-design with a friend of mine. So I’ve been thinking about mixing it up to try some different approaches to designing game. Today I wanted to present four approaches that you can use as a starting point. I am going to try each of these four approaches over the next month and see if I find inspiration.
Theme First
One of the most popular ways of starting out a game design is to choose a theme that you think is interesting.
This is a wide open way to design. You could choose to design about paratroopers rescuing chickens stranded on Antarctica. You could design about scuttlefish escaping sea urchins.
Going Theme First allows you to choose whatever you want the game to be about. Once you’ve chosen the theme you can then begin to consider the mechanics that might fit with the theme.
I personally like Theme First design. I like to picture myself immersed in the theme wondering what ways I can bring the theme together and make it feel like a grand experience.
Mechanic First
This is probably the other most popular way of designing a game. The designer might come up with a really interesting way to play a game. This could be a new component, a new way of using a component, a new combination of mechanics, or other things that haven’t been done before. Or you could pick a mechanic that has been done before and add a twist.
Once you’ve figured out your main mechanic and made it playable you can try to figure out what type of theme might fit with your mechanic.
This way of designing assures the designer that their game will utilize a gameplay mechanic that they like.
Scoring Condition First
This is a lesser used way of designing games. Some abstract games are designed with the scoring condition as the driver for the design.
This is essentially a specific variant of Mechanic First design, but with the end-game in mind. Designers choose how they want the scoring to work. Then they will fill in the design with the mechanics and slap on a theme if necessary.
This is something that I’ve been wanting to do but have not found a scoring condition that I like enough to build a game around.
Component First
This is a tough one to do because most designers don’t design around a “final product” type component. But there are times when a designer may make a game from the components that they have available.
When designing component first you would often choose a component or components that you really want in your game. Then you would choose a theme or mechanic that will work with those components.
This can be pretty awesome if you have a great component in mind. If you want to go with this approach it is probably best to be innovative and use either new components that haven’t been used in games before or to utilize existing components in new ways.

There are, of course, other ways to get started with a game design but I think these four ways are a great starting point to get you thinking about your game designs. If you have other ways that you think are important, please share them in the comments section. Thanks for reading and have a great Thanksgiving (If you are in the US) or a great weekend around the rest of the world.

How To Make A Quad-fold Board
When designing games it often becomes helpful or necessary to have a quality prototype, which often includes a quad-fold board. There are easy ways to do it, like taping a few pieces of paper together. And there are more difficult ways to make them. I usually only make them when I would rather have it fold to fit in a box. Today I want to share my method for producing a decent quad-fold board for your game design purposes.
Components
Here are the components I use when making a quad-fold board:
- Matte board (I buy bulk scrap matte board at Hobby Lobby since it is so inexpensive)
- Photo Paper (I use Kodak Glossy Photo Paper)
- Glue Stick (Or adhesive of your choice)
- Tape (I prefer masking tape)
- Rotary Cutter (I use this one)


The methods in this article are based on the fact that I have a 12 inch rotary cutter that cannot cut through two pieces of matte board at the same time. If I could cut through two matte board pieces at a time then I would probably use a different method.
Methodology
My assumption here is that you already have artwork you’ve created. If you have the artwork ready, then here are the steps I follow to make my quad fold boards…
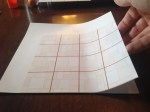
Print the Artwork
When I work with larger sized images I usually print them from either MS Publisher or MS Powerpoint. Publisher will require you make a larger template, but that is pretty easy to do. When you print this way you will print on several sheets of paper.
Once they are printed I will cut off the white margins for all the interior edges that will join up together. You can see an example of the cut photo paper above in the image with the glue stick.
Glue the First Two Pieces
Depending on whether you want your board to fold with the artwork out (unusual) or inward (common) you will either have to do one or two of these procedures respectively.
-
- Place glue on most of the area except by the joint.
-
- Glue down the first piece, lining up the edges as best as you can.
-
- Repeat for the other half. Trim off excess areas before proceeding.
-
- Lift the non-glued portions. Tape the two pieces together.
-

- Apply glue to each and press down.
-
- Half of your board is completed!
As I mentioned earlier, you will do this once if you don’t care that your artwork folds outward. If you prefer your artwork to fold inward, then repeat this process with the other two pieces of your quad-fold board.
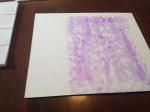
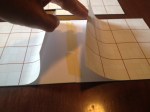
Before moving on I always like to check how smoothly the board folds. Here’s my example:
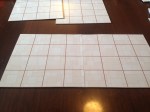
Completing your Board
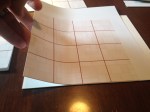
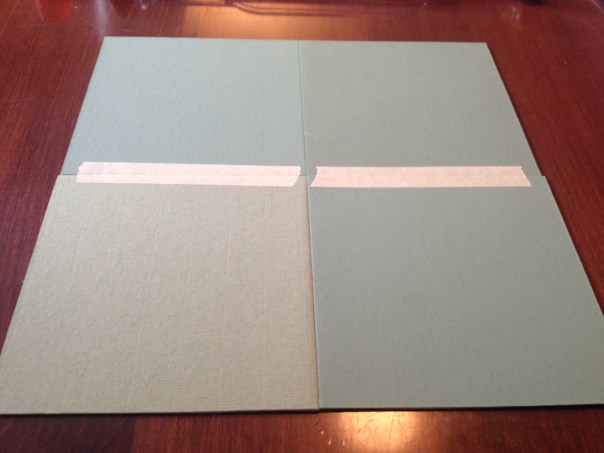
With a set of two pieces taped together you are now set to complete your board. This step is pretty simple. With all four pieces laid out, flip them all over together. Make sure they go into the correct places when flipped. You don’t want to flip them where they are but rather flip them and swap them horizontally. Before I start I put a piece of tape in the corners that line up in the middle of the board. This helps me know that I have the pieces together the right way.
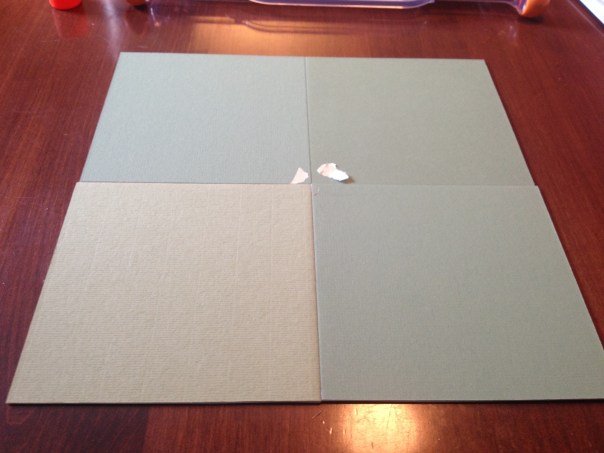
With them in the correct locations, all you need to do is apply two more pieces of tape as seen here:
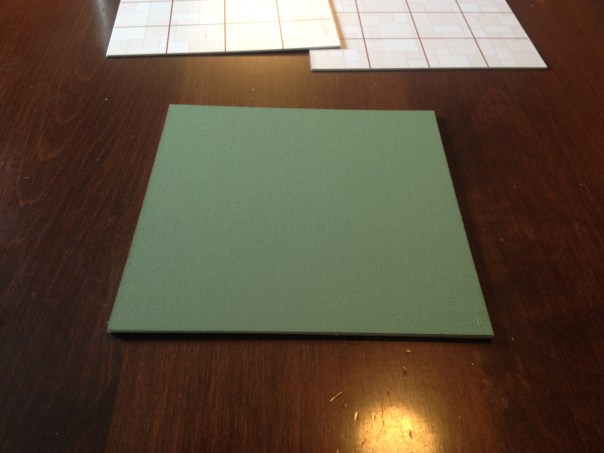
Completed Quad-Fold Board!
And there you go! You now know how to make a quad-fold board for your game designs. Just keep in mind that if you would prefer the artwork to fold inward then do the “Glue the First Two Pieces” process twice. Then flip them and use only one piece of tape on one of the seams.
Here’s is my completed board for this article:


And here is the quad-fold board I made for a high quality prototype of Scoville using Joshua Cappel’s artwork:


Another Option
If you are not equipped with printing capabilities or if you would prefer to not do this on your own, then feel free to utilize The Game Crafter as they can create a quality quad-fold board for you. You just upload your artwork in the correct size and pay a little money and they’ll make your board and mail it to you.
They have the following options available:
- Bi-fold Board (9 x 18 inches)
- Accordion Board (8 x 16 inches)
- Quad-fold Board (18 x 18 inches)
- Six-Fold Board (27 x 18 inches)
So how do you make your quad-fold boards? Do you use a different method? I’d love to hear if there is a better way (I’m sure there is).
Game Design Process Update
Hi. I’ve had an incredibly busy year with many things not related to board games. But I just finished some reading I had to do and now I find myself with a snippet of free time. So today I thought I would provide an update on my game design process.

Ye olde Game Design Graphic
But to do that I wanted to adjust my graphic a little. In the past I have used the one on the right to illustrate my steps in the game design process. I liked it for a while but I’ve felt called to make a new version. If you are interested in game design and you don’t really know how to go about things, please go read the Inspiration to Publication posts by Jay Cormier and Sen-Foong Lim (designers of many games including the excellent Belfort by Tasty Minstrel Games).
So today I present my new “Game Design Process” graphic.
My Game Design Process
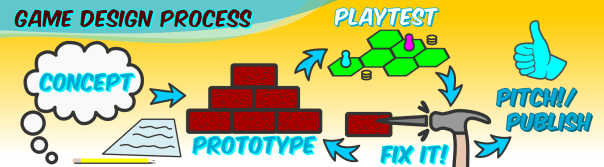
I’m not sure that’s an improvement but I had fun making the graphic anyway. It conveys the information in a more pictorial way rather than those boring rectangular prisms.
Let’s cover, briefly, what each of those game design steps really means to me anyway:
CONCEPT
The concept phase is all about brainstorming and coming up with the overall ideas for your game. This could be Theme-First or Mechanic-First. Either way, this phase is where you are taking a lot of notes and figuring out all the things you want your game to be.
PROTOTYPE
Once you’ve figured out the bulk of your game concept then it’s time to build it! In this phase you will create your physical prototype. If you don’t know how to get started, check out my article, “Starter Prototyping Tools.”
PLAYTEST
With your physical prototype ready to go it’s time to get it to the table and see if it works, see whether it is any fun, and find the ways to make it better! Just lure some friends with pizza or something. I wrote about playtesting once (here) but I am going to revise that article in the future because I’m not certain I agree with it completely anymore.
FIX IT! a.k.a. Applying Feedback
This is one of the more difficult things to do in board game design. It is tough sometimes to ignore feedback from your friends. It can be equally tough to accept tough feedback from them. But the most important thing is to understand WHAT the feedback actually means. For more info check out, “Coarse vs. Fine: Editing Your Game.”
PITCH! / PUBLISH
I wanted to put a caveat in the graphic somehow to stress that this part of the process shouldn’t happen whimsically when you feel like it. Before pitching to a publisher, or before self publishing, I highly recommend blind-playtesting. This is when you send a copy of the game to people you do not know. Let them read the rules and figure out the game. They will provide some of the best feedback you can imagine. After numerous cycles of fixing, prototyping, and playtesting where the feedback you receive is mostly or all positive, then I would feel confident in pitching the game or self-publishing. When you are ready to pitch the game you’ll want to contact the publisher that’s right for you and your game. Then you can follow the method in my article, “How to (Speed) Pitch Your Game.”
That’s an overview of my game design process. I know that there are people who do things differently. It would be weird if that weren’t the case. If there are things you think are essential to the process I’d love to hear about them. Just leave a comment below. Thanks for reading.
