Category Archives: Prototyping

3D Printing for Game Prototypes
When I got started in game design I hunted all over the internet forums to find the best deals on game design components. I searched for meeples, cubes, blank cards, and more. And I ended up paying a bunch of money for those things. I wished I could afford a MakerBot or other 3D printer but I wasn’t willing to spend $1,500+ at the time.
Times have changed and huge advancements in 3D printing technology has allowed the prices to drop. This has opened the door for many designers to be able to purchase their own 3D printer for game design purposes.
Which 3D Printer?
This is probably the most common question that potential consumers have when it comes to 3D printers. There are so many printers on the market and so many ways to modify those 3D printers.
My recommendation for people getting into the 3D printing world is to start cheap and simple. Some thoughts are here:
- Stay at or below $250.
- Purchase one that is ready to use out of the box.
- Start with simple prints.
My Printer – Monoprice Select Mini
 For my birthday last year I was gifted a Monoprice Select Mini 3D printer. It runs around $190. It also works right out of the box. The only adjustment required would be to level the bed. That just means that every part of the printing bed is equally distant from the nozzle when the nozzle is over that part of the bed.
This printer has been really great for me. I am currently using it to print some game design pieces for a vertical system in a game.
This printer is great for small game design components. The print volume is 12cm x 12cm x 12 cm. I have four different filaments so I can currently make components for games up to 4 players. With more filaments I could add more players.
What Filament to Use?
Most 3D printers use PLA, which is a plastic. PLA stands for Polyactic Acid. But don’t let the “acid” part scare you. This is just a common plastic material.
Other printers and some of the 3D Pens use ABS. ABS is Acrylonitrile Butadiene Styrene.
My printer uses the PLA. I purchase PLA on 1kg spools in whichever color I desire. I prefer the 3D Solutech brand but the Hatchbox products are also nice. Be careful when you purchase filament. They often list a +/- value of 0.05 or 0.03. Anything over these values may lead to poor print quality as it means the filament is not consistently thick.
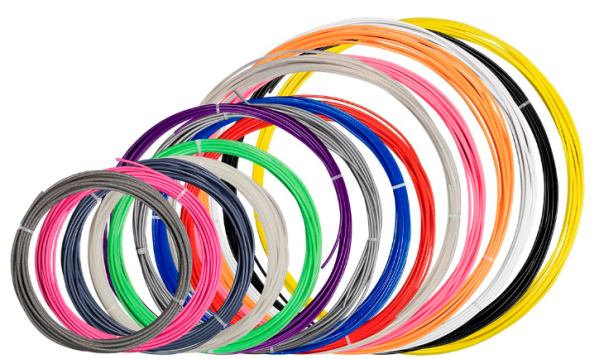
One thing I recommend for getting started is to purchase a filament sample pack. Monoprice sells one but it is currently out of stock. I’m sure you could find an appropriate sample pack at your favorite online retailer.
What about the 3D Models?
I am an engineer so I happen to have access to 3D solid modeling software. But if you’re not an engineer and don’t have access, do not fear! There are numerous 3D modeling tools out there that are free to use. Unfortunately I cannot speak for any of then.
Ultimately, to print in 3D you will need a .STL or .gcode file. You can make your own 3D geometry and save in this format or you can visit some of the following websites with loads of 3D files readily available!
- Thingiverse – Free.
- MyMiniFactory – Free and Paid models available.
- Shapeways – Upload your model and someone will print it and mail it to you.
- YouMagine – Free.
What about Slicing Software?
3D printed models are printed one layer at a time. To be able to tell the 3D printer what to do you will need to utilize a 3D printing software that can generate a .gcode file from your .STL file. You can pay for software like Simplify3D ($149) or you can use a free one.
The software I prefer, because it is relatively easy to use and understand, is Ultimaker’s Cura software. When you install the software you tell it which printer you have. It then knows how large of a print area you have available and other settings specific to your printer.
Bits for Board Gamers
There is a great thread on BoardGameGeek about 3D printers. They share a lot of the same links that I’ve compiled on this page. On the thread you can see prints available for a lot of your favorite board games.
Now that you’ve got a great framework to get started in 3D printing, what are you waiting for? Please feel free to comment with your experiences in 3D printing for board games.

How To Make A Quad-fold Board
When designing games it often becomes helpful or necessary to have a quality prototype, which often includes a quad-fold board. There are easy ways to do it, like taping a few pieces of paper together. And there are more difficult ways to make them. I usually only make them when I would rather have it fold to fit in a box. Today I want to share my method for producing a decent quad-fold board for your game design purposes.
Components
Here are the components I use when making a quad-fold board:
- Matte board (I buy bulk scrap matte board at Hobby Lobby since it is so inexpensive)
- Photo Paper (I use Kodak Glossy Photo Paper)
- Glue Stick (Or adhesive of your choice)
- Tape (I prefer masking tape)
- Rotary Cutter (I use this one)


The methods in this article are based on the fact that I have a 12 inch rotary cutter that cannot cut through two pieces of matte board at the same time. If I could cut through two matte board pieces at a time then I would probably use a different method.
Methodology
My assumption here is that you already have artwork you’ve created. If you have the artwork ready, then here are the steps I follow to make my quad fold boards…
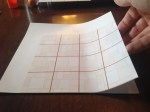
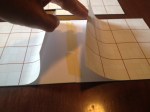
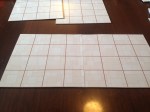
Print the Artwork
When I work with larger sized images I usually print them from either MS Publisher or MS Powerpoint. Publisher will require you make a larger template, but that is pretty easy to do. When you print this way you will print on several sheets of paper.
Once they are printed I will cut off the white margins for all the interior edges that will join up together. You can see an example of the cut photo paper above in the image with the glue stick.
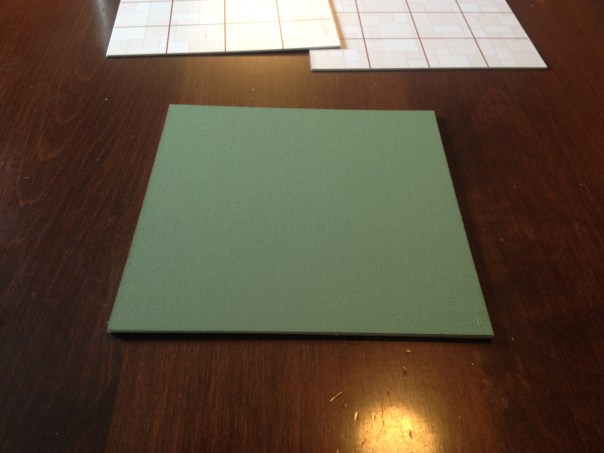
Glue the First Two Pieces
Depending on whether you want your board to fold with the artwork out (unusual) or inward (common) you will either have to do one or two of these procedures respectively.
-
- Place glue on most of the area except by the joint.
-
- Glue down the first piece, lining up the edges as best as you can.
-
- Repeat for the other half. Trim off excess areas before proceeding.
-
- Lift the non-glued portions. Tape the two pieces together.
-

- Apply glue to each and press down.
-
- Half of your board is completed!
As I mentioned earlier, you will do this once if you don’t care that your artwork folds outward. If you prefer your artwork to fold inward, then repeat this process with the other two pieces of your quad-fold board.
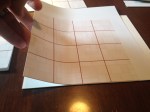
Before moving on I always like to check how smoothly the board folds. Here’s my example:
Completing your Board
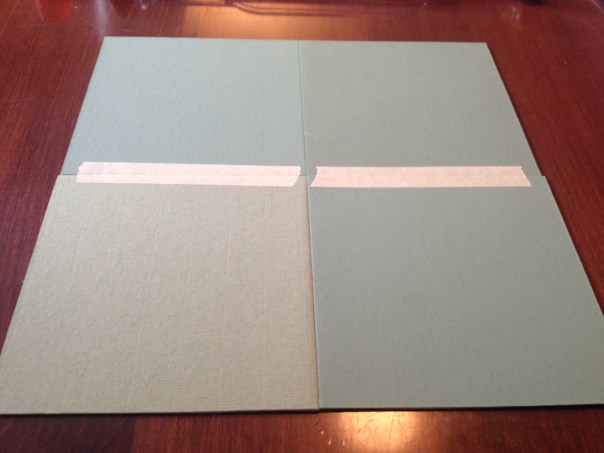
With a set of two pieces taped together you are now set to complete your board. This step is pretty simple. With all four pieces laid out, flip them all over together. Make sure they go into the correct places when flipped. You don’t want to flip them where they are but rather flip them and swap them horizontally. Before I start I put a piece of tape in the corners that line up in the middle of the board. This helps me know that I have the pieces together the right way.
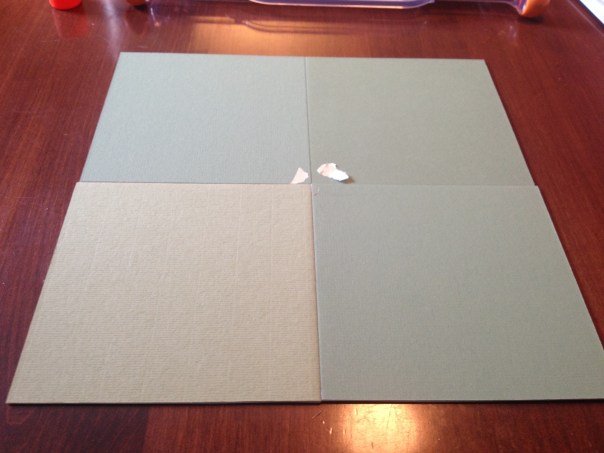
With them in the correct locations, all you need to do is apply two more pieces of tape as seen here:
Completed Quad-Fold Board!
And there you go! You now know how to make a quad-fold board for your game designs. Just keep in mind that if you would prefer the artwork to fold inward then do the “Glue the First Two Pieces” process twice. Then flip them and use only one piece of tape on one of the seams.
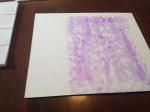
Here’s is my completed board for this article:


And here is the quad-fold board I made for a high quality prototype of Scoville using Joshua Cappel’s artwork:


Another Option
If you are not equipped with printing capabilities or if you would prefer to not do this on your own, then feel free to utilize The Game Crafter as they can create a quality quad-fold board for you. You just upload your artwork in the correct size and pay a little money and they’ll make your board and mail it to you.
They have the following options available:
- Bi-fold Board (9 x 18 inches)
- Accordion Board (8 x 16 inches)
- Quad-fold Board (18 x 18 inches)
- Six-Fold Board (27 x 18 inches)

So how do you make your quad-fold boards? Do you use a different method? I’d love to hear if there is a better way (I’m sure there is).
Game Design Process Update
Hi. I’ve had an incredibly busy year with many things not related to board games. But I just finished some reading I had to do and now I find myself with a snippet of free time. So today I thought I would provide an update on my game design process.

Ye olde Game Design Graphic
But to do that I wanted to adjust my graphic a little. In the past I have used the one on the right to illustrate my steps in the game design process. I liked it for a while but I’ve felt called to make a new version. If you are interested in game design and you don’t really know how to go about things, please go read the Inspiration to Publication posts by Jay Cormier and Sen-Foong Lim (designers of many games including the excellent Belfort by Tasty Minstrel Games).
So today I present my new “Game Design Process” graphic.
My Game Design Process
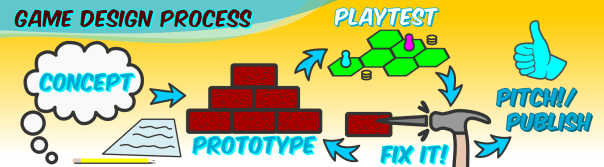
I’m not sure that’s an improvement but I had fun making the graphic anyway. It conveys the information in a more pictorial way rather than those boring rectangular prisms.
Let’s cover, briefly, what each of those game design steps really means to me anyway:
CONCEPT
The concept phase is all about brainstorming and coming up with the overall ideas for your game. This could be Theme-First or Mechanic-First. Either way, this phase is where you are taking a lot of notes and figuring out all the things you want your game to be.
PROTOTYPE
Once you’ve figured out the bulk of your game concept then it’s time to build it! In this phase you will create your physical prototype. If you don’t know how to get started, check out my article, “Starter Prototyping Tools.”
PLAYTEST
With your physical prototype ready to go it’s time to get it to the table and see if it works, see whether it is any fun, and find the ways to make it better! Just lure some friends with pizza or something. I wrote about playtesting once (here) but I am going to revise that article in the future because I’m not certain I agree with it completely anymore.
FIX IT! a.k.a. Applying Feedback
This is one of the more difficult things to do in board game design. It is tough sometimes to ignore feedback from your friends. It can be equally tough to accept tough feedback from them. But the most important thing is to understand WHAT the feedback actually means. For more info check out, “Coarse vs. Fine: Editing Your Game.”
PITCH! / PUBLISH
I wanted to put a caveat in the graphic somehow to stress that this part of the process shouldn’t happen whimsically when you feel like it. Before pitching to a publisher, or before self publishing, I highly recommend blind-playtesting. This is when you send a copy of the game to people you do not know. Let them read the rules and figure out the game. They will provide some of the best feedback you can imagine. After numerous cycles of fixing, prototyping, and playtesting where the feedback you receive is mostly or all positive, then I would feel confident in pitching the game or self-publishing. When you are ready to pitch the game you’ll want to contact the publisher that’s right for you and your game. Then you can follow the method in my article, “How to (Speed) Pitch Your Game.”
That’s an overview of my game design process. I know that there are people who do things differently. It would be weird if that weren’t the case. If there are things you think are essential to the process I’d love to hear about them. Just leave a comment below. Thanks for reading.
Hex-tile Prototype: Impossible
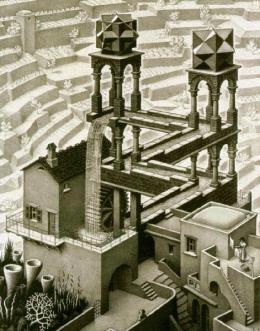
“Escher Waterfall”. Licensed under Fair use via Wikipedia – https://en.wikipedia.org/wiki/File:Escher_Waterfall.jpg#/media/File:Escher_Waterfall.jpg
For a long time I have wanted to design a game around the 3D world of M.C. Escher. My dad had a picture of the Escher waterfall hanging in his office. I was always captivated by the impossibility and reality of the image: Impossible because it could not exist in a real 3D world, Real because it DOES exist in the 2D world of the paper.
Putting 3D objects into a 2D world allows for some awesome things to happen. You are aware of this if you have played the app Monument Valley, which I recommend.
I have been working on several concepts for a 3D-2D game based on impossible geometry like that of the Escher waterfall. I have made two different prototypes. One is terrible and is really difficult to turn into a game. The other I have been able to turn into a game and I’m ready to playtest it. Today I’m covering the latter.
Impossible
Impossible is a real-time game of puzzle building and tile laying. It works similarly to Galaxy Trucker in that players will be grabbing tiles from a common pile. These tiles will then be added to their growing assembly. The objective is to create the face up Impossible Shape as quickly as possible to earn the most points for that shape.
An impossible shape in 3D, but very possible in 2D.
The game is a set number of rounds. In each round a new Impossible Shape tile is drawn. All players will be racing to complete this shape.
When someone says, “Go!,” players will begin taking tiles and building their shape. When they complete the shape they can place a meeple of their color onto the shapes tile to claim the highest remaining points for that shape.
Once all players have completed the shape the round is over. The tile is placed to the side for endgame scoring. Players put all their pieces back into the pile. A new Impossible Shape tile is drawn and the next round begins.
Components
The total list of components for the game includes:
- A bunch of hexagonal tiles
- A smaller bunch of rhombus tiles (I’ll explain why in a moment)
- The “Impossible Shape” tiles
- Rulebook
It’s a relatively simple design with a succinct components list that should make it relatively risk-free and publisher friendly.
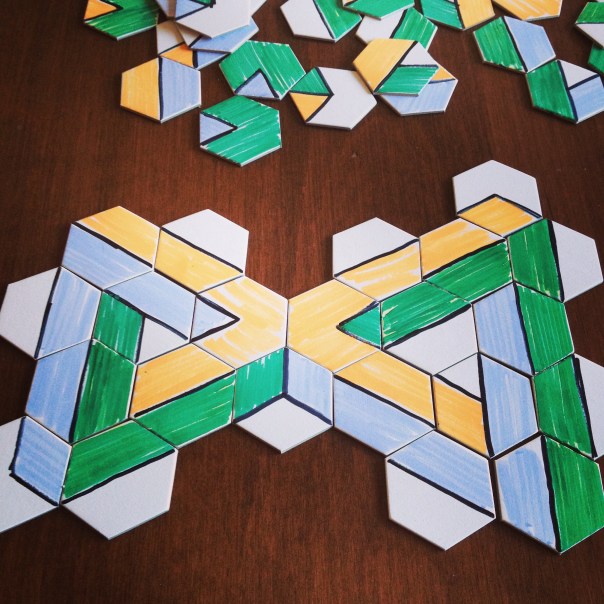
Why Rhombuses?
Because players can create the impossible shapes in different ways it leads to the need for many different designs on the hexagonal tiles. A simpler solution was to have “correction tiles,” which in this case are rhombuses.
Here is an example based on the image above. In the example a player is working on the left half of the image above. In their haste they grabbed the wrong tile for the upper corner. But instead of wasting precious time searching for the correct tile they realize that they can place an orange/purple rhombus over the wrong part of the tile. This allows them to have an accurate representation of the impossible shape.
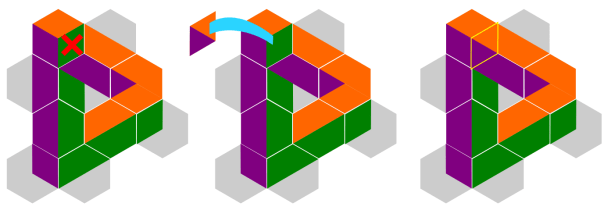
The player uses a correction tile to make the shape correct.
The downside of the correction tiles is that each one is worth -1 points. So players should try to avoid them.
How to Win
Below is an example of an Impossible Shape tile. The first person to complete it will receive 7 points at the end of the game. The second player will receive 4 and the third will receive 2.
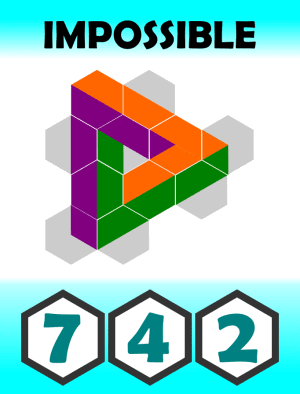
After a number of rounds agreed upon at the start of the game, all the points will be tallied and the winner will be determined.
Overall Impossible is a fast paced real-time game where you are racing against your opponents to build impossible shapes. Do you have the mind it takes to figure out the shapes and grab the right hex tiles? I’m pretty excited for this game and I’m looking forward to seeing where it ends up.
Thanks for reading! Let me know what you think about the design.
Impossible!
No, the title doesn’t refer to your shock that there’s actually a new blog post on Boards & Barley. Instead it refers to a new abstract game design of mine.

Waterfall (1961). Photo Credit: mcescher.com.
When I was a child I found a small print of M.C. Escher’s Waterfall Lithograph in my dad’s at-home office. At first I thought it was kind of neat but after a few minutes I realized how truly awesome the artwork was. There is an impossibility in the physical concepts of a waterfall flowing uphill. But yet this artwork makes it actually appear possible.
M.C. Escher has long been an inspiration of mine. I love trying to wrap my mind around the 2D artwork that portrays 3D impossibilities.
So I decided to make an abstract tile placement game around that concept. It is based on an impossibility that occurs in the waterfall lithograph. That impossibility is known as the Penrose Triangle. While I’m not using it exactly, I am using the fundamental idea of the Penrose triangle. I’ll show you below.
But first, because I have an illness where I must create a logo for any game design I am working on, here is the prototype logo:
![]()
The game is currently still in the concept phase. I have been trying to work out some “Euro-y” type scoring conditions but I’ll have to playtest it before I decide if they should be public goals or private goals, or a combination of both.
Here is an example scoring condition:
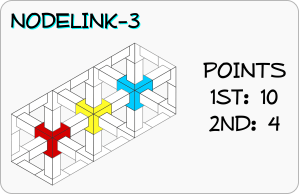
If players build a nodelink matching these colors then they will earn the points shown on the card. The first player to build such a nodelink would earn the 4 points while the second player would earn 4 points.
I currently have a bunch of different scoring conditions based on the nodes that will be built during the game. I’m looking forward to playtesting it and figuring out some of the balance about these cards.
The basic gameplay is simple. It’s sort of a mix between Carcassonne and Qwirkle. Players will play 1 tile anywhere that it fits onto the board. Nodes will be built up this way. Once a node is completed, it’s color is determined by whichever color is of a majority at the node.
There will also be one-time use bonuses that allow players to play more than one tile at a time. These should allow for players to make awesome moves in the game and have rewarding moments. My hope is that it also allows for some “take-that” type action where you can mess with something that other players are working on.
That’s the current status of Impossible. I will be bringing the prototype to Gen Con and I’m hoping to get it in front of some people. Thanks for reading and let me know if you have any questions.
