Monthly Archives: February 2014
How to Teach Games

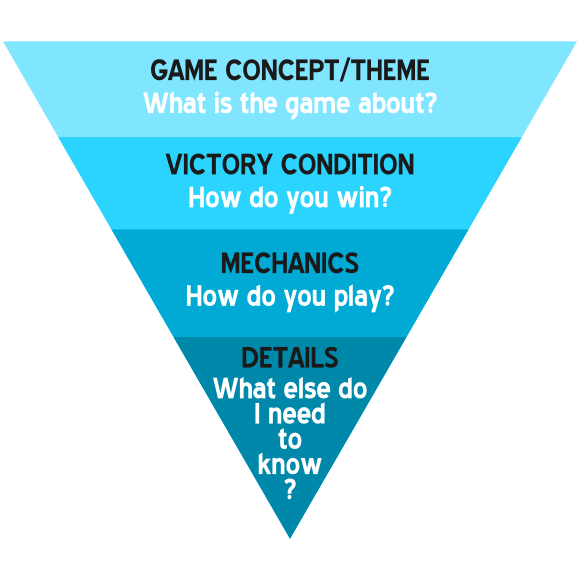
Teaching games is like an upside down pyramid. Photo Credit: ©hassansagheer via DeviantArt, Inverse Pyramid, Louvre Museum. I do not own this material.
I’ve had several friends tell me that I am good at teaching games. So I sat down for a while with a nice brew and thought about why they might have said that, and about what makes someone good at teaching games. So I’ve postulated and hypothesized some ideas that I want to lay out for you today.
There are some rules and some guidelines. But the overall idea of how to teach games can be summarized in this upside down pyramid table with the idea being that you teach from the top down:
 Before we get into those concepts I want to address Rule #1 of teaching games…
RULE #1: Know How To Play!
That seems pretty straightforward, right? It is really annoying when someone is all excited to teach you a game and then they keep looking through the rules for all the weird little oddities. Don’t be that person.
Learn the game. Read the rules. Watch videos about how to play the game. Set the game up. Pretend to play it solo. Do whatever you need to do to know the game before you attempt to teach it to others. Don’t waste their time.
Ok… glad I got that off my chest. Now let’s hop on top of that inverted pyramid!

1) Explain the GAME CONCEPT/THEME
I always like to start at the beginning. Tell the players what the game is about. Tell them about the theme. Tell them the overall idea of the game. Players will want to know what is exciting about the game. They will want to somehow relate to the theme, if at all possible. At a bare minimum, players will want to understand what the theme is so that they can try to immerse themselves in it.
Games are supposed to be fun and it is often more fun if you can immerse yourself in the theme*.
* Does not apply to abstract games.
2) Explain the VICTORY CONDITION
Now that your players know what the game is about, they’ll want to know how to win or at least how/when the game ends.
I think this is very important to know early on. I dislike when someone is teaching a game and they have told you about 30 different rules and then someone says, “How do you win?” That’s annoying.
So after I explain what the game is about, I tell them how they win the game.
3) Explain the MECHANICS
Players should now know the victory conditions. It is now time to explain how they can reach those victory conditions.
At this point you will teach the mechanics of the game. You will be teaching the actual things that you will be doing during the game. This is the most time-intensive portion of teaching a game. Also, there are a few guidelines during this portion of teaching that I like to follow:
- Teach along the flow of the game
- Teach the basics of each portion of the game… save the details for later.
- As you teach, remind the players how the mechanics relate to the victory condition.
- Give examples of how one decision can help you make the next.
Teaching along the flow of the game means don’t skip around. If the game follows a progression of things, teach them in order.
Teaching the basics means telling players the overall idea of what is happening. The details can come later on.
Remember to relate the different phases of the game to the victory conditions whenever possible. That way players can quickly learn which mechanics are the most helpful along their path to victory.
And giving examples of how decisions affect future decisions can be really helpful.
4) Explain the “necessary” DETAILS
Once you have taught the basics of the mechanics, go back and fill in the details. Once players know the overall flow of the game, then revisit each of the portions of the game and dive deep enough where people aren’t lacking anything that they will need to know.
These are the sorts of things players will need to know, but don’t need to know until after they have learned the general flow of the game.
Got all that? Here’s an example…
 I’ll attempt to “teach” you how to play Compounded from designer Darrell Louder and publisher Dice Hate Me Games. I love this game and it is a great example for this article. If you haven’t played it, I highly recommend it. Let’s start with step 1) Concept/Theme.
1) CONCEPT/THEME: You are a lab manager working on the greatest compounds known to man. Your objective in the game is to manage your lab workbench better than your opponents. To do that you will have to complete compounds, increase your experiment levels, and gain the most atomic points.
It’s that easy and quick. Give the players the basic idea of why they are playing the game, and what their overall objective is while playing.
2) VICTORY CONDITION: To win the game you will have to score the most Atomic Points. To earn Atomic Points you will have to complete compounds. To complete compounds you will have to place elements on these cards (*points to cards). Once you have completed a compound you will earn points and bonuses, which I’ll explain in a moment. The game ends when someone reaches 50 Atomic Points (or condition A, or condition B, etc.).
Okay, in that portion I started from the top and worked my way down. Score Points. How? Complete Compounds. How? Place elements on compounds. Start at the top and then fill in the details. It allows players to understand the grand scheme of things.
3) MECHANICS: Now that you know how to earn points, let’s discuss how we actually play. Each round is made up of a few different phases. (*points to top of player mats where the phases are listed). First is the Discovery phase where we will draw elements from the bag and possibly trade with other players. After Discovery is the Study phase where we will claim compounds by placing our discs on them. After the Study phase is the Research phase where we can place elements on compounds and try to complete them. After the Research phase comes the Lab Managing phase where we check for completed compounds and restock the lab with new compounds.
So when I teach Compounded I like to run quickly through the four phases of a round before I give too much detail about any one of them. This way players will become familiar that each round of the game has four phases where you are doing certain things. Once players understand the flow of the game, then I get into the details.
3) DETAILS: Those are the different phases. Let’s discuss each one. So in the Discovery phase players will draw a number of elements shown by their DISCOVERY research level. Each player starts the game at “2.” Also during the discovery phase players will have the opportunity to trade things. You can trade anything EXCEPT Atomic Points and research levels. No future trades are necessarily binding. That depends on your real life integrity. Then in the Study phase you each have one disc to place on a compound. …
I could go on and on, but the idea here is that for each phase of a game you should be mentioning the details. Like during the explanation of the Lab Managing phase of Compounded you should point out the little symbols on the corners of the cards that either give you a bonus or start a lab fire or whatever they may be. Players will want to know those things.
So that’s the basic way that I teach a game of Compounded to new players. I follow the four major steps shown in the inverted pyramid.
I want to point out that Dice Hate Me did an awesome thing by listing the phases of the round right on each player mat. Here is a picture showing how Dice Hate Me incorporated my Steps 3 & 4 onto the player mat to help players learn and play the game:

Having the overview of the game flow and the details where all players can see it serves as a constant reminder throughout the game. It also helps to prevent players from asking the same questions over and over again.
I know that not everyone will agree with how I think games should be taught. If you don’t agree, let me know about your way. I’d love to hear how others teach games. If you have a way that works really well, post it in the comments! Thanks for reading!

Monday Brews 2-24-14
Wow! The Kickstarter campaign is over and I can get back to life as normal. I may write an article about it in the next few days, but today we have the standard Monday Brews for you.
So let’s check out the Boards & Barley I enjoyed in the last week…
The Barley:
 BARLEY SPOTLIGHT: Cave Creek Chili Beer
In order to celebrate the completion of the Scoville Kickstarter campaign I thought it would be fun to try a chili beer. There is a local store where I had seen one before so I stopped there on Friday. Thankfully they had one left. So at midnight when the campaign ended a few friends shared the bottle with me and we all sampled the chili beer. Here’s my review: yuck!
But at least we celebrated with an appropriate beer! Here are the other Barleys I enjoyed:
- New Glarus Cabin Fever Honey Bock
- New Glarus Coffee Stout
- Lakefront Brewery Eastside Bavarian Dark Lager
- NEW! Vintage Dedication: This is one of the best Dubbels I have had. It had a perfectly Belgian character and I would definitely drink it again.
- NEW! Vintage McLovin: If the Dubbel hadn’t been so strong I probably would have enjoyed this Red Ale a little more. It was still a good beer though.
The Boards:
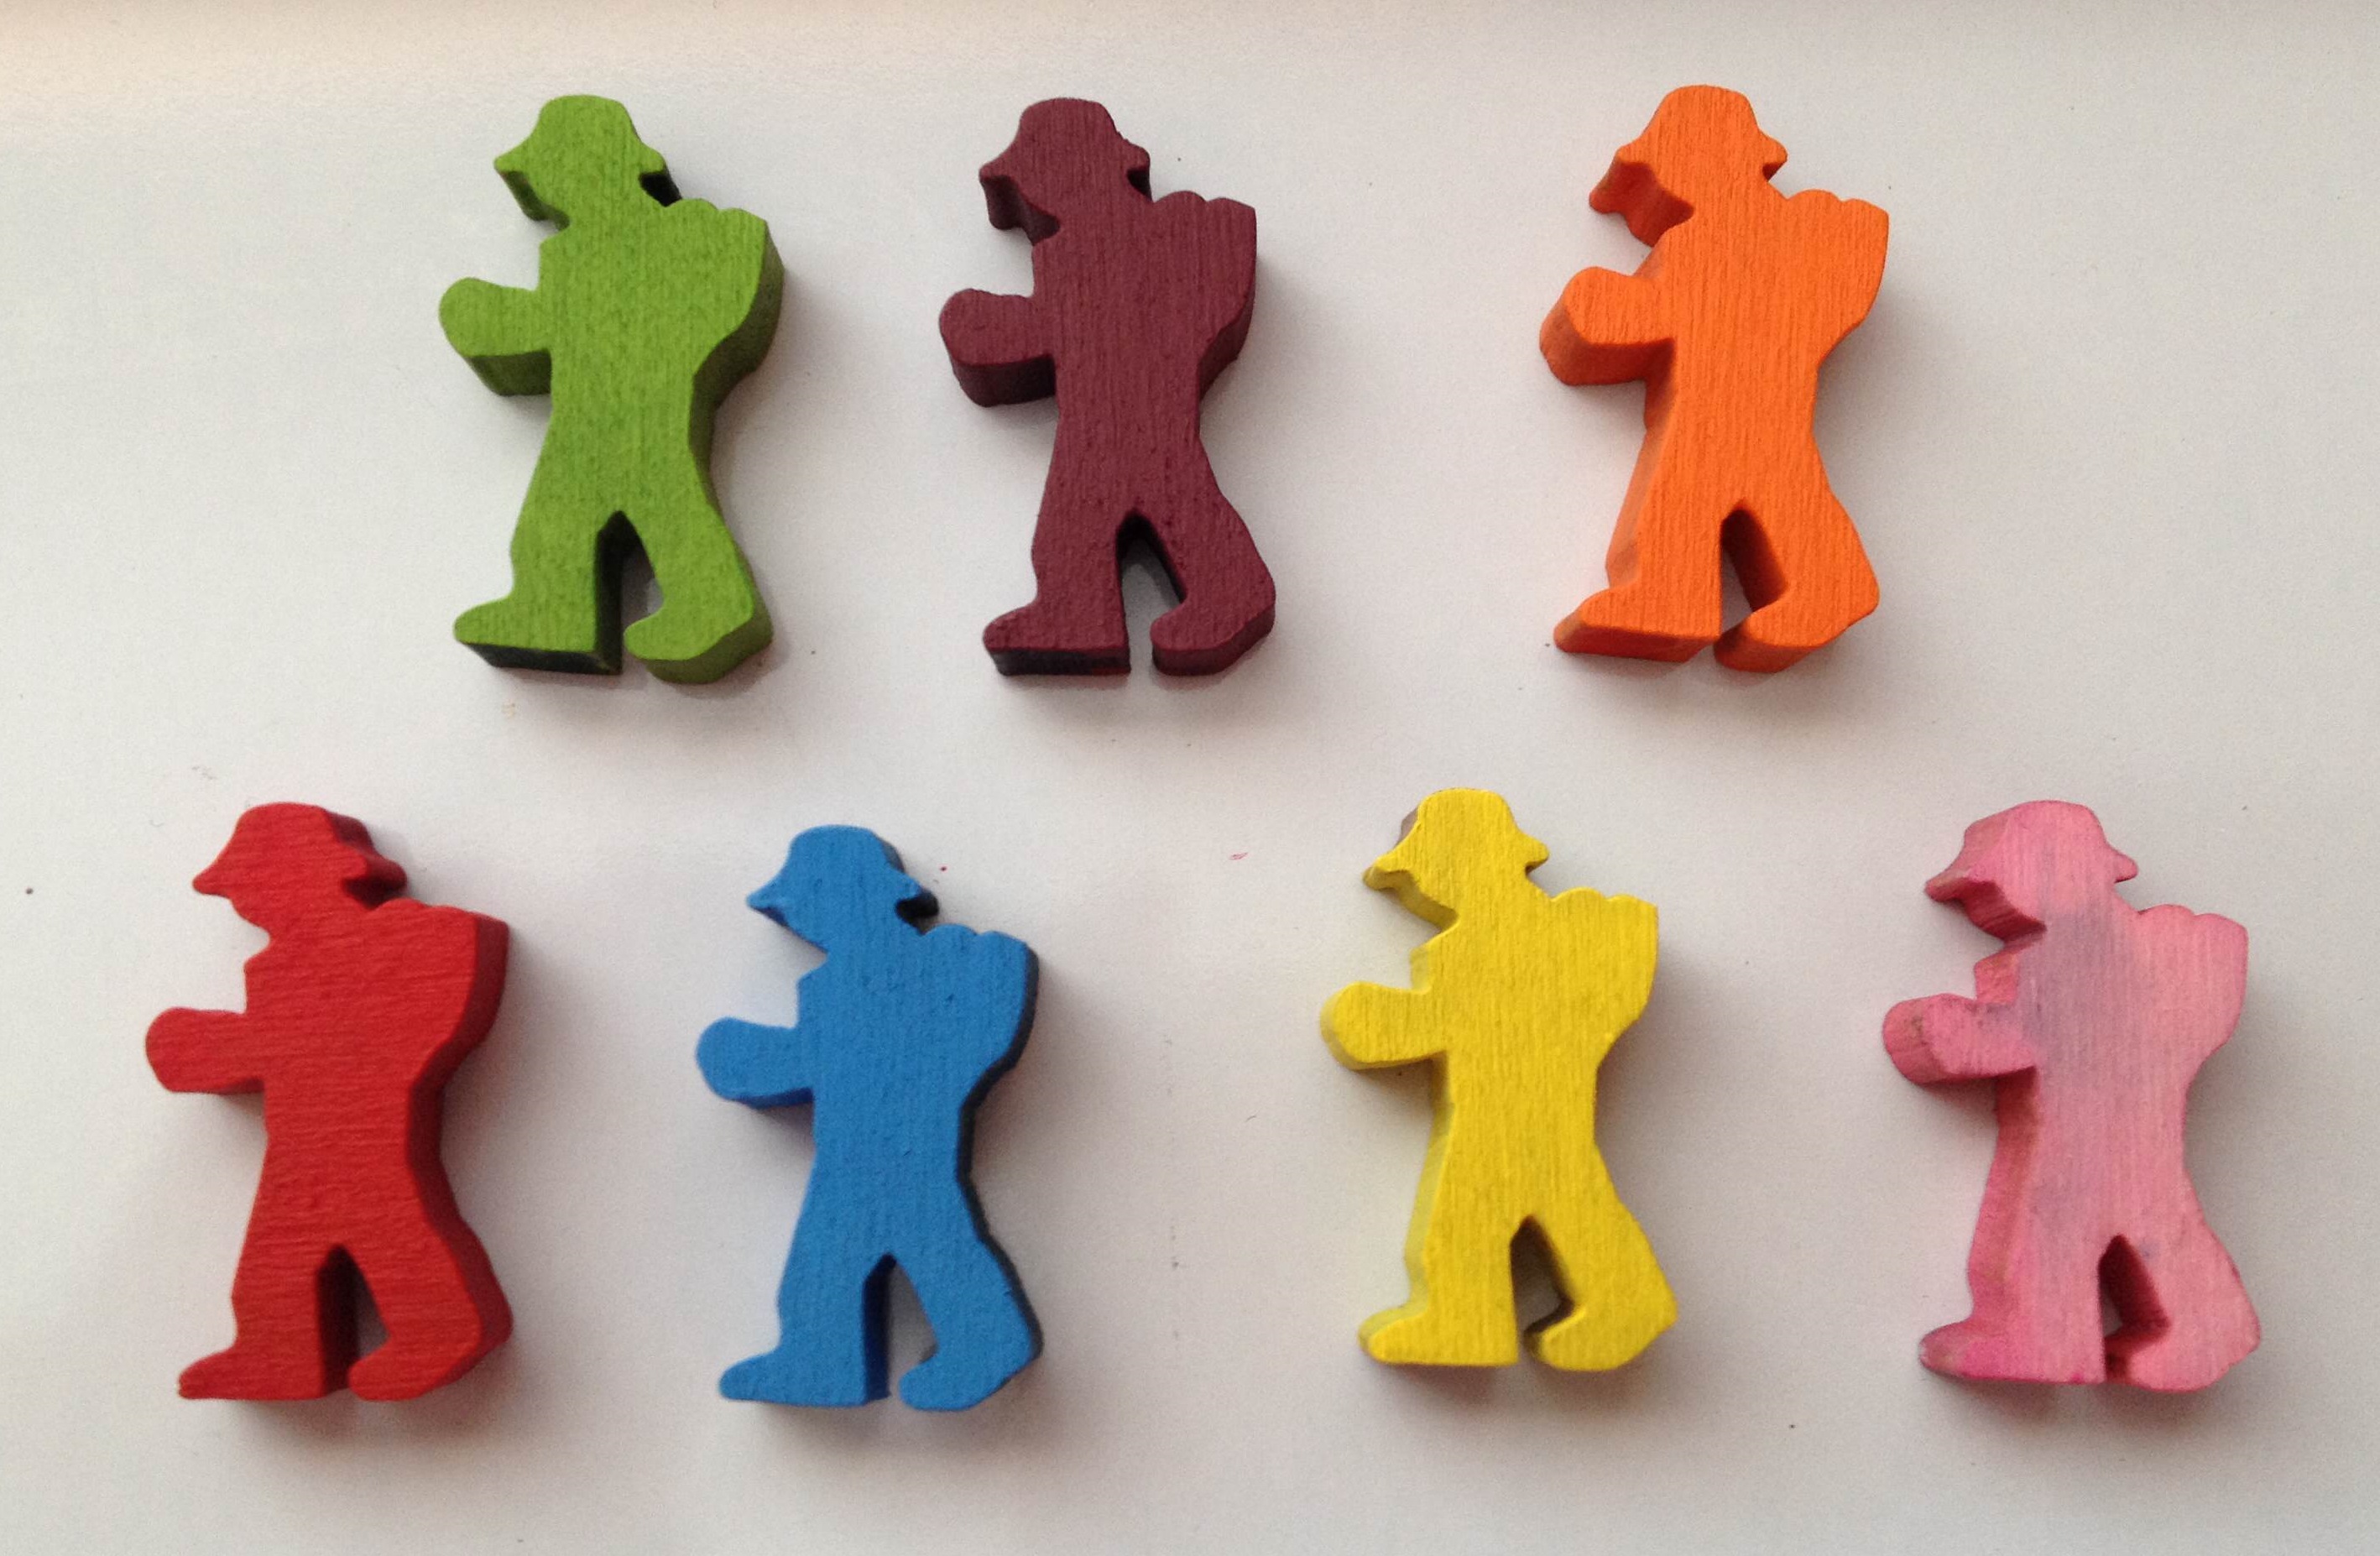
Scoville Farmer Meeple Awesomeness! Pink not included.
BOARDS SPOTLIGHT: Scoville (Again!)
After the campaign ended at midnight three of us played a game of Scoville. I struggled and fought all game long and didn’t seem to be doing too well. But in the end I did just well enough to win by 1 point!
It was a light gaming week. But those are four enjoyable games!
Designer’s Corner:
It’s time to put Brooklyn Bridge together. That’s all. I’ll let you know how that comes along.
***
So those are the Boards & Barley I enjoyed in the last week. What did you enjoy???
Monday Brews 2-17-14
Hi everyone! Thanks for visiting. Before we get to the Monday Brews I wanted to take this opportunity to once again point out that Scoville is on Kickstarter. The campaign ends on Friday and is flying it’s way to the last stretch goal. At $80,000 Tasty Minstrel Games will put pepper shaped components into the game instead of cube-based components. Here’s an example of how much more awesome things will look when we hit that goal with your help:

Wow! Those peppers really spice up the art!
So go check out my game on Kickstarter! Thanks!
Okay. Now to the Monday Brews. I realized that I was getting a little monotonous with my descriptions of beers that I’ve had numerous times. So I’m changing up the way I do the Monday Brews articles a little bit. Instead of writing out a little blurb for each beer and each game I’m going to feature one of each and simply list the rest unless it was new to me, in which case I’ll write a little one-liner type thing. This saves all of us time since you don’t have to read the same boring descriptions each week and I don’t have to type them.
So let’s check out the Boards & Barley that I enjoyed this past week…
The Barley:

I thought it was a weird spelling of “Sudoku” at first.
BARLEY SPOTLIGHT: Toppling Goliath Pseudo Sue Pale Ale
I’ve found I am starting to enjoy Pale Ale’s more and more recently. Typically they are where I draw the line for hops in my beers. This one was fairly hoppy, coming in at 50 IBUs. Fortunately it didn’t have a lingering bitter aftertaste that is common among IPAs and more potent Pale Ales. So I enjoyed this one.
- Fleming’s Scotch Ale (My Homebrew)
- NEW! Green Flash Saison Diego – When I cracked this one it foamed over for about 10 minutes and left a little mess on the counter.
- NEW! New Glarus Spiced Ale – This was a decent spiced ale that wasn’t overly spiced.
- New Glarus Cabin Fever Honey Bock
- NEW! Big Wood Jackpine Savage – This was borderline too hoppy for me, but came in a pretty cool can.
The Boards:
BOARDS SPOTLIGHT: Scoville
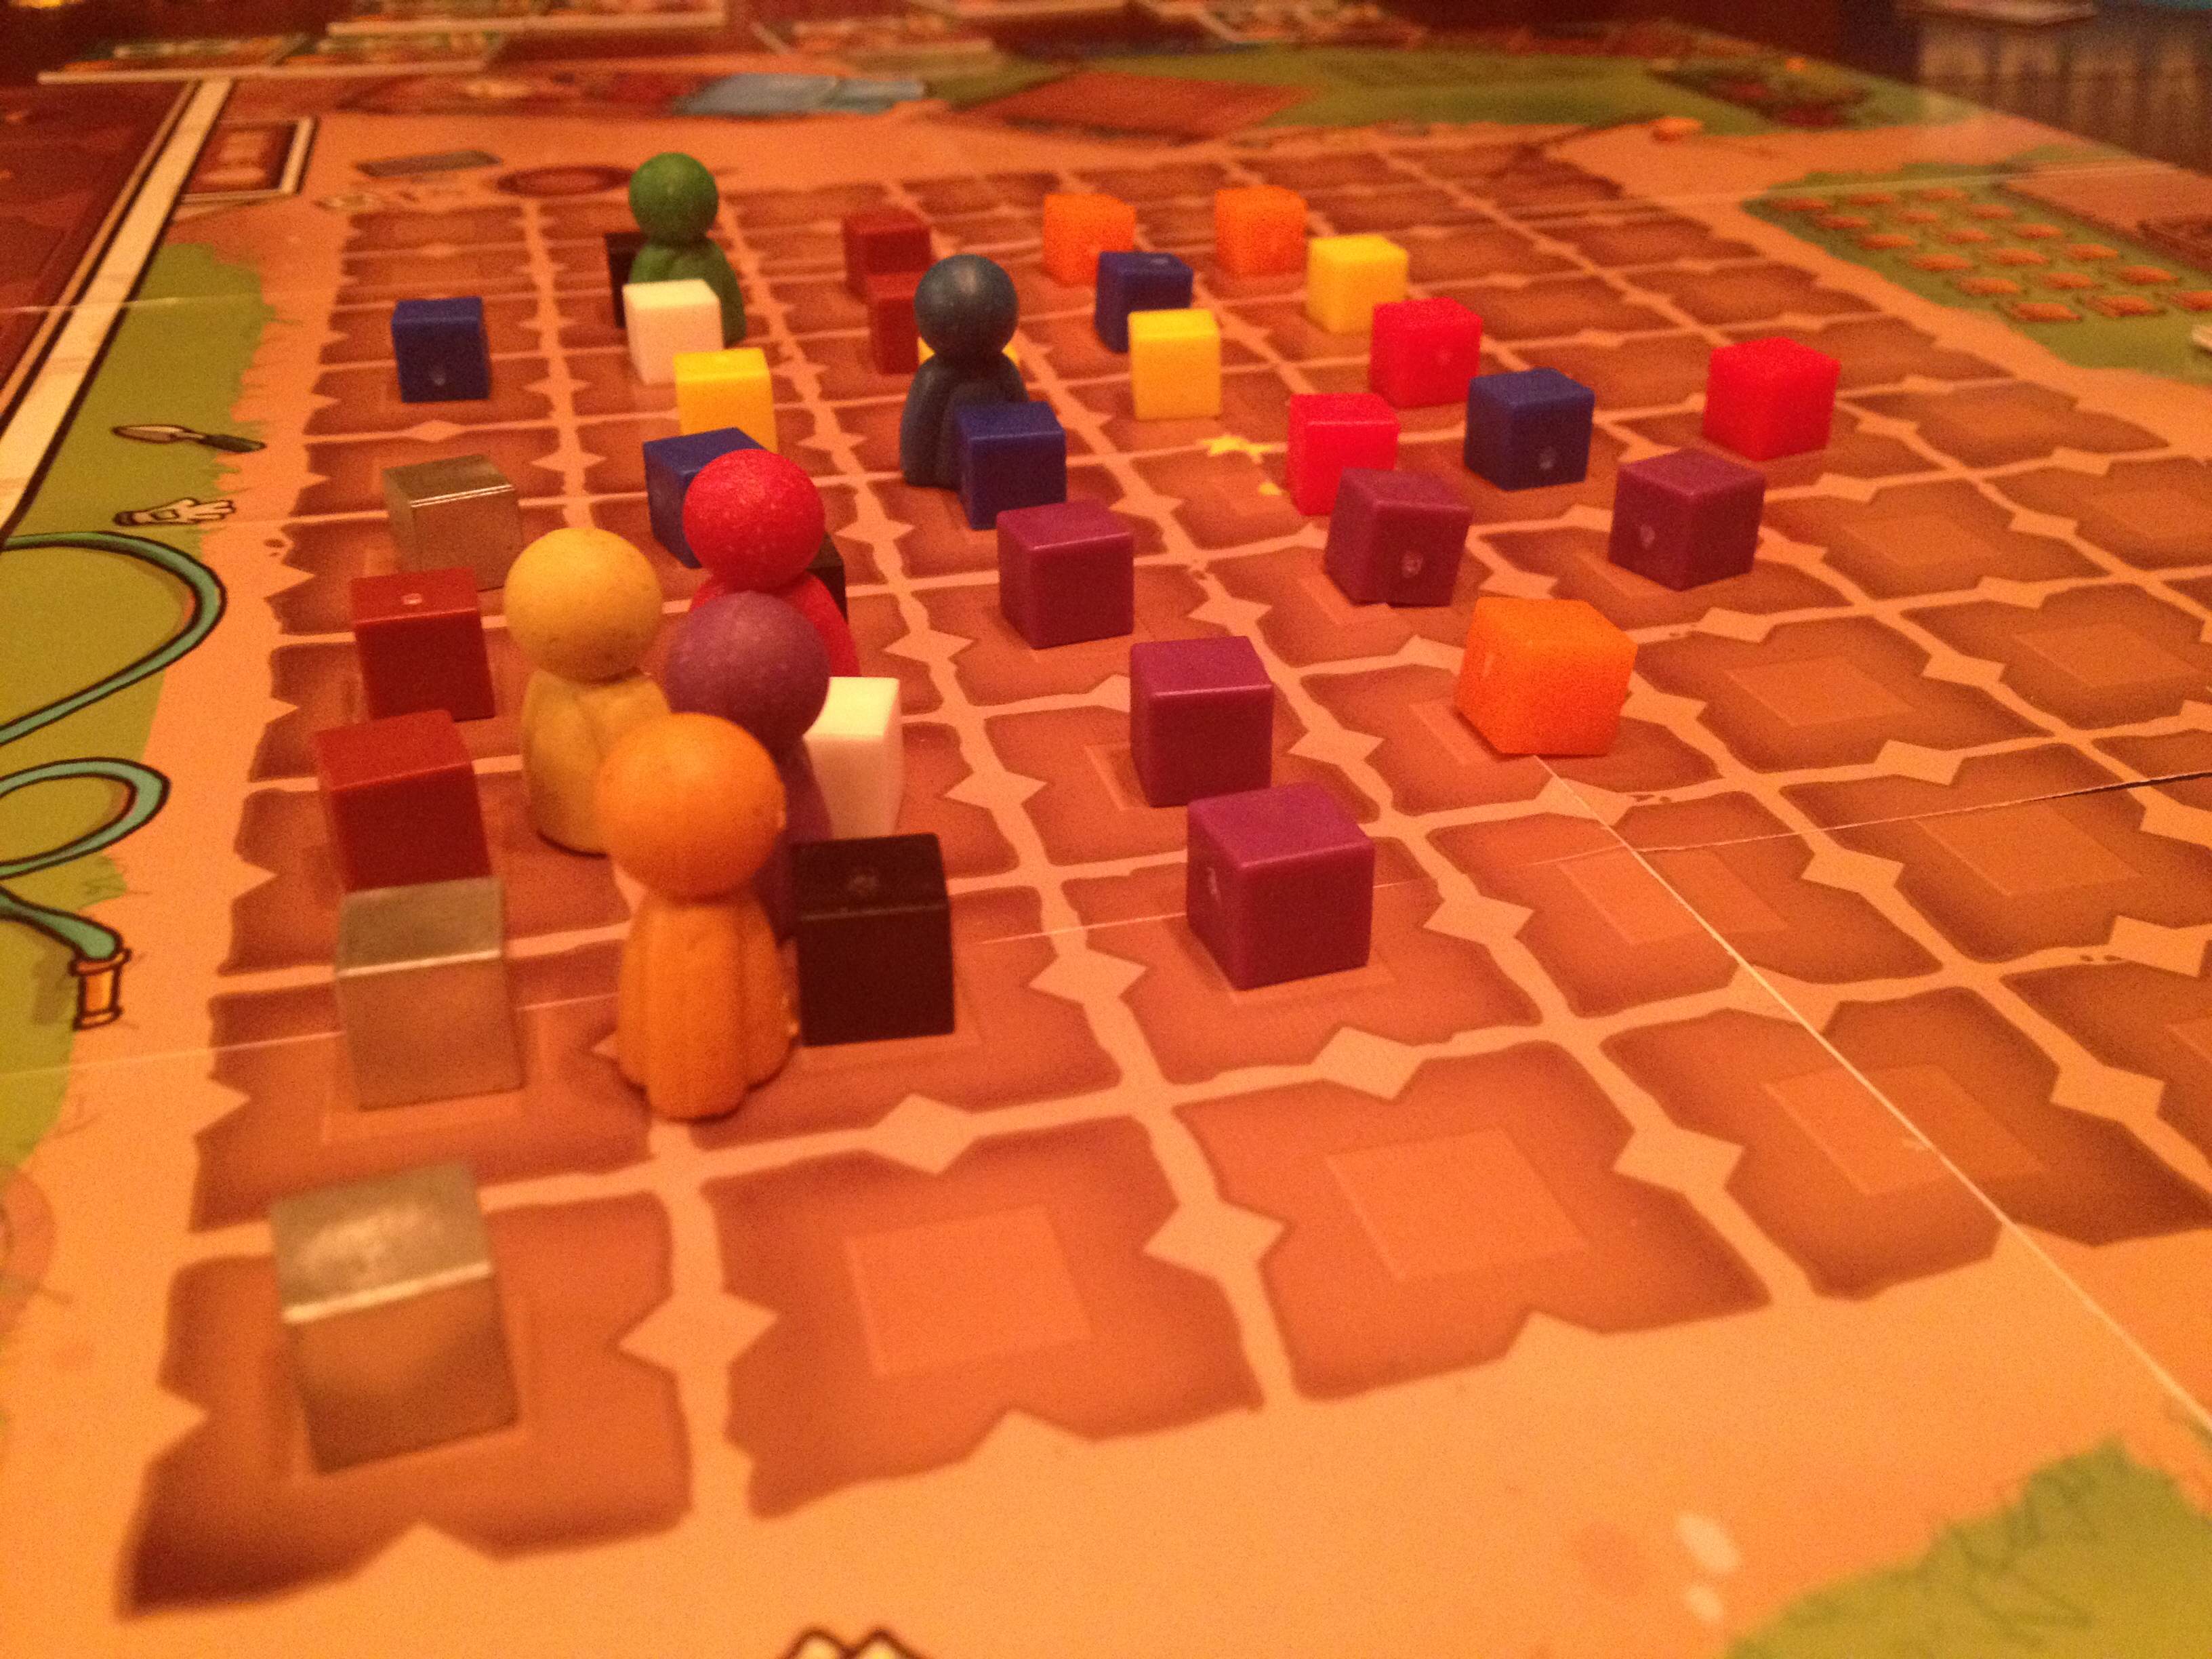
A near-endgame field condition from a recent 6 player game of Scoville. (Prototype copy)
I was honored at a recent game night when people requested to play Scoville. I had my copy along to show some people the awesome artwork, but I wasn’t expecting to play it. But we got in a tight 6 player game. I was able to pull out the victory with a big final move to get a 24 point recipe.
My favorite thing about Scoville is how the map (planting/harvesting) mechanic works. There are so many interesting decisions of which pepper to plant, where to plant it, and which direction to move your meeple when harvesting. I can’t wait to play it again!
If anyone has any questions about Scoville, please let me know by posting a comment at the bottom of this blog post. Thanks so much!
And here are the other games I played this past week, including two new games.
- NEW! Eight Minute Empire Legends – This was an interesting game in that it plays quickly and there is a fair amount of strategy, but it definitely takes more than 8 minutes.
- Skyline
- Compounded
- NEW! Karesansui – I think this game has a bunch of potential as an auction game. Unfortunately I was terrible at it.
- 7 Wonders
- Long Shot
Designer’s Corner:
As you can imagine I’ve been spending quite a bit of my time focused on the Scoville Kickstarter campaign. That means I haven’t really been doing too much with my current game designs. This was an interesting game in that it plays quickly and there is a fair amount of strategy, but it definitely takes more than 8 minutes.
The one game I have been doing some work on is Brooklyn Bridge. One thing that was pointed out to me was that the worker placement locations will have to change based on player number. It seems like such an obvious thing when I think about the design, but it was something that I just hadn’t thought of. So I can use that information to start to put together a prototype where it will work with anywhere from 2-5 players. That’s what is currently in my design queue.
***
So those are the Boards & Barley that I’ve been enjoying. What have you been enjoying?
Scoville and Me
Scoville – Where dreams come true!
I was thinking the other day about how strange all of this Kickstarter stuff is and that people are pledging money toward a game that I designed. It’s all been a really wild ride and it’s awesome to see a dream come true like this. If you are reading this, you are likely a backer, and for that I thank you.
On the flip side, I run this blog and it hasn’t exactly been running like normal while Scoville has been on Kickstarter. For that I apologize. Today won’t be like normal either. I realized that the truth is I may never have a game on Kickstarter again. So I’m trying to enjoy all of the stuff going on around the campaign, both good and bad. I’m taking the perspective of just enjoying it.
So today I thought I would share with you all the awesome opportunities that people have presented me with. These are the interviews and podcasts that I’ve had a pleasure of being a part. But first, for those who have not seen it, Undead Viking has a video review of Scoville for you visual and audible pleasure.
Undead Viking Video Review
Interviews
I had the pleasure of being involved in three different interviews. The #BoardGamersAsk was a live interview on Twitter where anyone could ask me anything. It was pretty awesome!
 Indie Cardboard: January 26, 2014
 #BoardGamersAsk via Ministry of Board Games: January 31, 2014
 Cardboard Republic: February 14, 2014
Podcasts
It turns out that the guy who runs My Board Game Show lives in my town. So I was able to go over to his house and record the podcast live with him. And I had the pleasure of joining the Dice Hate Me crew, who are always fun to chat with. Here’s the four podcasts I had the privilege of being on:
 My Board Game Show – Scoville & Mob Town: February 4, 2014
 Dice Hate Me State Of Games: The one about the hot games of 2014: February 7, 2014
 Let’s Level Up: February 11, 2014
 G*M*S Magazine Boardgame Review Room: February 11, 2014
In the meantime…
Thanks for checking out Scoville on Kickstarter! It really means a lot to me. I’ve got other games I’m working on that I hope will end up as awesome as Scoville.
Monday Brews 2-10-14
Welcome to another Monday. I’m hope you are having a fantastic day! I am. That’s because over the weekend Scoville funded on Kickstarter! Woo hoo! Now we are on to the stretch goals!
Before we get into the Boards & Barley that I enjoyed last week I wanted to inform you that Tasty Minstrel Games has posted a contest to Board Game Geek. Go check it out for your chance to win a copy of Scoville: BGG Scoville Contest.
Okay… now let’s get on to the good stuff. As usual we’ll start with the Barley.
The Barley:

New Belgium Folly Pack
New Glarus Cabin Fever Honey Bock: Again… because it’s so good!
Cisco Brewing Grey Lady Witbier: My friend Ben had some of these. I had not heard of this brewery before. They are located in Nantucket
St. Francis Sloth Brown Ale: I had not heard of this brewery/restaurant until Friday. They opened in 2009 in Milwaukee, WI. It was a pretty good beer and I’m looking forward to a stop at their brewery the next time I’m in the area!
New Belgium Mighty Arrow: I bought a variety 12-pack that had a revival beer called Mighty Arrow. It was a very decent pale ale and the bitterness did not linger. The other cool thing about it was that it had the old label on it.
New Belgium Trippel: I really like the clean and simple approach for the new labels for New Belgium brewing. They still maintain the New Belgium character but now look much better. Nice move on their part. Also, their Trippel was pretty good.
North Coast Old Rasputin Russian Imperial Stout: My wife and I hosted a Winter Olympics party and I was planning to buy the large plastic 2-liter type bottle of crappy Russian beer that costs about $2. Alas, my FLBS (Favorite Local Beer Store) did not have any. So I went with a Russian Imperial Stout. While it’s not a Russian beer, it at least had the word “Russian” in it. People didn’t complain.
The Boards:
X-Wing: I think X-Wing is great! It’s a lot of fun flying through space trying to take out your opponents and trying to figure out what they are going to do. My biggest problem, however, is that my friend’s wallet is hurting a little from all of the stuff that you must have. Okay… maybe you don’t “need” to have it all, but you should!

Awesome Awesomeness!
Belfort + Expansion Expansion: We got to try out the new Expansion Expansion, which features the best name for an expansion ever! I thought it was an awesome addition to the game. With the expansion you choose one of the characters in a reverse draft each round. That character can provide you with a bonus ability during that round or they can be used to let you expand one of your properties. Expanding a property gives you another scoring opportunity, which can be really useful. Overall I am glad to have backed the project. The Expansion Expansion adds a great level to the game and gives you a cool way to build an engine in the game. I’m looking forward to playing again!
Ingenious: This is one of those stupidly simple games that I wish I had designed. I mean, line up similarly colored components for points. That’s the game in a nutshell. It’s so simple, yet also challenging and fun as well. My only beef with the game is that it is possible to end with 0 points by the bad luck of never drawing a certain color. I wish that wasn’t possible. Oh well. I guess I should design my own stupidly simple game that fixes that problem.
Designer’s Corner:
With all this Scoville stuff on my mind I’ve been able to come up with what I think will be a really interesting expansion to the game. I’m not going to give away any details just yet but I’m pretty excited about it.
In other design news, talking on podcasts lately a lot of people have been asking me what I’ve got in the pipeline. The big game in the pipeline is Brooklyn Bridge. It’s my time-based worker placement game with a twist. I’ll eventually make a post all for the game, but the idea is you have a crew that is working on the Brooklyn Bridge. It’s your job to send your workers to purchase resources and utilize them as best as possible. The crew that has contributed the most to the bridge at the end will be the winning crew.
With only 11 days left for the Scoville Kickstarter campaign I can say I’m definitely looking forward to getting back to designing again. The last few weeks have been pretty devoid of design efforts. Go back Scoville so that we can get pepper components rather than cubes!
***
Thanks for reading! What Boards & Barley have you been enjoying lately?
