Blog Archives
How to Teach Games

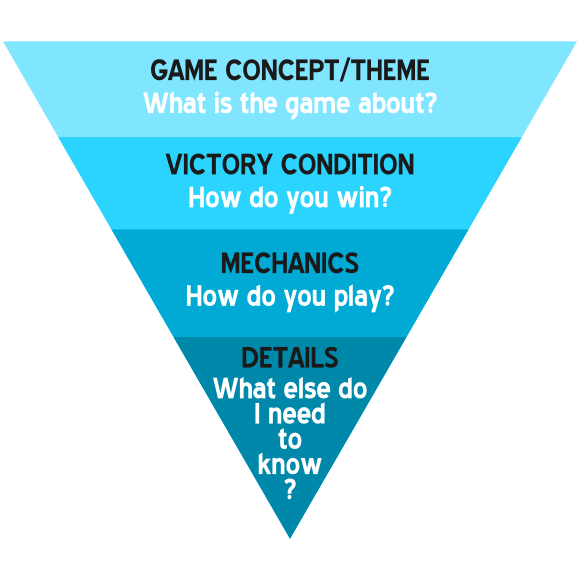
Teaching games is like an upside down pyramid. Photo Credit: ©hassansagheer via DeviantArt, Inverse Pyramid, Louvre Museum. I do not own this material.
I’ve had several friends tell me that I am good at teaching games. So I sat down for a while with a nice brew and thought about why they might have said that, and about what makes someone good at teaching games. So I’ve postulated and hypothesized some ideas that I want to lay out for you today.
There are some rules and some guidelines. But the overall idea of how to teach games can be summarized in this upside down pyramid table with the idea being that you teach from the top down:
 Before we get into those concepts I want to address Rule #1 of teaching games…
RULE #1: Know How To Play!
That seems pretty straightforward, right? It is really annoying when someone is all excited to teach you a game and then they keep looking through the rules for all the weird little oddities. Don’t be that person.
Learn the game. Read the rules. Watch videos about how to play the game. Set the game up. Pretend to play it solo. Do whatever you need to do to know the game before you attempt to teach it to others. Don’t waste their time.
Ok… glad I got that off my chest. Now let’s hop on top of that inverted pyramid!

1) Explain the GAME CONCEPT/THEME
I always like to start at the beginning. Tell the players what the game is about. Tell them about the theme. Tell them the overall idea of the game. Players will want to know what is exciting about the game. They will want to somehow relate to the theme, if at all possible. At a bare minimum, players will want to understand what the theme is so that they can try to immerse themselves in it.
Games are supposed to be fun and it is often more fun if you can immerse yourself in the theme*.
* Does not apply to abstract games.
2) Explain the VICTORY CONDITION
Now that your players know what the game is about, they’ll want to know how to win or at least how/when the game ends.
I think this is very important to know early on. I dislike when someone is teaching a game and they have told you about 30 different rules and then someone says, “How do you win?” That’s annoying.
So after I explain what the game is about, I tell them how they win the game.
3) Explain the MECHANICS
Players should now know the victory conditions. It is now time to explain how they can reach those victory conditions.
At this point you will teach the mechanics of the game. You will be teaching the actual things that you will be doing during the game. This is the most time-intensive portion of teaching a game. Also, there are a few guidelines during this portion of teaching that I like to follow:
- Teach along the flow of the game
- Teach the basics of each portion of the game… save the details for later.
- As you teach, remind the players how the mechanics relate to the victory condition.
- Give examples of how one decision can help you make the next.
Teaching along the flow of the game means don’t skip around. If the game follows a progression of things, teach them in order.
Teaching the basics means telling players the overall idea of what is happening. The details can come later on.
Remember to relate the different phases of the game to the victory conditions whenever possible. That way players can quickly learn which mechanics are the most helpful along their path to victory.
And giving examples of how decisions affect future decisions can be really helpful.
4) Explain the “necessary” DETAILS
Once you have taught the basics of the mechanics, go back and fill in the details. Once players know the overall flow of the game, then revisit each of the portions of the game and dive deep enough where people aren’t lacking anything that they will need to know.
These are the sorts of things players will need to know, but don’t need to know until after they have learned the general flow of the game.
Got all that? Here’s an example…
 I’ll attempt to “teach” you how to play Compounded from designer Darrell Louder and publisher Dice Hate Me Games. I love this game and it is a great example for this article. If you haven’t played it, I highly recommend it. Let’s start with step 1) Concept/Theme.
1) CONCEPT/THEME: You are a lab manager working on the greatest compounds known to man. Your objective in the game is to manage your lab workbench better than your opponents. To do that you will have to complete compounds, increase your experiment levels, and gain the most atomic points.
It’s that easy and quick. Give the players the basic idea of why they are playing the game, and what their overall objective is while playing.
2) VICTORY CONDITION: To win the game you will have to score the most Atomic Points. To earn Atomic Points you will have to complete compounds. To complete compounds you will have to place elements on these cards (*points to cards). Once you have completed a compound you will earn points and bonuses, which I’ll explain in a moment. The game ends when someone reaches 50 Atomic Points (or condition A, or condition B, etc.).
Okay, in that portion I started from the top and worked my way down. Score Points. How? Complete Compounds. How? Place elements on compounds. Start at the top and then fill in the details. It allows players to understand the grand scheme of things.
3) MECHANICS: Now that you know how to earn points, let’s discuss how we actually play. Each round is made up of a few different phases. (*points to top of player mats where the phases are listed). First is the Discovery phase where we will draw elements from the bag and possibly trade with other players. After Discovery is the Study phase where we will claim compounds by placing our discs on them. After the Study phase is the Research phase where we can place elements on compounds and try to complete them. After the Research phase comes the Lab Managing phase where we check for completed compounds and restock the lab with new compounds.
So when I teach Compounded I like to run quickly through the four phases of a round before I give too much detail about any one of them. This way players will become familiar that each round of the game has four phases where you are doing certain things. Once players understand the flow of the game, then I get into the details.
3) DETAILS: Those are the different phases. Let’s discuss each one. So in the Discovery phase players will draw a number of elements shown by their DISCOVERY research level. Each player starts the game at “2.” Also during the discovery phase players will have the opportunity to trade things. You can trade anything EXCEPT Atomic Points and research levels. No future trades are necessarily binding. That depends on your real life integrity. Then in the Study phase you each have one disc to place on a compound. …
I could go on and on, but the idea here is that for each phase of a game you should be mentioning the details. Like during the explanation of the Lab Managing phase of Compounded you should point out the little symbols on the corners of the cards that either give you a bonus or start a lab fire or whatever they may be. Players will want to know those things.
So that’s the basic way that I teach a game of Compounded to new players. I follow the four major steps shown in the inverted pyramid.
I want to point out that Dice Hate Me did an awesome thing by listing the phases of the round right on each player mat. Here is a picture showing how Dice Hate Me incorporated my Steps 3 & 4 onto the player mat to help players learn and play the game:

Having the overview of the game flow and the details where all players can see it serves as a constant reminder throughout the game. It also helps to prevent players from asking the same questions over and over again.
I know that not everyone will agree with how I think games should be taught. If you don’t agree, let me know about your way. I’d love to hear how others teach games. If you have a way that works really well, post it in the comments! Thanks for reading!

Monday Brews: Thanksgiving Edition
Hello my faithful internet friends. Today is Tuesday but I’m presenting my Monday Brews article anyway. The Monday after Thanksgiving is a family day for us to go cut down a Christmas tree and decorate our house. Thanks for understanding.
While my Thanksgiving week didn’t come close to my BGG.con week in terms of games played, it was surprisingly good. Here’s a recap of the Boards and Barley that I enjoyed last week:
The Barley:
Fleming’s Scotch Ale: This is my newest homebrew and the first few bottles I’ve had have been quite delicious. It is named after Sir Alexander Fleming, discover of penicillin among other accomplishments. All of my 2013 brews have been named after renaissance men (though Fleming isn’t technically a renaissance man, he was the closest person Scotland has to one). In 2014 all my brews will have a board game related name!
The Boards:
Glass Road: While I haven’t yet figured this game out, I know that I enjoy it. It is fun to work with the dials and try to plan my turns the right way so that I can be able to do stuff on my turn. I like the interaction with trying to choose the right cards. And overall I’m satisfied with the game. I may, however, add a house rule that we add a round to the game. Most of the times I’ve played it has felt like I was barely able to get an engine going and then the game was over.
Carcassonne: I enjoyed this classic with my in-laws family. We played with the Inns & Cathedrals expansion and the Traders and Builders expansion. I got beat handily, which was annoying since one player kept targeting my areas and trying to either share points or win the majority.
Stone Age x2: I introduced this game to my in-laws foreign exchange student from Denmark. He really got it right away and was glad we could play it again before the weekend was over. I really enjoy this worker placement game because it is so accessible to new players. I’ve pondered getting the Style Is The Goal expansion so it can play with 5. Do any of you have any thoughts about that expansion? Is it lame?
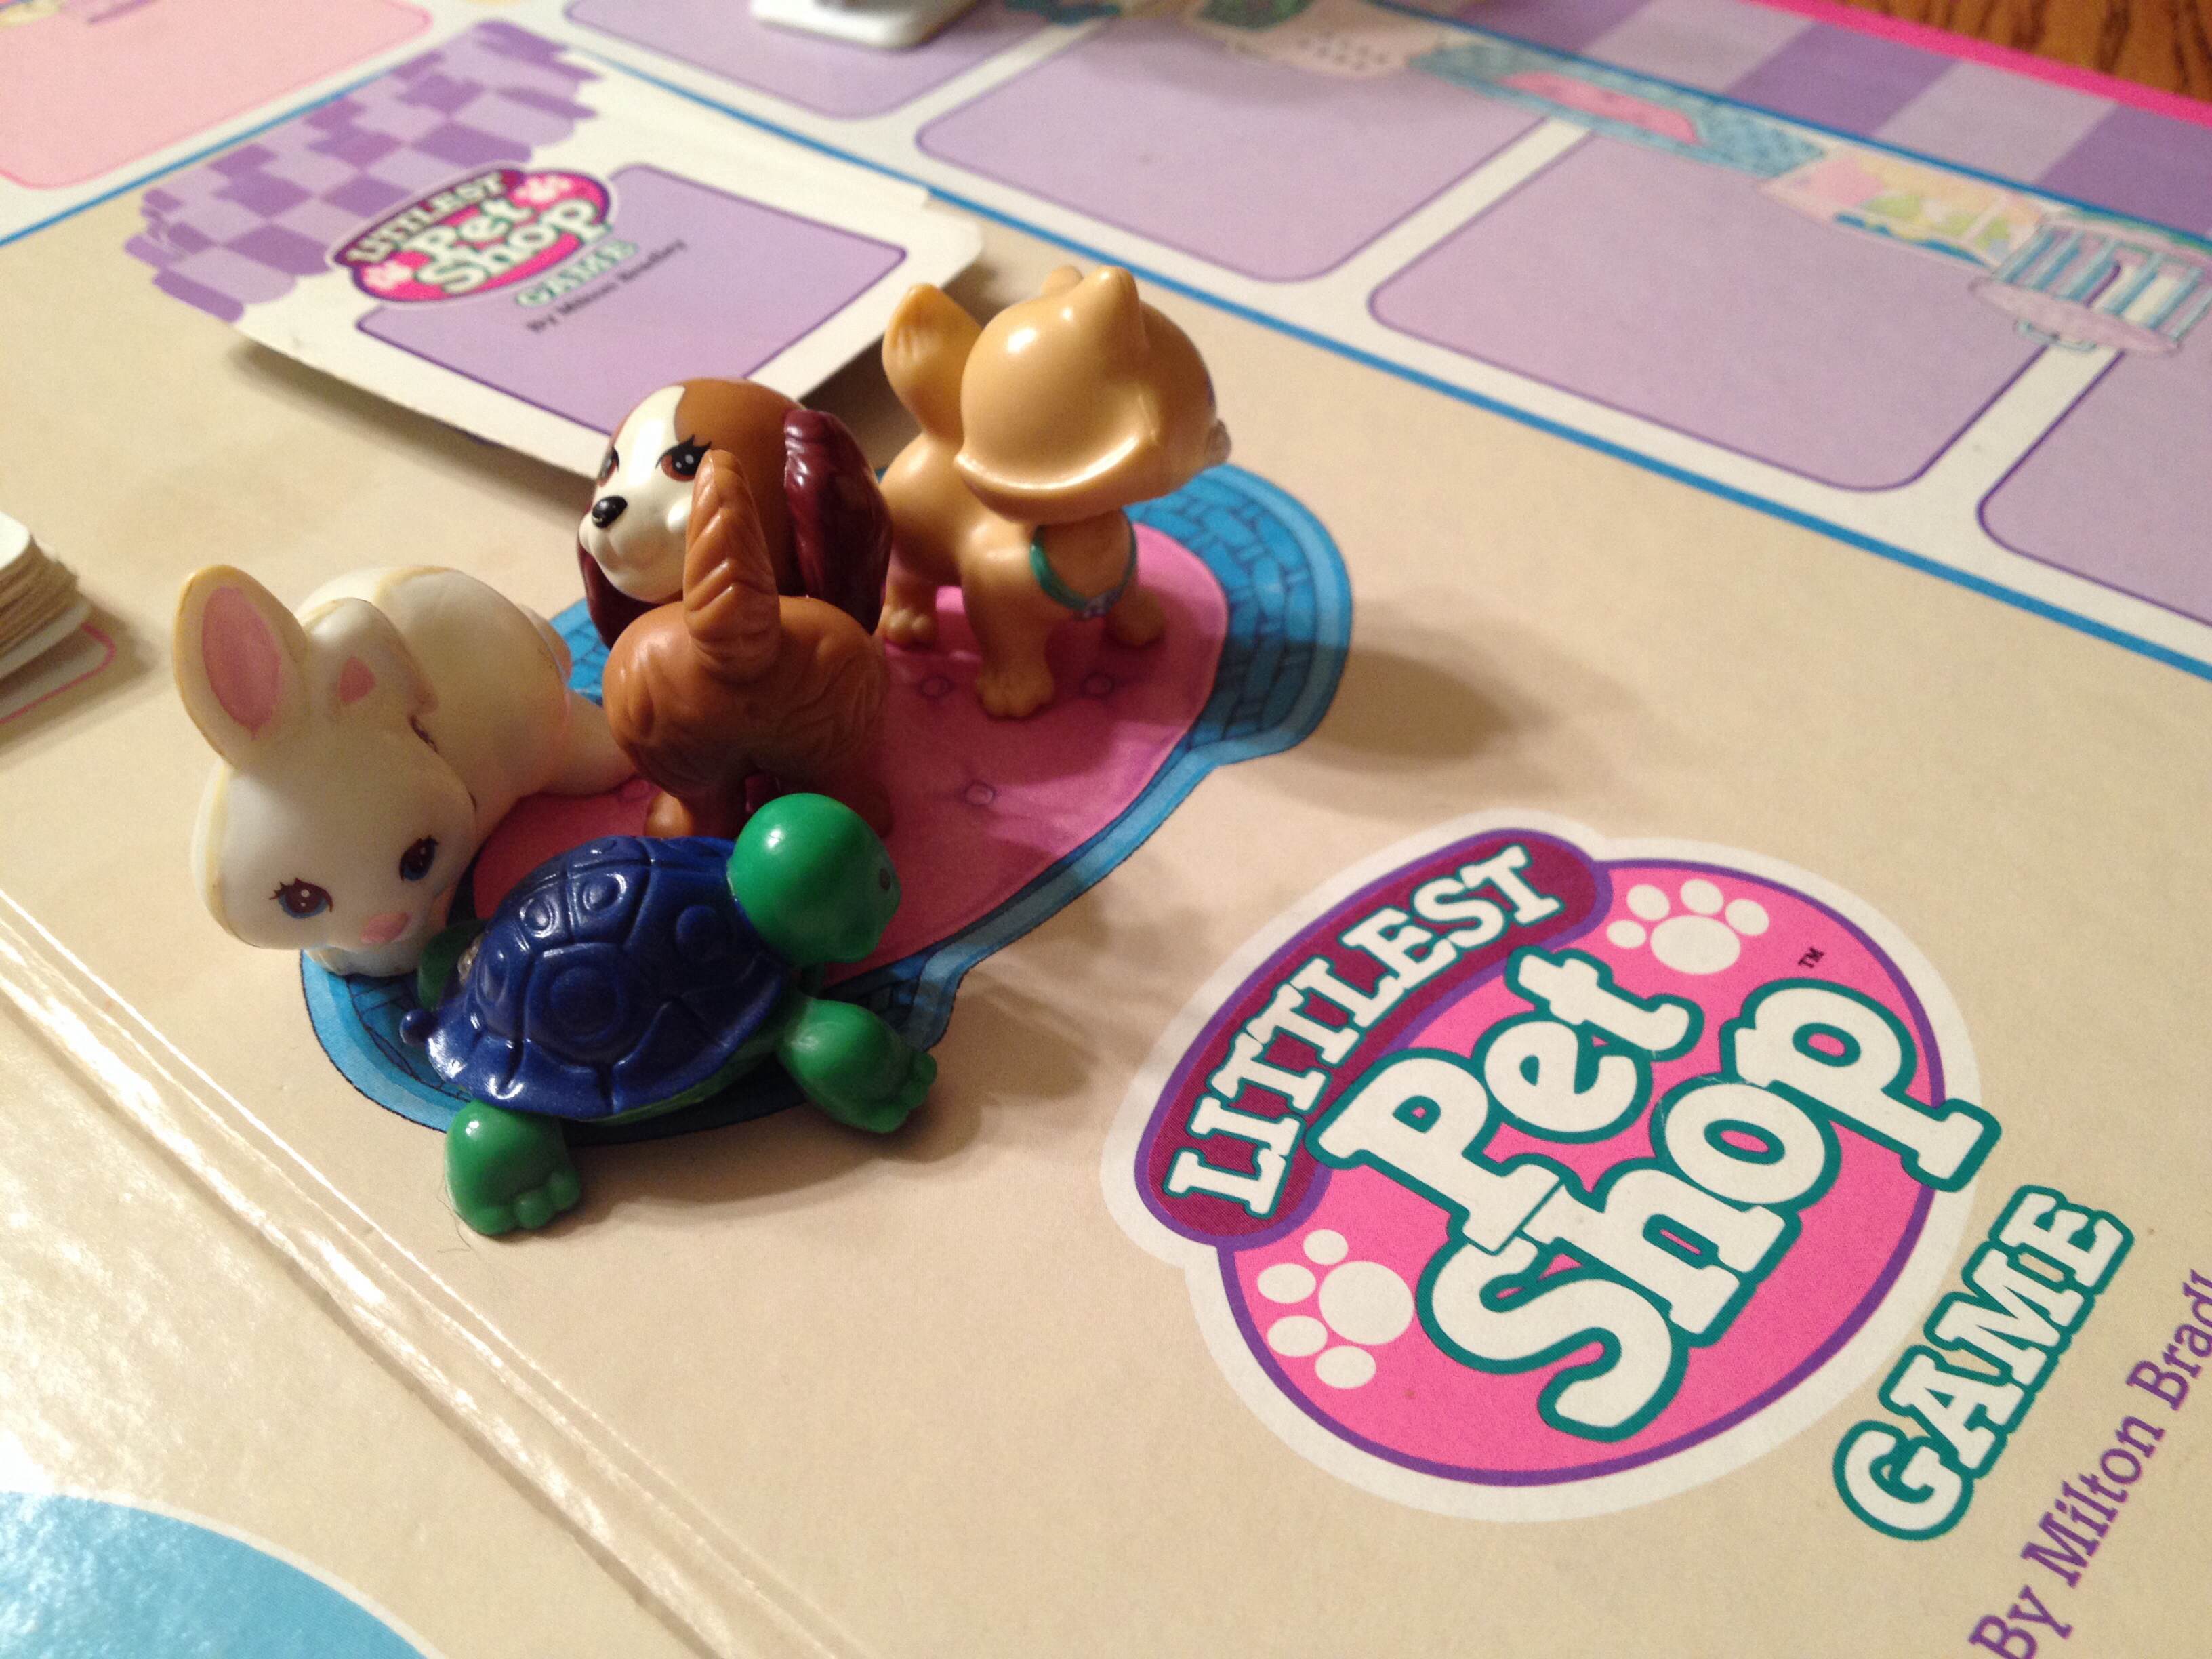
Good fun for 4 year olds!
Littlest Pet Shop x2: My 4yo daughter enjoyed playing this game while we were at the in-laws. She kept making up rules to her advantage. I’ll have to teach her about following the rules. But it was a lot of fun to watch her excitement when she earned one of the little animal figures.
Kingdom Builder x2: I know this is a controversial title, but I really enjoy the game. There’s a good amount of strategy if you get the right cards. Even when you get bad cards, the game doesn’t last too long. We played with the Crossroads expansion.
Undermining: This is another game I like to put in front of new gamers. It’s fun to imagine actually digging down for the precious materials and then using them to upgrade your Universal Mining Vehicle. This game, though, is one where I usually use a house rule or two. One of them is to adjust the scoring for the contracts and another is to have the endgame trigger be the emptying of two contract piles. Fun game though!
Compounded x2: Speaking of fun games, the in-laws really seemed to like this game. I got demolished both times we played. I just kept drawing hydrogen and carbon and I needed neither of them! Oh well. It’s a really fun game and I’m looking forward to the next time I get to play!
So overall it was a pretty good gaming week!
Designer’s Corner:
I actually made some game design progress this past week as well. While I was at the in-laws I sat down for a while and worked on Brooklyn Bridge. I like the overall concept that I’ve put in the game, but some of the details about how it works are a little too thematic. So I’ve decided to step away a little from the theme and make the game more fun, which is always a good thing. I have a little up-front work to do to get the game playable, but I’m hoping that I can do some great first playtests around mid-January.
***
So those are the Boards and Barley that I enjoyed and the design progress that I made in the last week. What did you enjoy?
Oxides and Acids: A Review of Compounded

A game that I received via Kickstarter that has brought enjoyment to my gaming group recently is Compounded. This game was designed by Darrell Louder and published by the excellent Dice Hate Me Games.
In Compounded you are essentially a lab manager taking care of different experiments. Your objective in the game is to earn the most Atomic Points (AP… Note: this is the type of AP that you want!). Atomic points are earned by completing compounds. Each round consists of the following four phases:
- Discovery Phase: Players obtain new elements from the draw bag based on their Discovery research level.
- Study Phase: Players place or move their claim tokens, which indicate the compounds that they are claiming.
- Research Phase: Players take elements from their workbench and place them on compounds.
- Lab Phase: Players score any completed compounds and deal with any lab fires.
The game lasts until someone reaches 50 atomic points or when someone has 3 of their 4 research levels topped out or when the research field can no longer be filled.
Throughout the game players are trying to complete compounds that will be beneficial for them. Beneficial refers to the type of research that they will gain when completing a compound. Let’s take a look at the examples in this image:

The compound in the middle, Hydroxylamine, will award 6 atomic points (upper right corner). The player completing the compound will also be able to increase their “Discovery” experiment level (Blue indicator next to the score). Also, the player completing the compound would receive a Lab Key token, which they could use later in the game to obtain the first player marker. The compound on the left awards 5 points, a bump in the “Research” experiment level, and causes volatility in the lab (red flame icon in the lower right corner), which is like a lab fire. The compound on the right awards 6 atomic points, a bump in the “Study” experiment level, and safety goggles, which can be really useful!
As players complete compounds their abilities will increase. That nature of the game allows things to ramp up really well throughout the game. Here are my thoughts:
Here’s What I Like:
Science and Theme: You’ve gotta give it to the designer and publisher. This is not a typical theme and I imagine some people would find it dry because there is no boring looking renaissance man on the cover. However, the theme is so perfectly integrated into the game that you almost forget that don’t realize Hydrogen Oxide is, in fact, water! Everything thematically works really really well in this game.
Graphic Design: Normally I list that I enjoy the artwork in a game. This game is a little different. There is actually very little artwork. Rather, the game is nearly all graphic design. Even the box cover isn’t your typical fully painted work of art. So why is this in the section of things I like? Because they pulled it off beautifully. In a game like this there’s just no need for gaudy, over the top artwork. This is a streamlined product that looks really nice.
Gameplay: I really enjoy how this game works. It is similar, in some respects, to Scoville in that each round of the game is made of different phases. I enjoy that each round is discrete and you have to work to maximize what you can do during your turn while hoping you’re doing a better job than your opponents.
Here’s What I Dislike:
Luck: Since drawing elements during the discovery phase is a luck mechanic, it can make things a little frustrating if you are unable to draw what you need. This issue is minimized, however, by your abilities as they increase throughout the game. While luck is present, it becomes less and less as the game goes on, which is good.
Flame Token and Draw Bag Components: This is more of a gripe than something I dislike. I wish the flame tokens were slightly larger so they would be easier to grab. I understand that their size makes them fit really well onto the compound cards, so I can forgive that. The draw bag is also slightly too small. We swapped it for a draw bag from VivaJava and the VivaJava draw bag worked much better.
Designer Perspective: What Would I Change?
First, you should be aware that I have not yet played the game with the Chemical Chaos or Journal expansion cards. As a designer I would like to drop some of the symmetry from the game. I’m not sure how it would work, but I like the idea of having different starting conditions or abilities for each player. Perhaps Player 1 could start with a bumped Discovery level and fewer elements. Perhaps Player 2 could start with a bumped Research level. Those options for asymmetry wouldn’t work very well. A better option would be hidden objectives. Like someone could be an Oxide collector where they try to get a set of three different oxides for bonus points. I think that could be fun as it helps to steer your long term strategy in the game.
Beer Pairing:
 While I have not had this particular brand of beer, I cannot think of a better partner for Compounded than Element Brewing Company. And the beer I’ve chosen for this pairing is the Dark Element.
According to the website, Dark Element is strikingly viscous and creamy on the palate with citrus fruit and chocolate cream. It sounds like a delicious beer that would pair well with Compounded!
Overall Rating:
I really think this is a fantastic game. The game flows nicely, minimizes downtime, maximizes strategic decisions, and, most importantly, is a lot of fun. But then as a bonus you can learn stuff while you’re playing! I can’t wait to play Compounded again. I’ll rate this game a 9 out of 10 on the BoardGameGeek scale:

Excellent game. Always want to play it.
