Category Archives: Lessons Learned
Symmetry in Board Game Design
My recent design, Conclave, initially suffered from a lack of symmetry. After a great playtest session with Jeremy Van Maanen, Adam Buckingham, Corey Young, and Brett Myers I received some great feedback that pointed out how the initial round could greatly influence the game due to the asymmetry. So I balanced the player decks to eliminate that asymmetry. What followed was a nice conversation on Twitter about symmetry versus asymmetry. So I though I’d write a brief guide about putting symmetry into your game design, and where it might be appropriate.
My Definition of Symmetry:
Before discussing where symmetry or asymmetry is important it is necessary for me to define the terms so that you understand what I mean throughout the rest of this article.
SYMMETRY: when conditions within a game are equal for all players.
This could be that all players have the same options on a turn or that they all start with the same cards or they all have the same opportunity to progress. Symmetry is typically only present at the beginning of a game. Once one player has taken a turn, then the game is different for the next player. So games where all players have an equal opportunity to be the first player inherently are symmetric at the start. Games where a random player goes first are not inherently symmetric since by the time the second player goes, the game conditions for that player are different than they were for the first player.
An example of a symmetric game starting condition is one where players simultaneously bid for turn order. Another example is when all players simultaneously make their first move in a game.
ASYMMETRY: when conditions within a game are unequal for all players.
I think of asymmetry as the situations where players have differing decks of cards, or different options on their turn, or different opportunities in the game. But asymmetry also applies to when games change from turn to turn and thus no two players ever face identical game conditions. There are many examples of asymmetry within games. And to provide examples could take a long time. Instead, check out Lewis Pulsipher‘s thread on BoardGameGeek: Looking at Game Design as Ways of Introducing Asymmetry.
Where to design for Symmetry:
There are definitely places within game designs for symmetry. If conditions within a game ever put a game out of balance, where one player has a distinct advantage toward victory through no means of their own, then the design calls for symmetry to remove that lack of balance.
My example, from Conclave, fits perfectly here. The original design provided each player with a 30 card deck. However, during the game not all of the cards were used. This caused a problem with probability. There was a chance that one player may end up only getting cards of their own color to place on the table while another player would only end up getting cards of the other player’s colors. This would then cause the game to be very much in favor of that first player despite them not earning that opportunity. This lack of balance called for adding symmetry to the game.
In this case symmetry refers to all players having the same amount of opportunity on the table. With balanced decks where all players play all of their cards it means all players will have the same opportunity within the remainder of the game.
This is my recommendation:
Apply symmetry where a game could otherwise randomly favor any single player.
This will not only make sure the game is fair, but it will also make sure that players can enjoy the game without feeling like they never had a chance.
Where to design for Asymmetry:
I would recommend designing for asymmetry anywhere and everywhere, as long as it does not conflict with my recommendation above.
Asymmetry for Conclave would mean adding different abilities based on the person you are representing.
Asymmetry can refer to players having unique abilities or different ways to move forward in the game or different cards and thus different opportunities. Examples of asymmetry in games are plentiful. The Settlers of Catan has a beautiful level of asymmetry that depends where players place their initial settlements. Ticket to Ride has asymmetry with the destination tickets, which determine each players individual path to victory.
Asymmetry in a game can add to the variability and replayability of games. And often it can add to the tension of a game as well. One example that comes to mind is Shipyard. In that game there is a great asymmetry in players options on their turn. This is simply due to limiting the options that a player can take on their turn. No two players turns in a row are the same. Yet the asymmetry in player options add a lot of tension and strategy.
I am definitely an advocate for asymmetry in game design.
My Bottom Line:
Now that we’ve briefly discussed symmetry versus asymmetry in game design I want to make my point one more time. When a game design creates an unfair advantage for a player that is not based on the choices of any player, the game requires symmetry and balance. Apply symmetry to a game to balance the game and make it fair. In all other circumstances, feel free to apply asymmetry to your design. It will be harder to design and require more playtesting to balance, but it adds so much to the game.
What are your thoughts about symmetry versus asymmetry in game design? Do you prefer one over the other? How would you define the two? I would love to hear your thoughts. Thanks.
Monday Brews: Reviewing Ben Franklin’s Honey
I’m back from a series of mini-vacations. In that time my Ben Franklin’s Honey Ale was able to carbonate and mature enough to try it out. So today I will review my second beer, Ben Franklin’s Honey!
Brewing Ben Franklin’s Honey
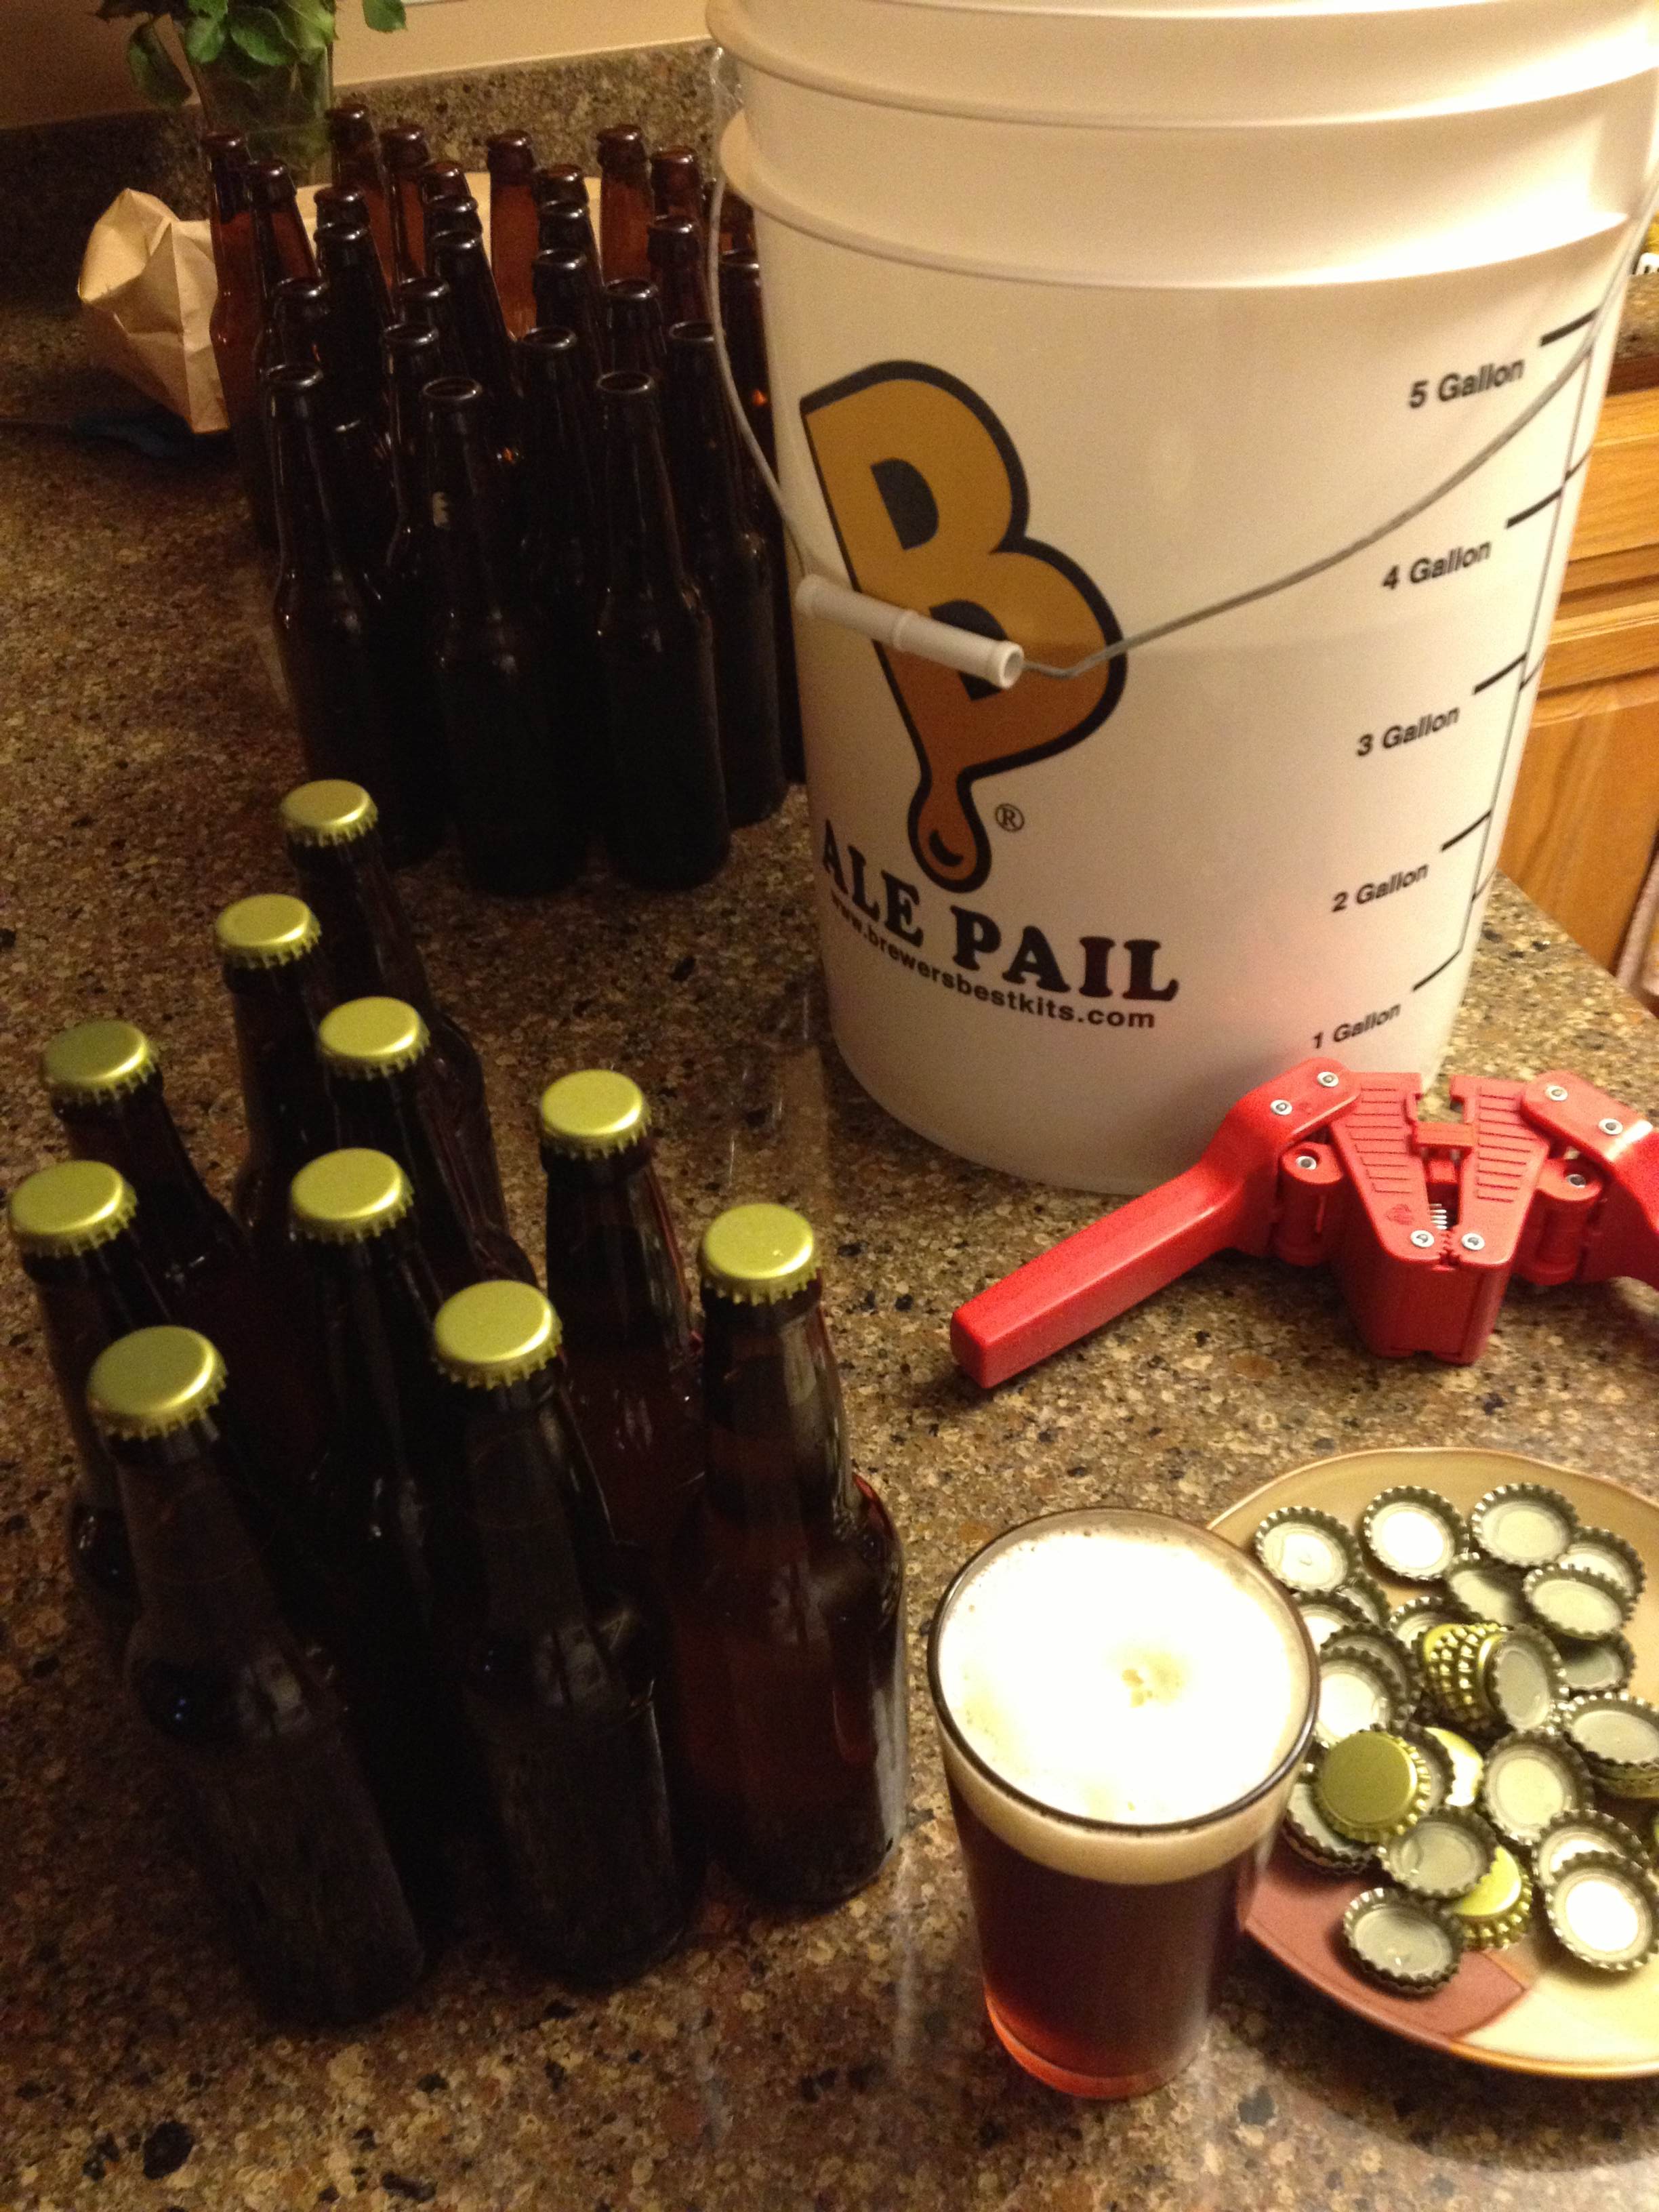
Bottling Ben Franklin’s Honey while enjoying Alberti Amber!
I’ve mentioned this beer before so I won’t go into depth here but I wanted to mention a few things.
The first is that brewing my second batch of beer was much less intimidating than the first. Everything was easier. Everything went better. And the overall amount of time and effort that was required fell a lot.
The second thing I wanted to mention is that I recently learned a little about lagering. This seemingly has nothing to do with Ben Franklin’s Honey, however, I only learned about lagering due to a conversation that was started because of Ben Franklin’s Honey. Why do I mention this? See more below.
The third thing I wanted to mention is that timing is an important part of brewing beer. Due to the amount of time is takes to brew/ferment/carbonate it is important to choose a date by which you want your beer to be ready. Then work backwards. So assume you want a month in the bottles. Then add in a week in the carboy. Then add a week in the fermenter. All told for a simple ale you’re looking at a month and a half minimum. That’s how far in advance you need to brew before your desired release party.
So completing my second brew has taught me a lot about the process and what it all involves. And I now have a great summer beer to enjoy over the next couple months!
Tasting Ben Franklin’s Honey
Last night I had the privilege of sharing the first tasting of Ben Franklin’s Honey with three friends over a game of Ora et Labora. My friends were willing to give it a try. The collective opinion: Enjoyable!
This beer is a pretty light beer that tastes “summery.” It comes in around 5% alcohol. It has a light and clear color. The honey flavor was not overwhelming, which was good.
Overall I would say this was an enjoyable brew. I have plenty more to enjoy and may bring a few to GenCon. I will hold off on rating this beer until I have had a few more. But if this brew is like the Alberti Amber, which got much better after maturing in the bottles for a month, then this will be a fantastic beer come August!
Ben Franklin’s Honey’s Successor?
So above I mentioned lagering. This leads me to my next brew. I am planning on brewing an Oktoberfest!
The problem with lagering is that it is slow and needs to ferment at a cooler temp than a typical basement. My luxury is that I have an extra refrigerator in my basement. So I can probably adjust the temperature on the fridge to a point that might work for lagering.
Since I can try to lager, I now have to make sure the timing will work. If lagering takes 6 weeks and maturing in the bottle takes a month, then I have 2.5 months before it will be drinkable. So if I want my Oktoberfest to be available at typical Oktoberfest time (September), then I need to get going on it.
If I brew within the next two weeks I should be able to have a decent Oktoberfest ready on time. Oktoberfests are one of my favorite beer styles. Perhaps it’s partially due to the season in which they show up since I really love late summer/early autumn. Perhaps it’s because I would love to attend the real Oktoberfest in Germany. Whatever the reasons, I am planning on brewing/lagering an Oktoberfest for this fall.
Have you been brewing? Any tips you’d like to share about lagering? I’m planning a post about the lagering process and how it compares to brewing ales and your tips could be included. Thanks for reading!
Trading Post Part 2: Early Prototyping
Trading Post Logo… for now.
I have a new game design I’m working on and today I am posting the second of 4 articles about it. Including last week, today, and the next two Thursdays, I’ll be writing about the game from it’s creation to the present state. Here’s the four articles in this series:
- 5-16-13: Origins of Trading Post
- TODAY 5-23-13: Prototyping Early Versions
- 5-30-13: Hiatus and Re-design
- 6-6-13: Path to GenCon
So today let’s again jump back in time a few years and take a look at my early prototyping attempts, from when I didn’t know anything about prototyping games!
The Board:
One of the first things I attempted to make when I thought I had the design “together” enough was a board. I figured black and white was a great place to start. So I drew a few sketches about the layout and then opened The Gimp.
For those of you who don’t know what The Gimp is, here’s where you can go to learn more: http://www.gimp.org/
It is an open source image editing software. While it used to be my weapon of choice for image editing and graphic design, I now use Inkscape since it is a vector graphics software (and still free).
So in The Gimp I got a 21″ x 21″ file open and began by creating the main hex grid. Last week I wrote about a grid of squares with truncated corners where cubes could fit. Well, that was gone by the time I decided to make a prototype. So here we are already discussing a hex grid map with square tiles. In the earliest designs all the tiles were going to be 1″ squares. So the board reflected that. You’ll understand why I went with squares a little more in the discussion about components below.
The hex shaped grid for player territories was a beast to design. I actually had to do math to get the grid to be a hex in The Gimp. This would have been relatively easy in Inkscape. But it wasn’t very fun in The Gimp.
After wrestling with the hex grid territory region I added a few other smallish things to the board. This included the title, resource areas, a time track, and a spot for cards. After spending a completely ridiculous amount of time on a board for a prototype that hadn’t even been played, here’s what I ended up with:
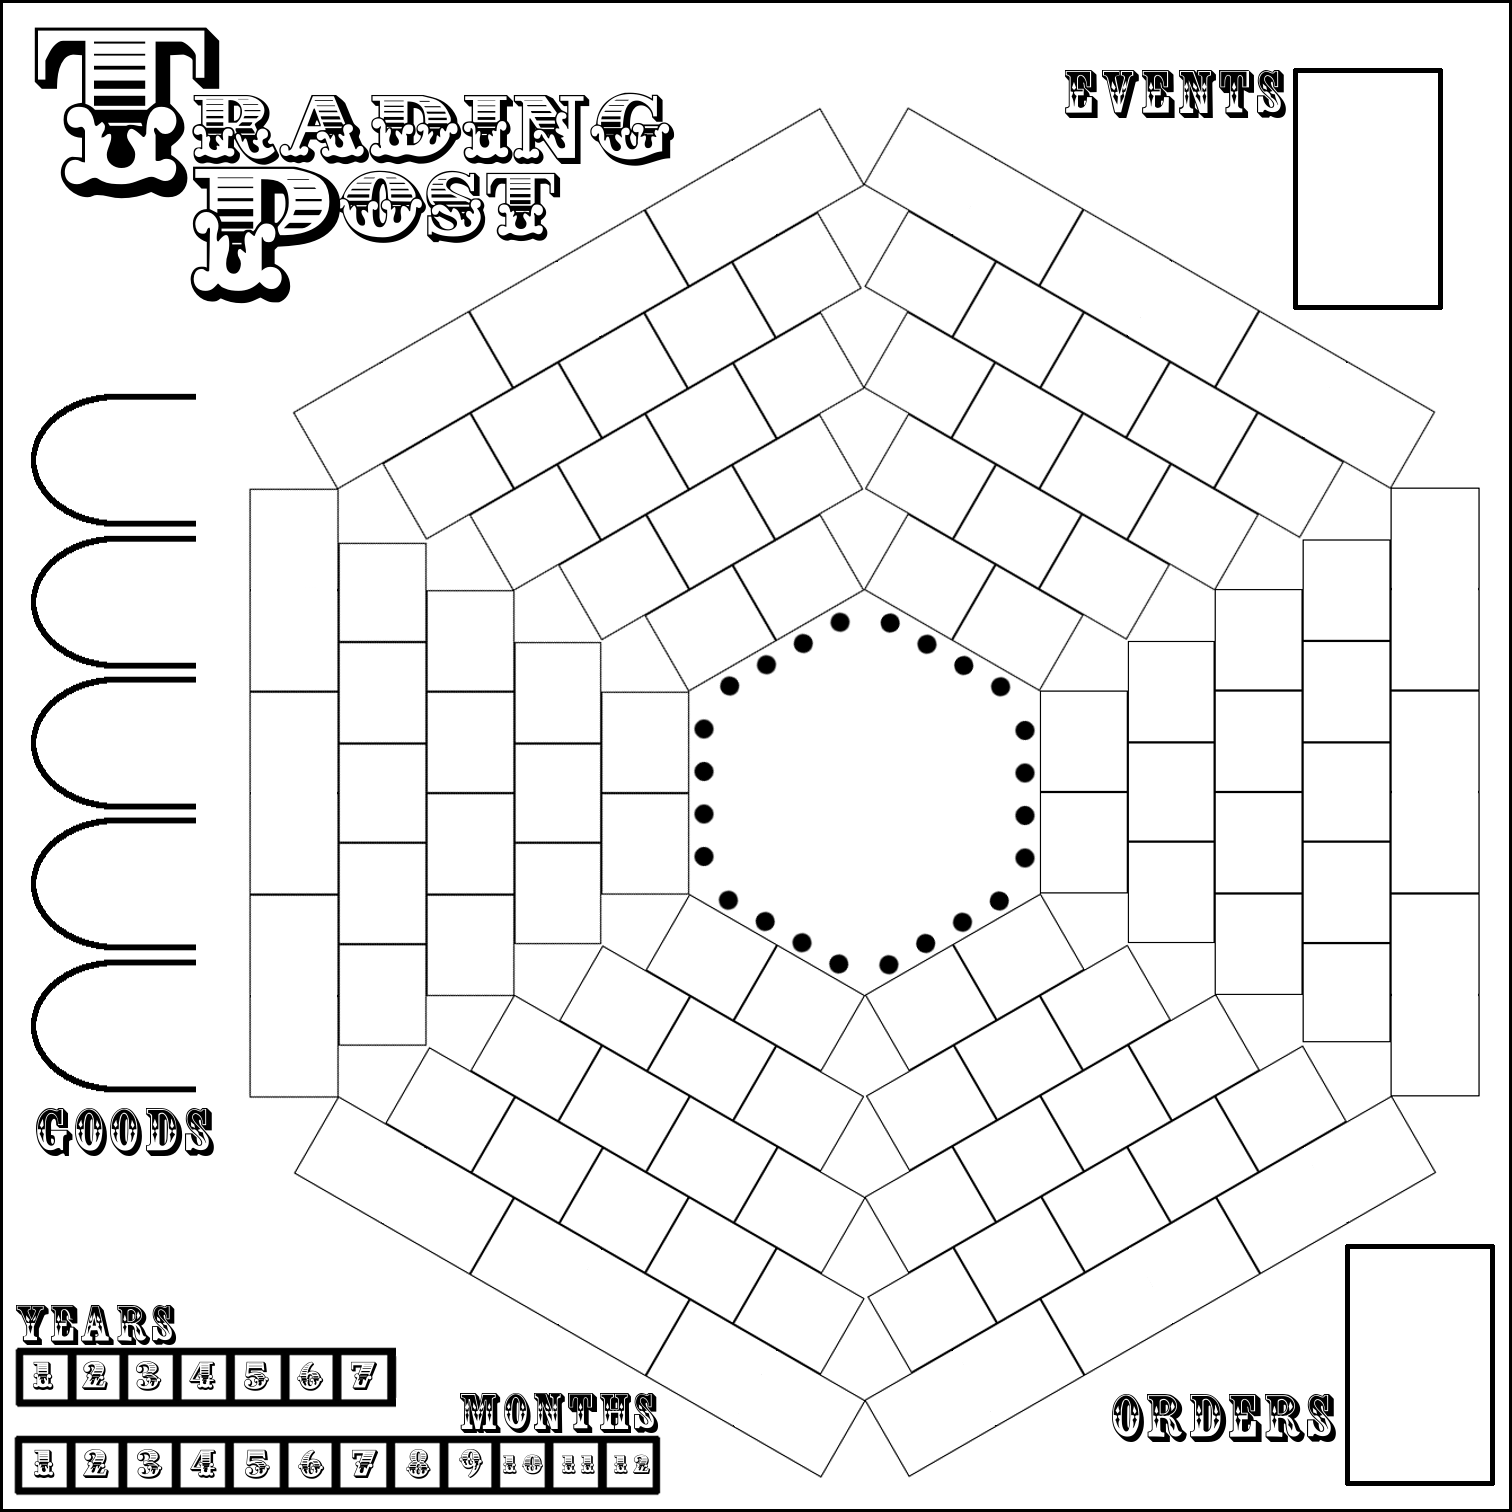
Well, it’s better than nothing, right?
As you can see it values function over form. Ugly though it be, it would still get the job done. So I printed it on 9 different sheets of paper and tried to get all the edges lined up. Maybe my struggles with creating a full size game board when working on Trading Post are what subconsciously led me to not having a full size board for Scoville.
The Territory Tiles:
The main concept of the design involves exploration of your territory. Players start with their pawns in the center and eventually should try to explore all of their territory. So I had to make tiles to put on the sections of your territory as you would discover them.
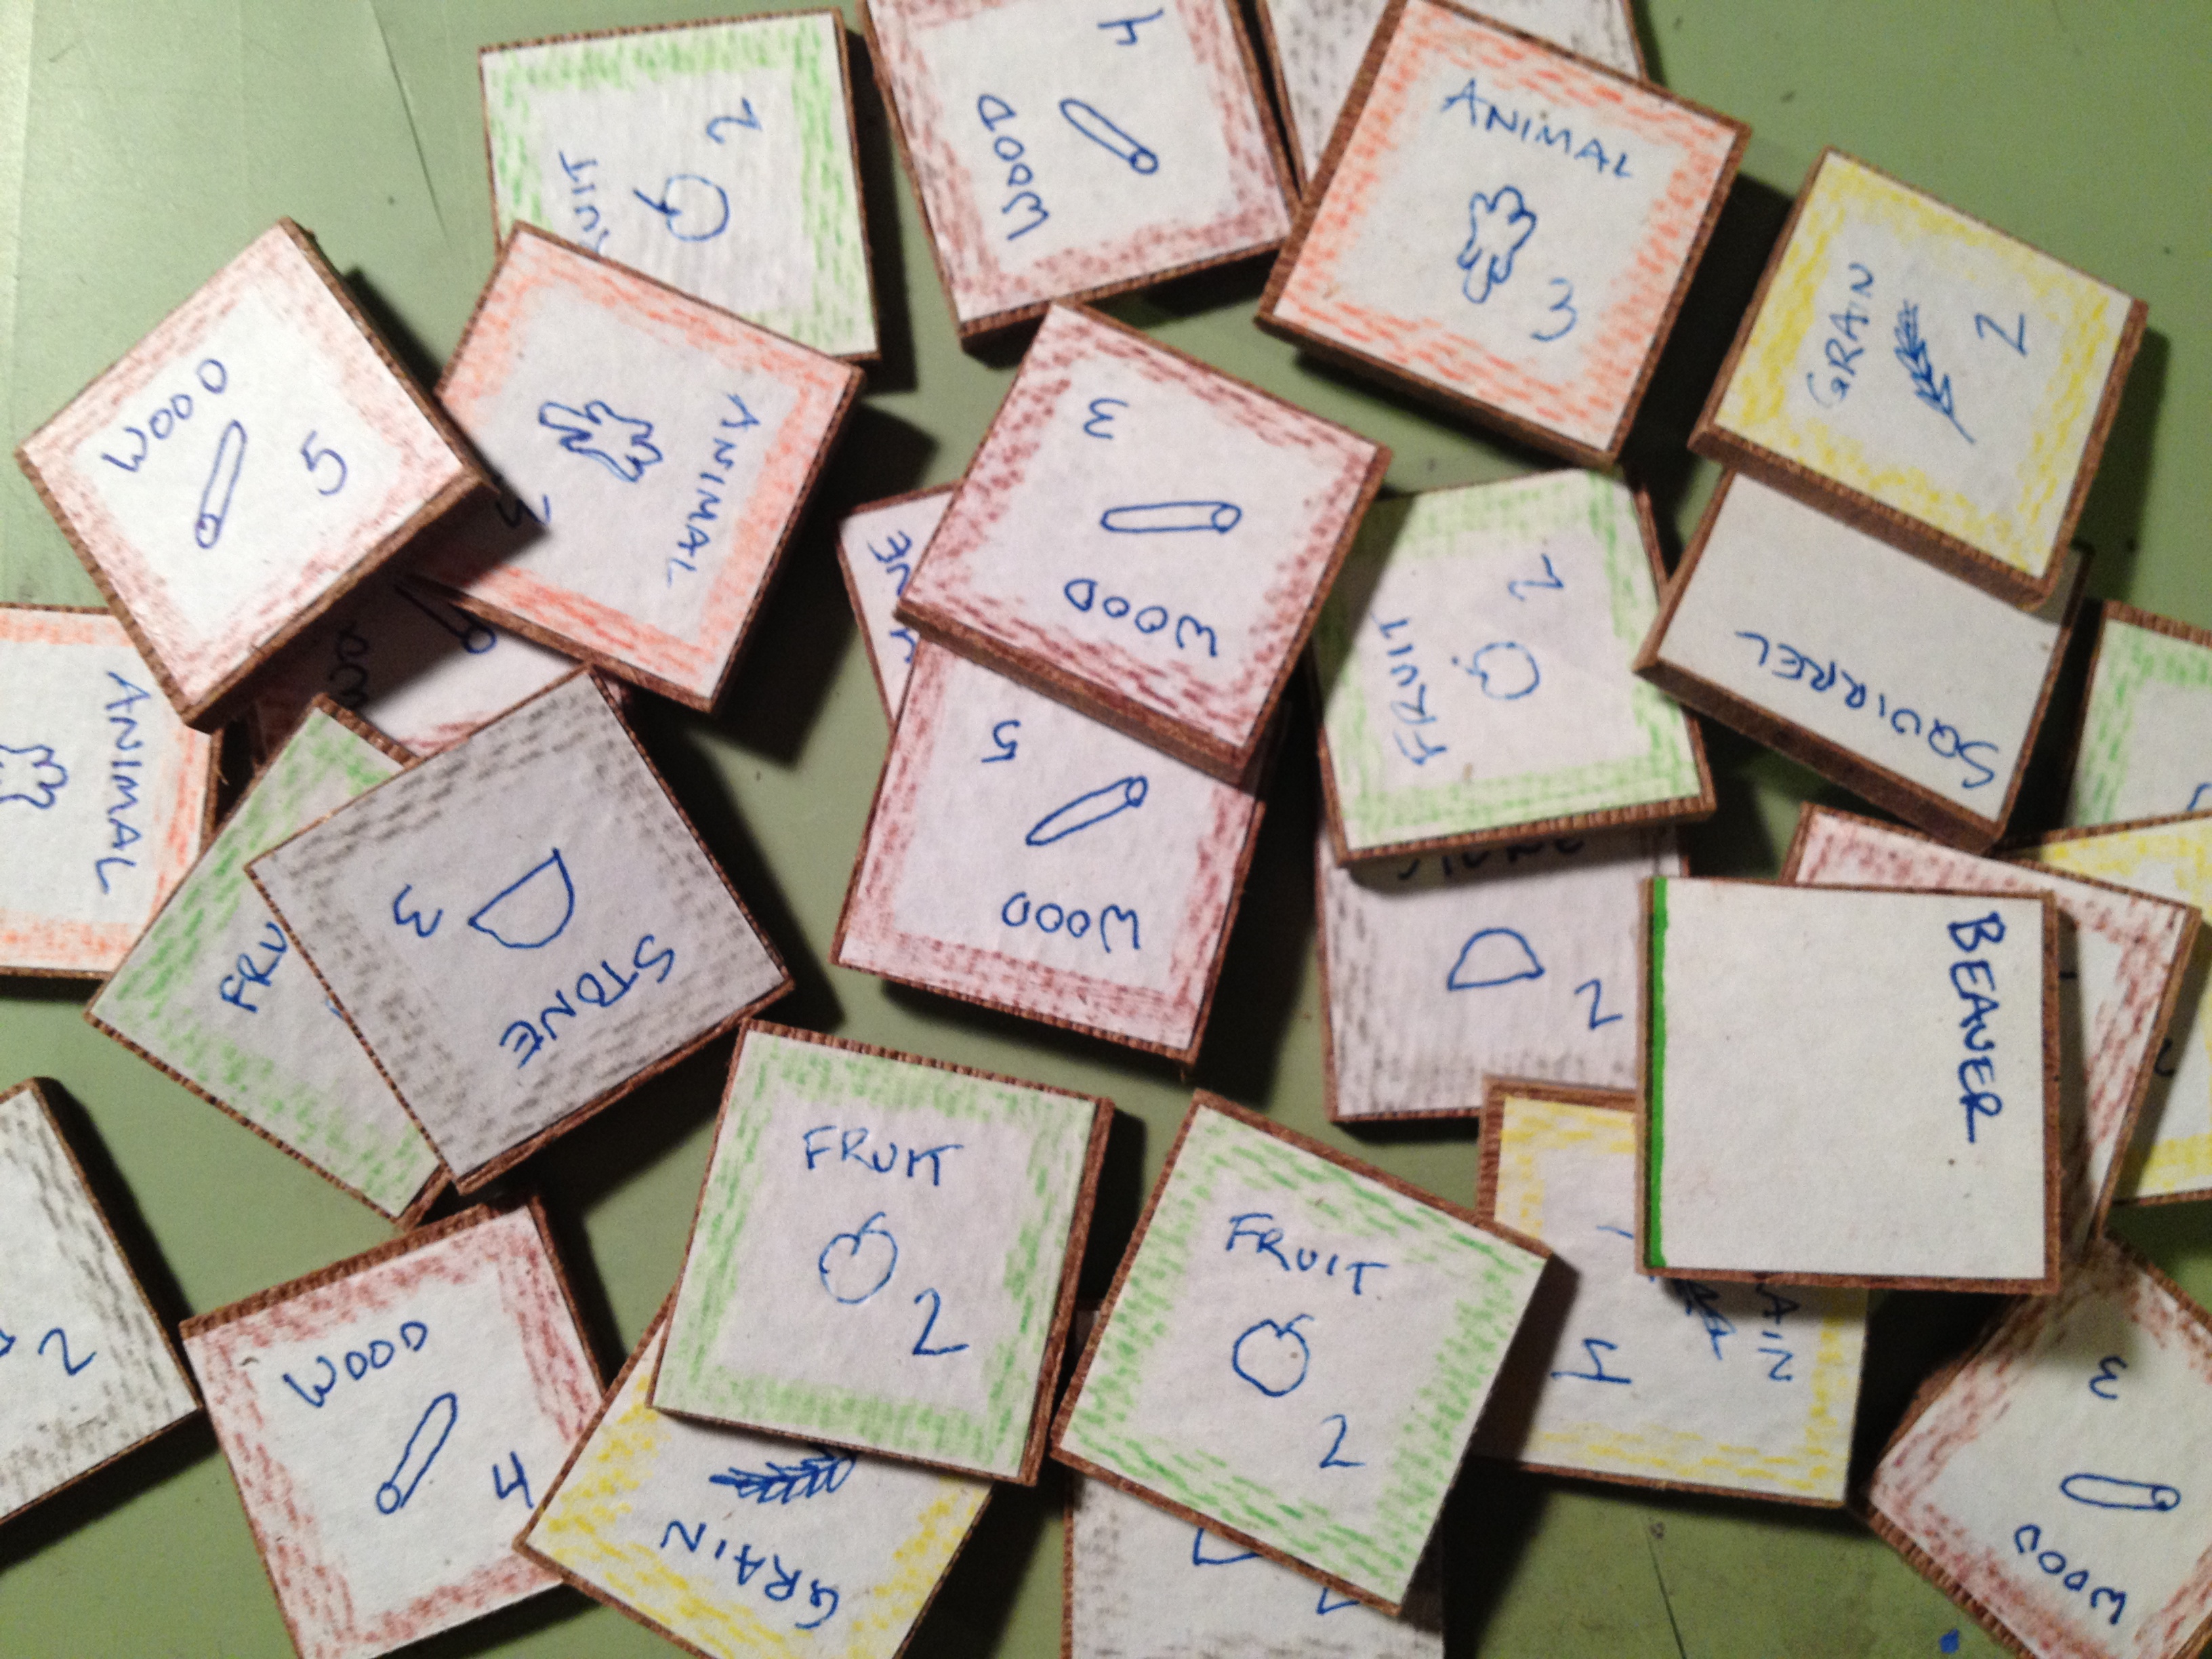
Wood tiles with hand drawn icons and colored pencil edges. Wow.
These tiles would represent different resources that could be available, AND the amount of that resource that the piece of land would produce… for the rest of the game. This included things like Wood, Stone, Fruit, Grain, and more.
Here is a lesson I learned when prototyping the territory tiles: Just buy chipboard components from someone like Printplaygames.com. For the cost you can get just about everything you would need to get your game to the prototype phase.
Did I make such a wise decision? Not even close. I actually bought a wood board and went to a friend’s house to use their table saw to cut 1″ square tiles. Then I cut out square pieces of paper. The paper got glued to the tiles. Then I drew little icons on each one and colored the edges to match the icon. Here’s a recommendation: Don’t do it like that!
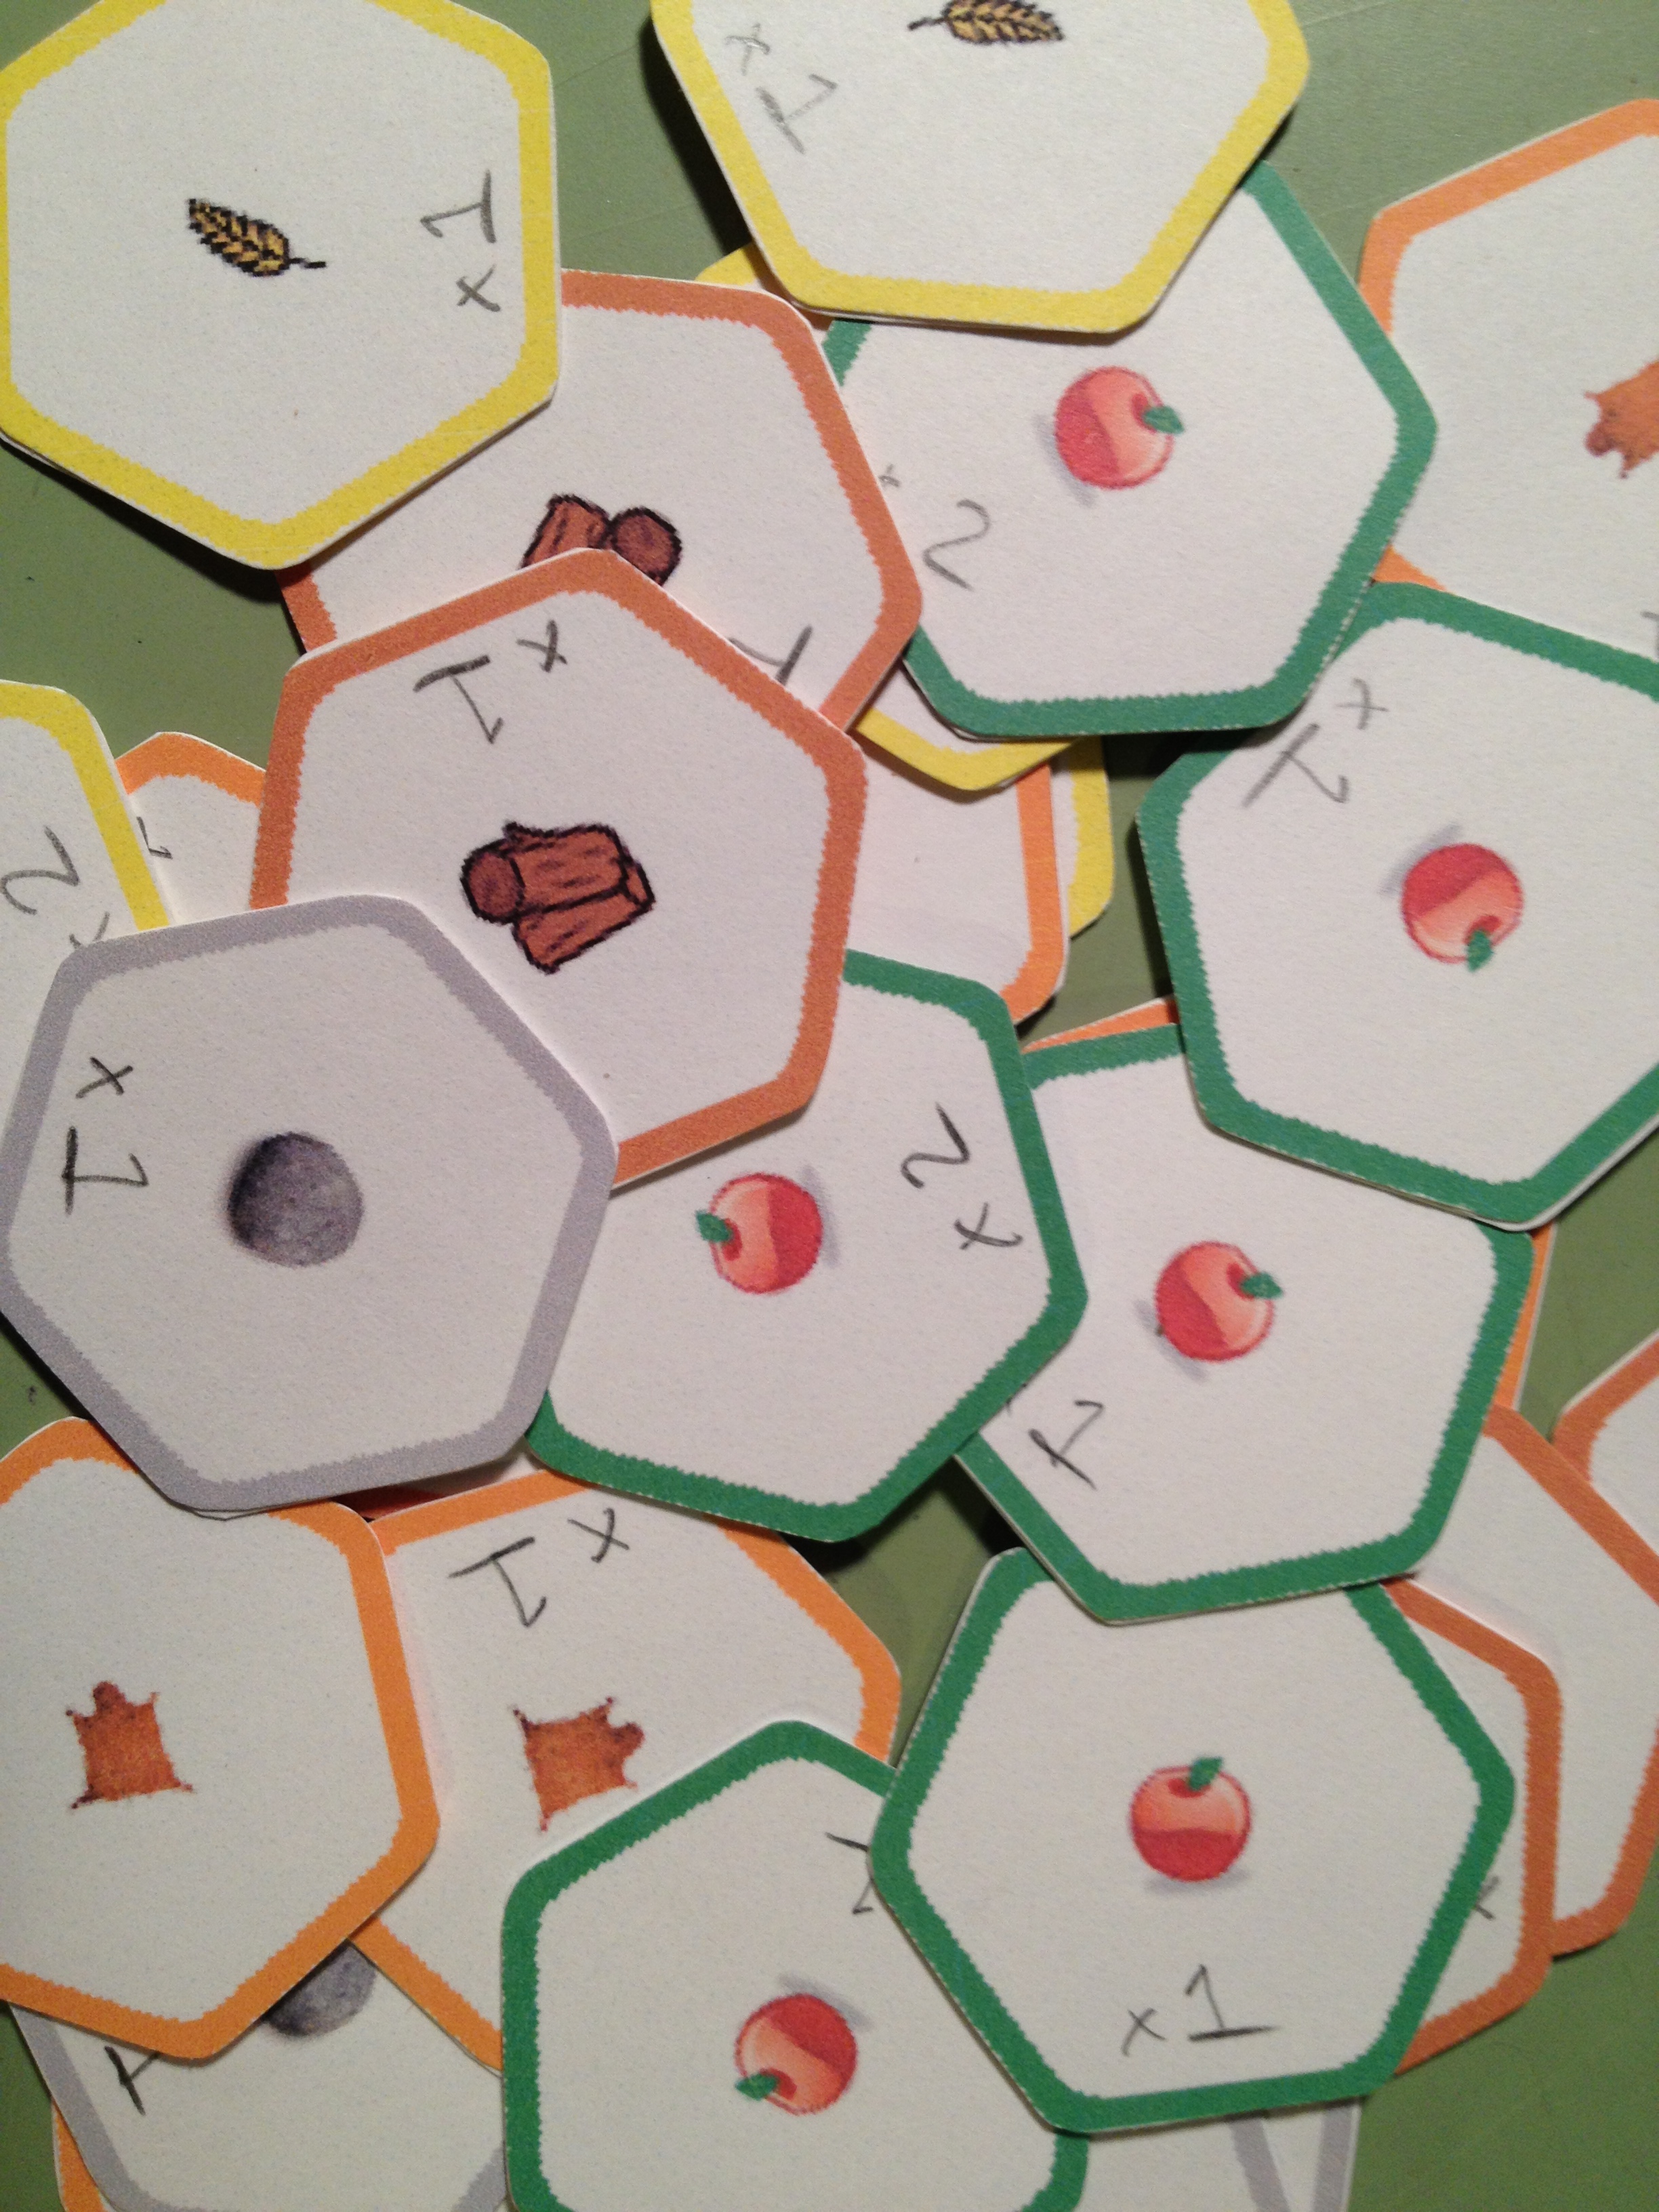
Hex punched, corners rounded, glued back to back. Aye!
Eventually I got to the point where a hex-based grid seemed like a better idea and I began to work toward a hex-based prototype. I used a computer aided drafting software called SolidWorks to render a hex grid that I could print out for the hex-based prototype. I don’t recommend using CAD software for board game design unless you’re making minis. The main problem is that the CAD software typically doesn’t allow you to save images in high quality. The downside of the change to a hex-based system was that all the effort I put into the wooden square tiles was now wasted. (I can say that it was wasted because it was never even used in a playtest).
The hex-based system didn’t change how the game was played. It just made things fit a little better and look neater & tidier on the board. It was at this point in my board game design career that I decided to purchase a hex-punch. I bought a Creative Memories Double Hex Punch off eBay for about $8. It turns out that that’s a crazy awesome price! Despite the price I recommend buying a variety of punches, especially circles. I just searched and found a few of the Creative Memories hex punches on eBay for about $37. Another free designer tip:
Punches can be your best friend!
Here is a link for punches from Fiskars. I would recommend starting on eBay, though.
Ugh. Looking back on all of this makes me wish I had been familiar with Inkscape at the time I was working on this design. All of the art and tiles could have been made with Inkscape so much more easily than what I was doing.
Well I now had my territory tiles made. Now it was time to add the other unnecessary ingredients in this poor game design…
The Event & Order Cards:
After reading the article about what makes a game good (Note: here’s the article I mentioned in last week’s Trading Post article, thanks to Neil Roberts who found the link – What Makes a Game Good?) I knew that I wanted to especially avoid monotony in the game design. I already had a random draw for territory exploration. But how else could I increase variability and replayability?
My poor attempt at adding replayability.
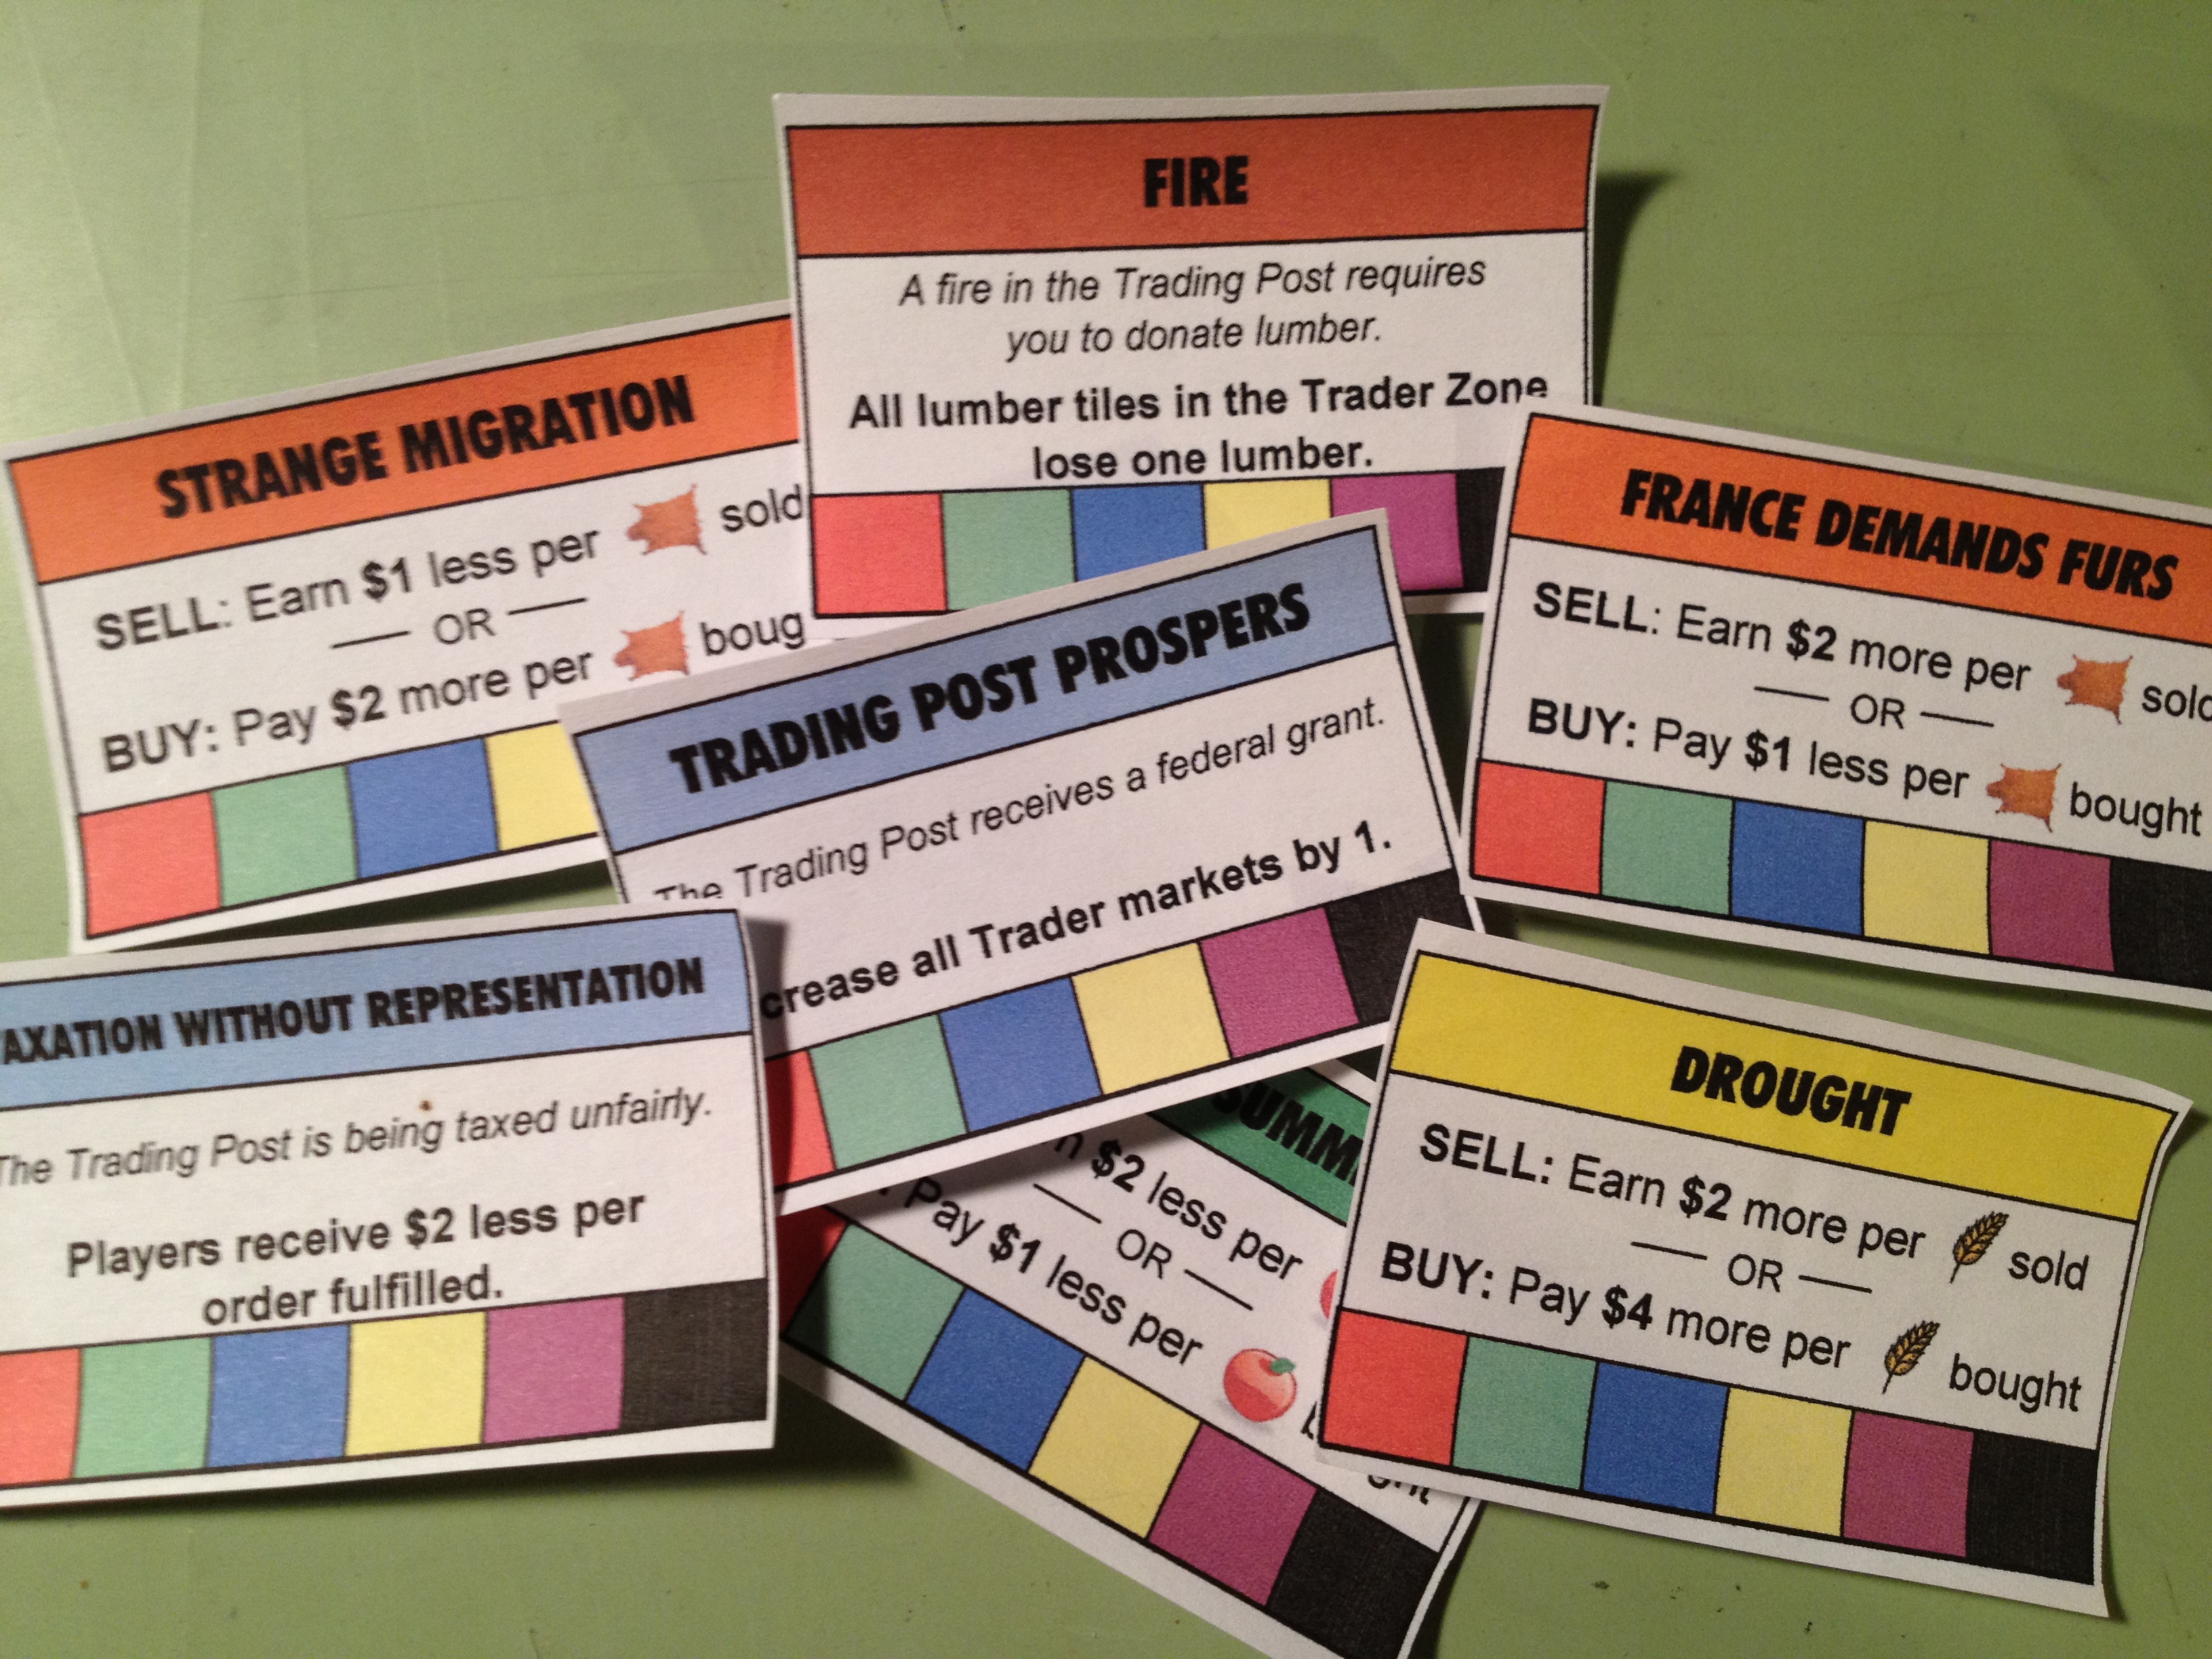
I came up with the idea that each “year” in the game would have something different going on. I called these “Event” cards. They typically affected how the market worked for different goods. But they also could positively or negatively affect all players. A few of the event cards are shown here on the right.
These were masterfully made in Excel. The bottom row of the event cards is a spot for players to put a cube of their player color when the card affected them to show that it had done so. Cards could only affect a player once. The top box on the cards is also color coded. The DROUGHT card in the image affects GRAIN and thus matches the yellow color of the grain. Pretty awesome, huh?
But this wasn’t enough! Another free designer tip:
Don’t add complications until the game needs it!
At the time I was designing Trading Post I hadn’t learned that lesson. So I added ORDER cards in a seemingly theme-less way to make each game different. I guess I was really worried that people would be bored with Trading Post after one or two plays.
Thematically the ORDER cards represented things the Trading Post needed during that year. That at least made sense. These things included blankets, hats, pies, buildings, flagpoles, and on and on. I struggled to make a list long enough of the sorts of things that a Trading Post might need. But eventually I got them all together and started making more “awesomeness” in Excel. Here’s a glimpse of the result:
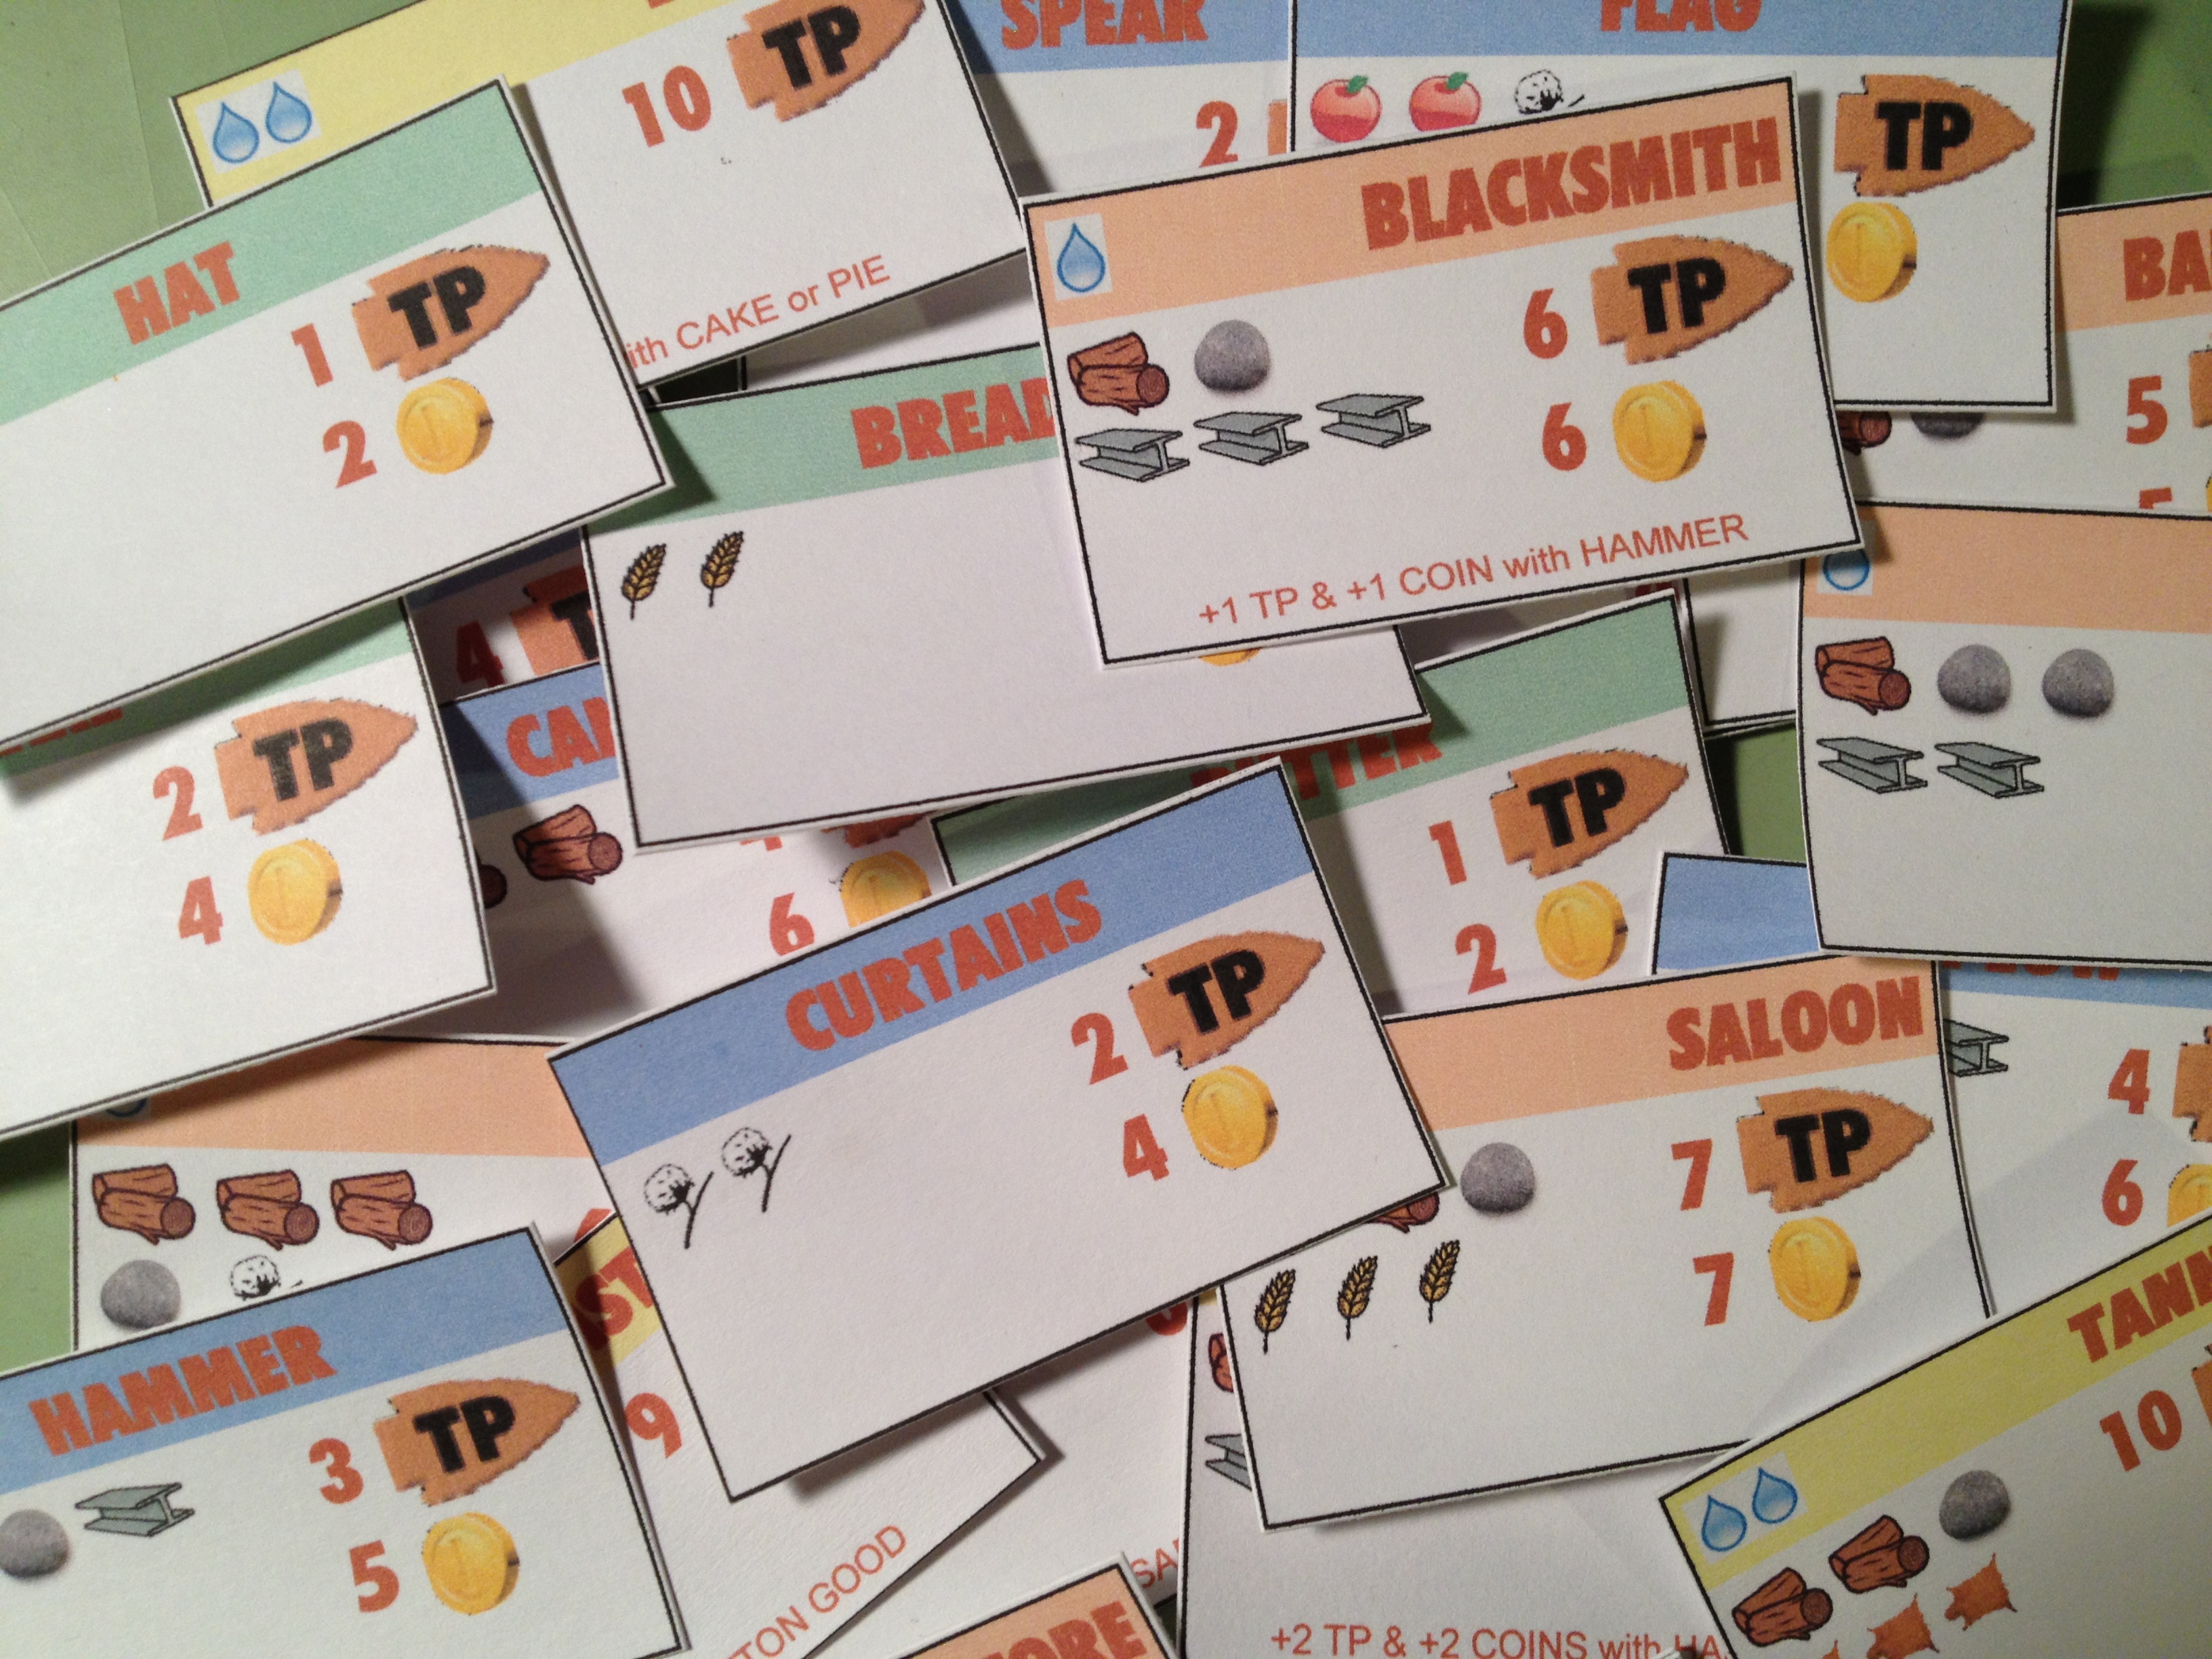
Trading Post Order Cards. Excel is NOT a graphic design tool!
So made a stack of about 50 order cards that would come out randomly, four per year. These would be available on a first come-first serve basis. The cost is shown on the left. In the image above, for example, the curtains would cost 2 cotton. The reward is on the right. In the same curtains example the reward was 2 Trading Points and 4 coins. I even added further complication by having some order cards provide a bonus if the owner already had fulfilled a prerequisite. In the image above an example is the BLACKSMITH. If you had fulfilled the HAMMER order card for the Trading Post and then fulfill the Blacksmith card you would earn an extra point and an extra coin. I suppose I added this to the design to produce a more guided decision tree to players.
In most of these images the way the prototype components were made was by printing on normal paper and glue-sticking them to 60lb. paper. The problem with this method is warping. And it was a big problem with the original Trading Post components. This is one reason that I have moved on to gluing stuff to matte board or chip board.
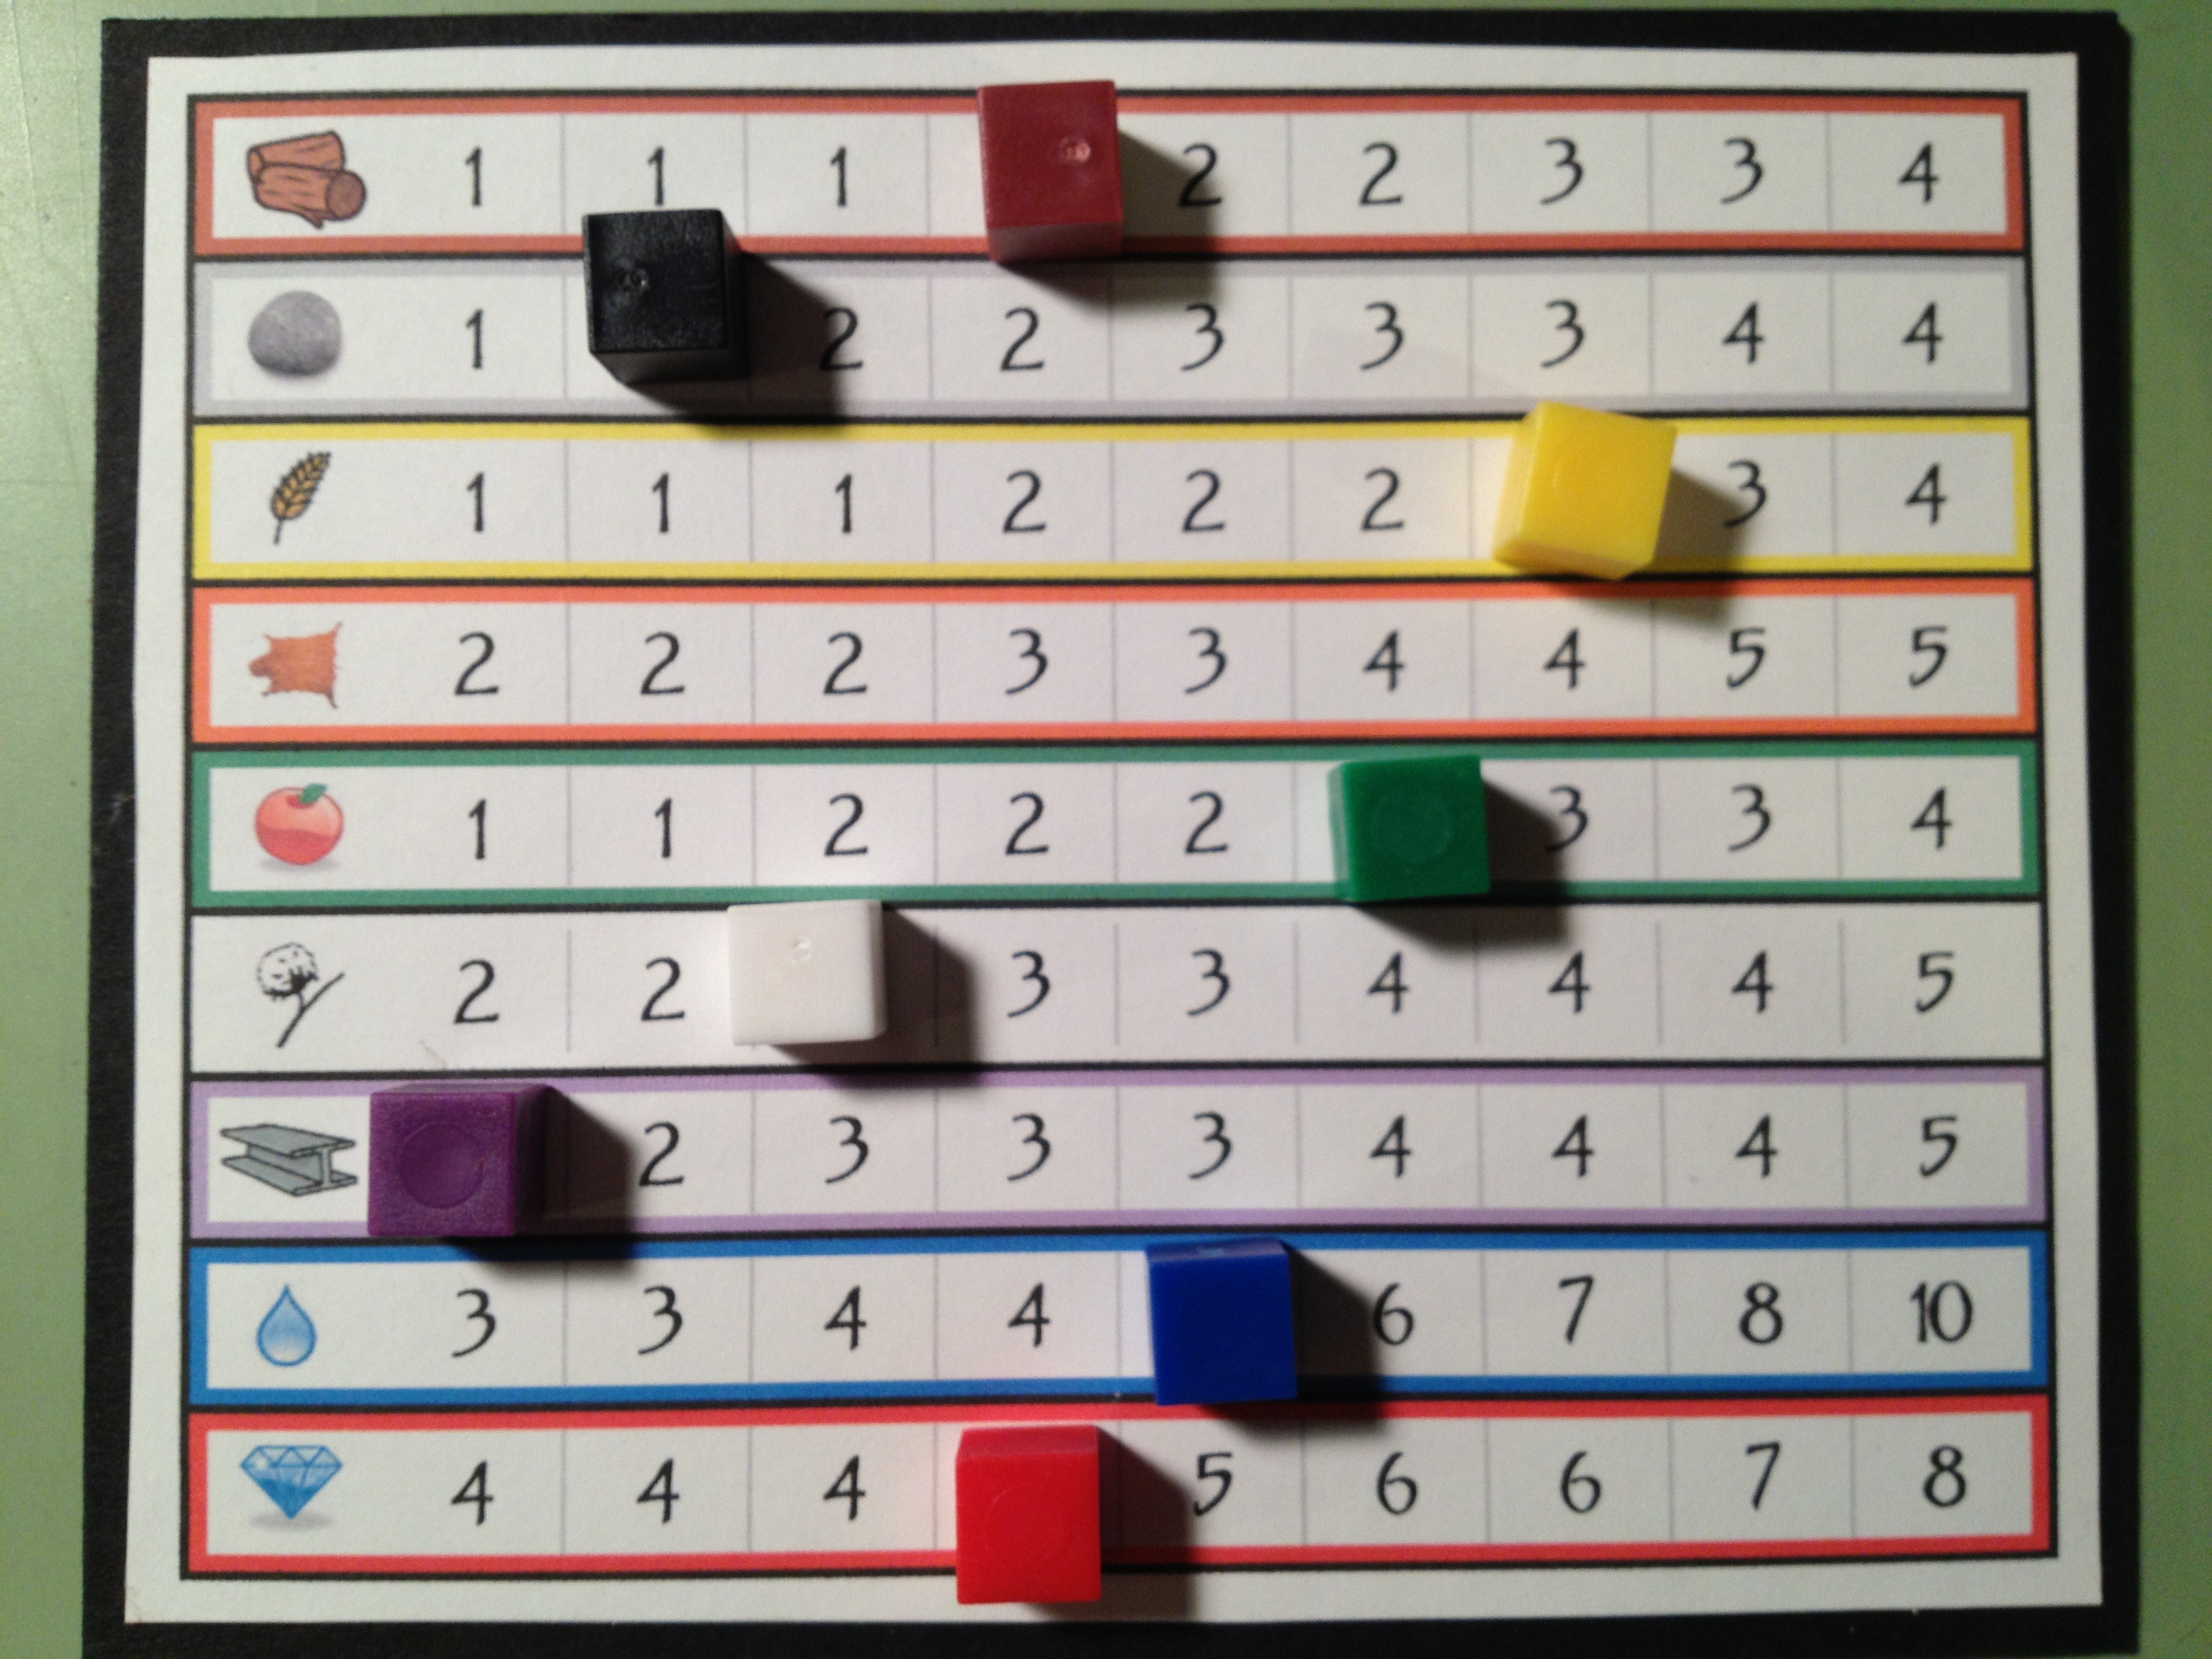
The market.
By this point in the design I had the board, the territory tiles, the event cards, and the orders. A market board was also built for the game to allow people to trade for different goods. This would be the driving economic factor of the game, but would also allow players to obtain goods that their randomly seeded territory did not produce. With all those components in place it was time to focus on what was in front of me… the player mat!
The Player Mats:
Since I knew that I wanted a main concept of the game to revolve around exploration I decided that upgrading your ability as an explorer would be critical. Thematically that meant going from a “trader” to a “trader with a horse” and eventually to a “trader with a wagon.” From early on in the design I limited the explorable zone for a “trader” to the first two rows out from the Trading Post. The idea behind this that fit the theme was that a man or woman could only walk, explore, and carry enough food for an expedition two rows out from the Trading post. By upgrading and purchasing a horse you’d be able to move faster and thus could explore more territory on the same rations. So when you purchased a horse you would be able to explore rows three and four away from the Trading Post. Finally, if you wanted to explore the outer most regions you would need to build a wagon.
So there is a side objective of all players in the game to be collecting the components they needed to be able to build their wagon. In the design I set it up so that you had to procure certain items. Once you had all these items you had a de-facto wagon. The wagon would allow you to explore the fifth row from the Trading Post.
I designed the player mats to show how far you could move and how much you could carry based on your status. And I included a Wagon Construction Area showing your progress toward a wagon. Here’s a look at the first and second versions of the player mats:

The top shows the original version. The bottom shows the cleaner, more user-friendly second version.
The cool thing, or at least what I thought was cool, was that in the second version you would actually be building your wagon by placing the pieces on top of the illustration.
One other thing to point out about how the game worked is illustrated in the second version of the player mats. There is a row for INCOME and a separate row for MONEY. Thematically the INCOME row represented any money earned during your turn. This would be like getting a paycheck. The way it worked was that after your turn, your income would be added to your money and then the income track would be set to zero. This means that any money earned on your turn isn’t available until the next turn.
I would say that through this whole prototyping process, which occurred in mid-2011, my favorite components were the player mats.
Overall Prototyping Experience:
The best possible tip I could provide to designers regarding prototyping would be this:
Just make something functional and test it. Only put in the effort to make it look good once you know it’s working.
Next week you’ll see that I don’t heed my own advice. But I’m inhibited by my desire to make things look good. And now that I know how to use Inkscape it takes much less effort to produce something that looks good.
Looking back at all the things I did for Trading Post I’ve realized that I wasted a lot of time. I built spreadsheets. I wasted hours using The Gimp to make that board. I added needless complexity, which then required me to make more components.
The game was only attempted to be playtested in its previous form twice. The effort to playtest ratio for this game is just ridiculous. So next week I’m covering my hiatus from the game, how I’ve advanced as a designer during that hiatus, and now how I’m going about redesigning the game. With that in mind I’ll leave you with one final image, which is a printout of a spreadsheet that I made so I could take notes on. This illustration sums up all the things that I am trying to avoid with the redesign!
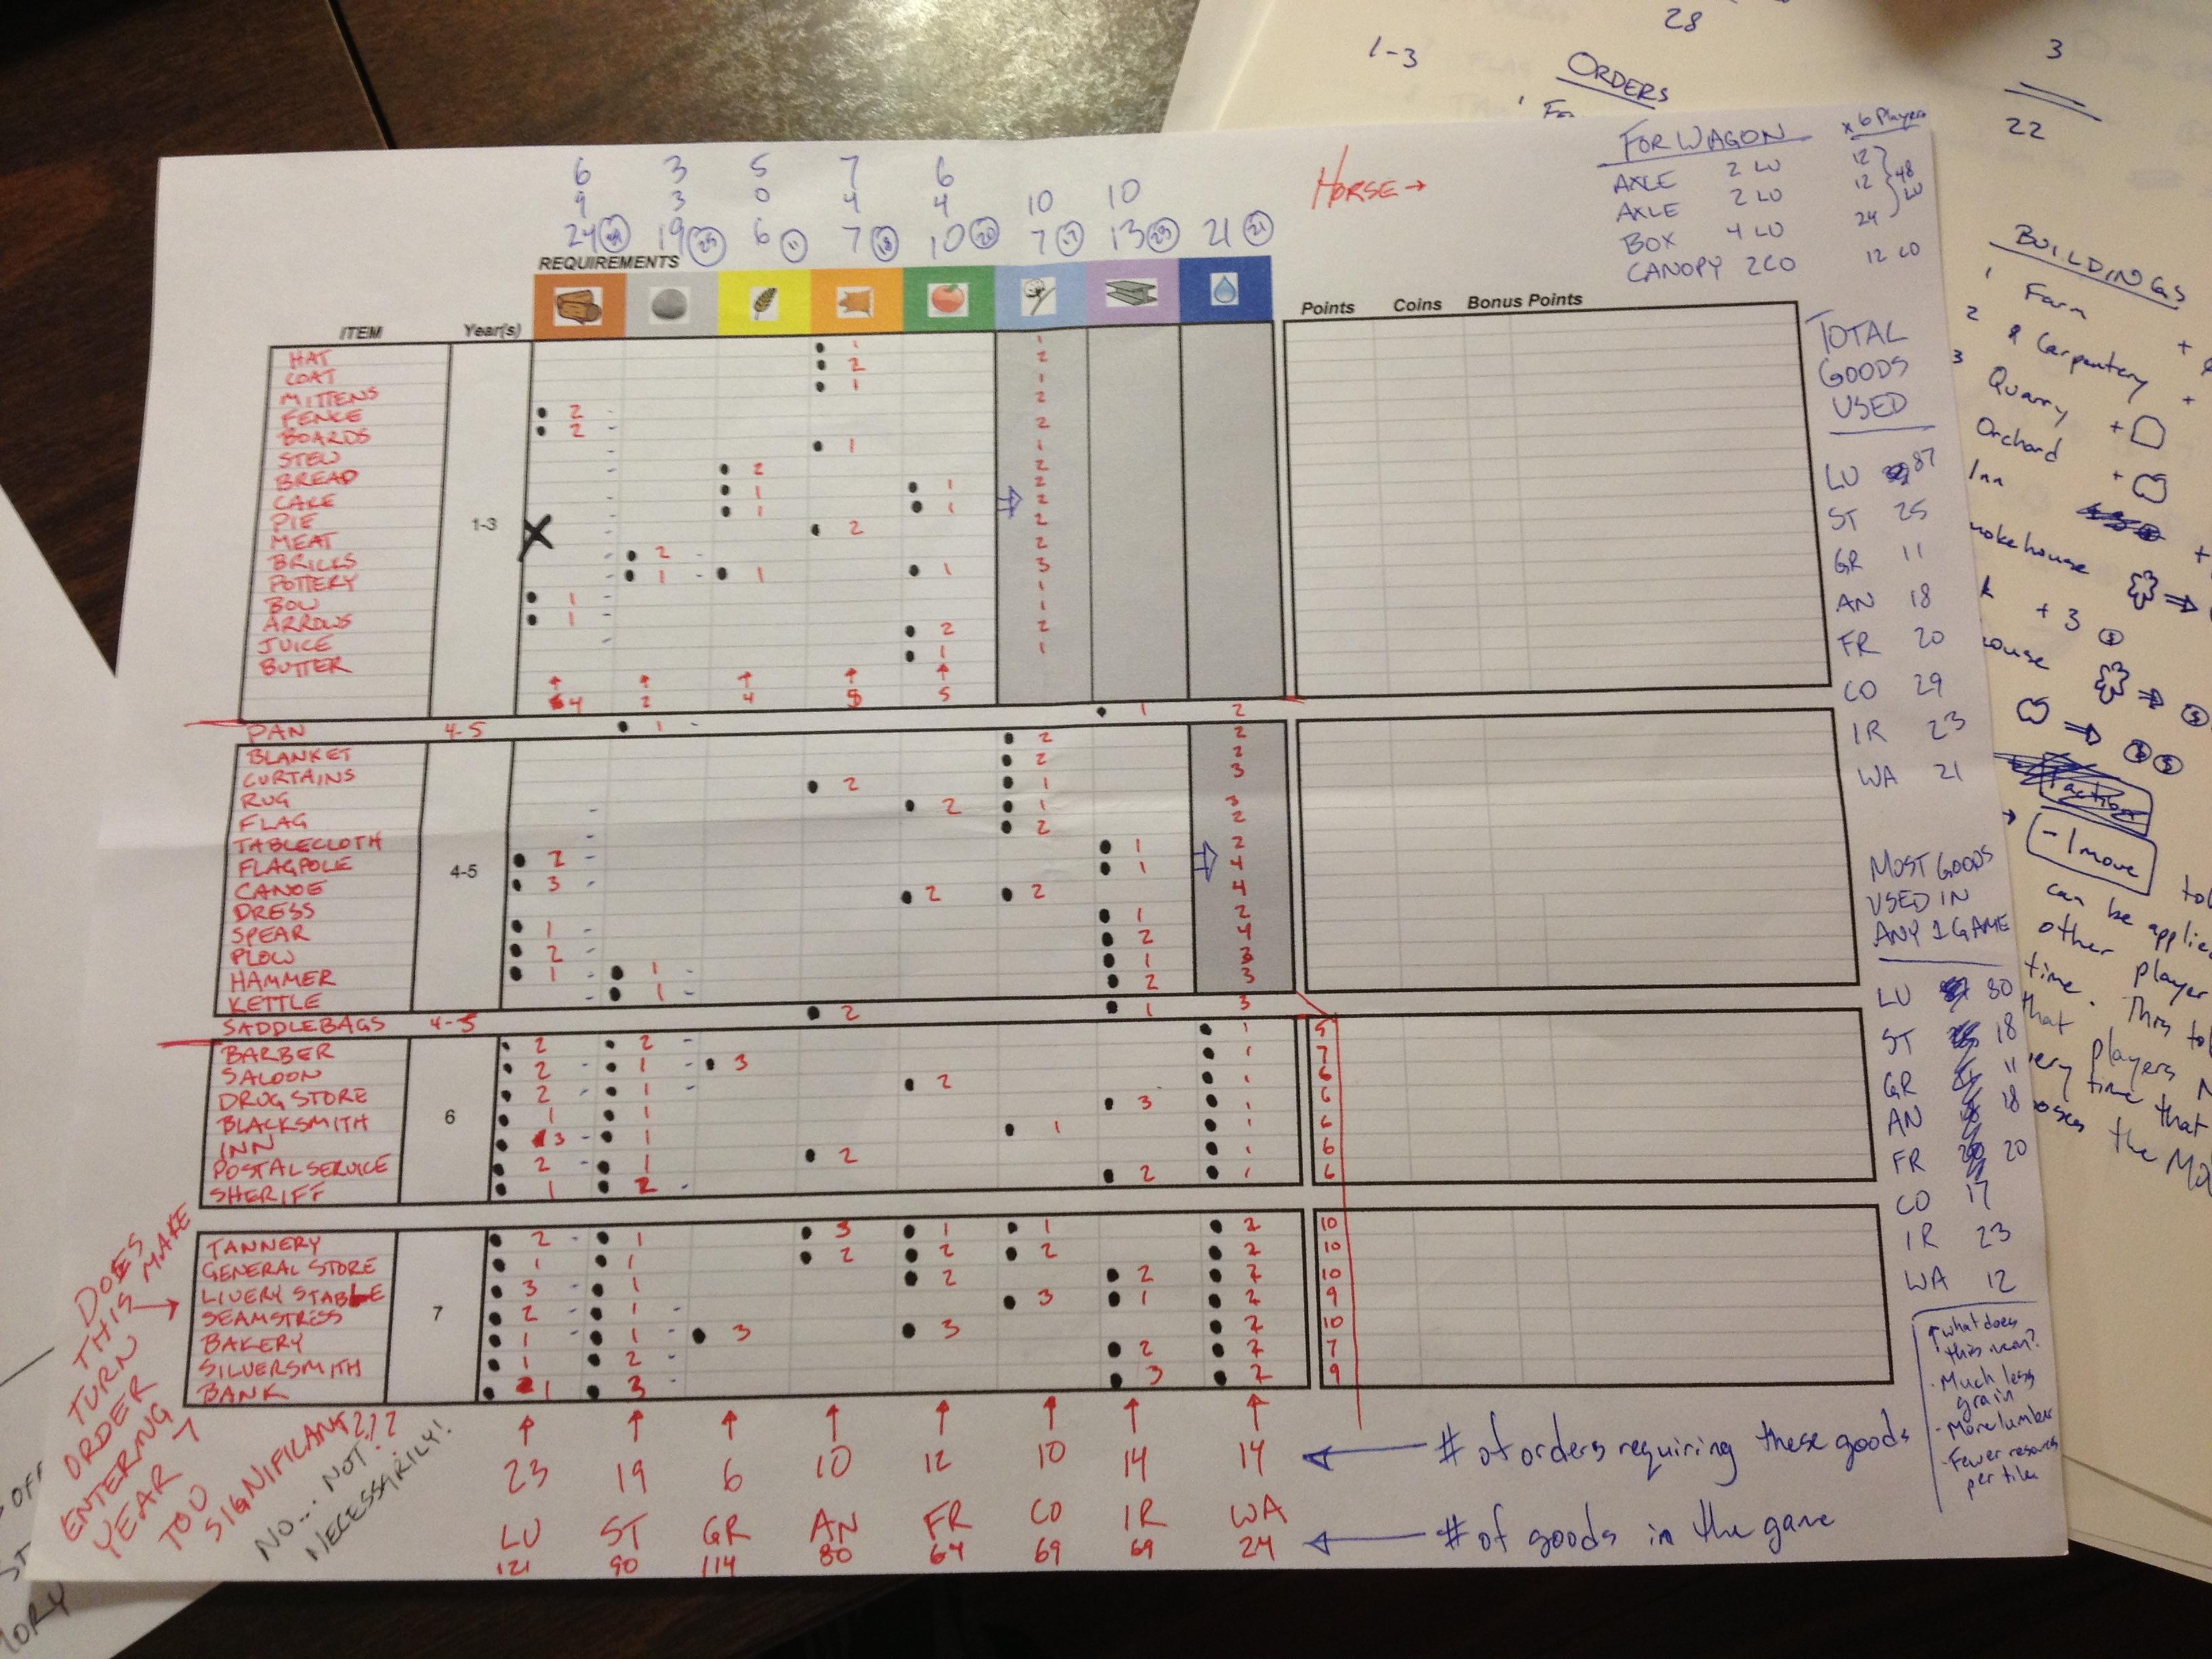
Wow. Just wow. Next week you’ll see dramatic improvements!
Thanks for reading. I’m happy to answer any questions you have about Trading Post and the things I’ve posted so far. Just share your comments below!
My First Brew: Alberti Amber

Yes… Yes we do!
If you’ve been following this blog then you know I’ve purchased my first beer brewing kit. 2013 just seems like a great year to get started. I’ve wanted to brew for about 5 years now. So it’s about time I leveled up in Manliness and actually brewed.
Achievement Unlocked!
Two Saturdays ago I connected my propane tank to my turkey fryer and boiled some wort! It was an interesting learning process and I’m proud to be able to report on it today on B&B!
Pre-Brew Nerves
Some of us who run, and by “us” I mean “you,” have experienced something known as Raceday Nerves. It’s where you’re all nervous before you start a race. I’ve been there too. I ran a couple half marathons two years ago and have definitely had those butterflies. Why do I bring that up? Because for some reason I had a little pre-brew jitters. I guess it was because I was hoping to not mess up.
There was nothing I could do about the nerves so I just got to it. Here’s my homebrew setup:
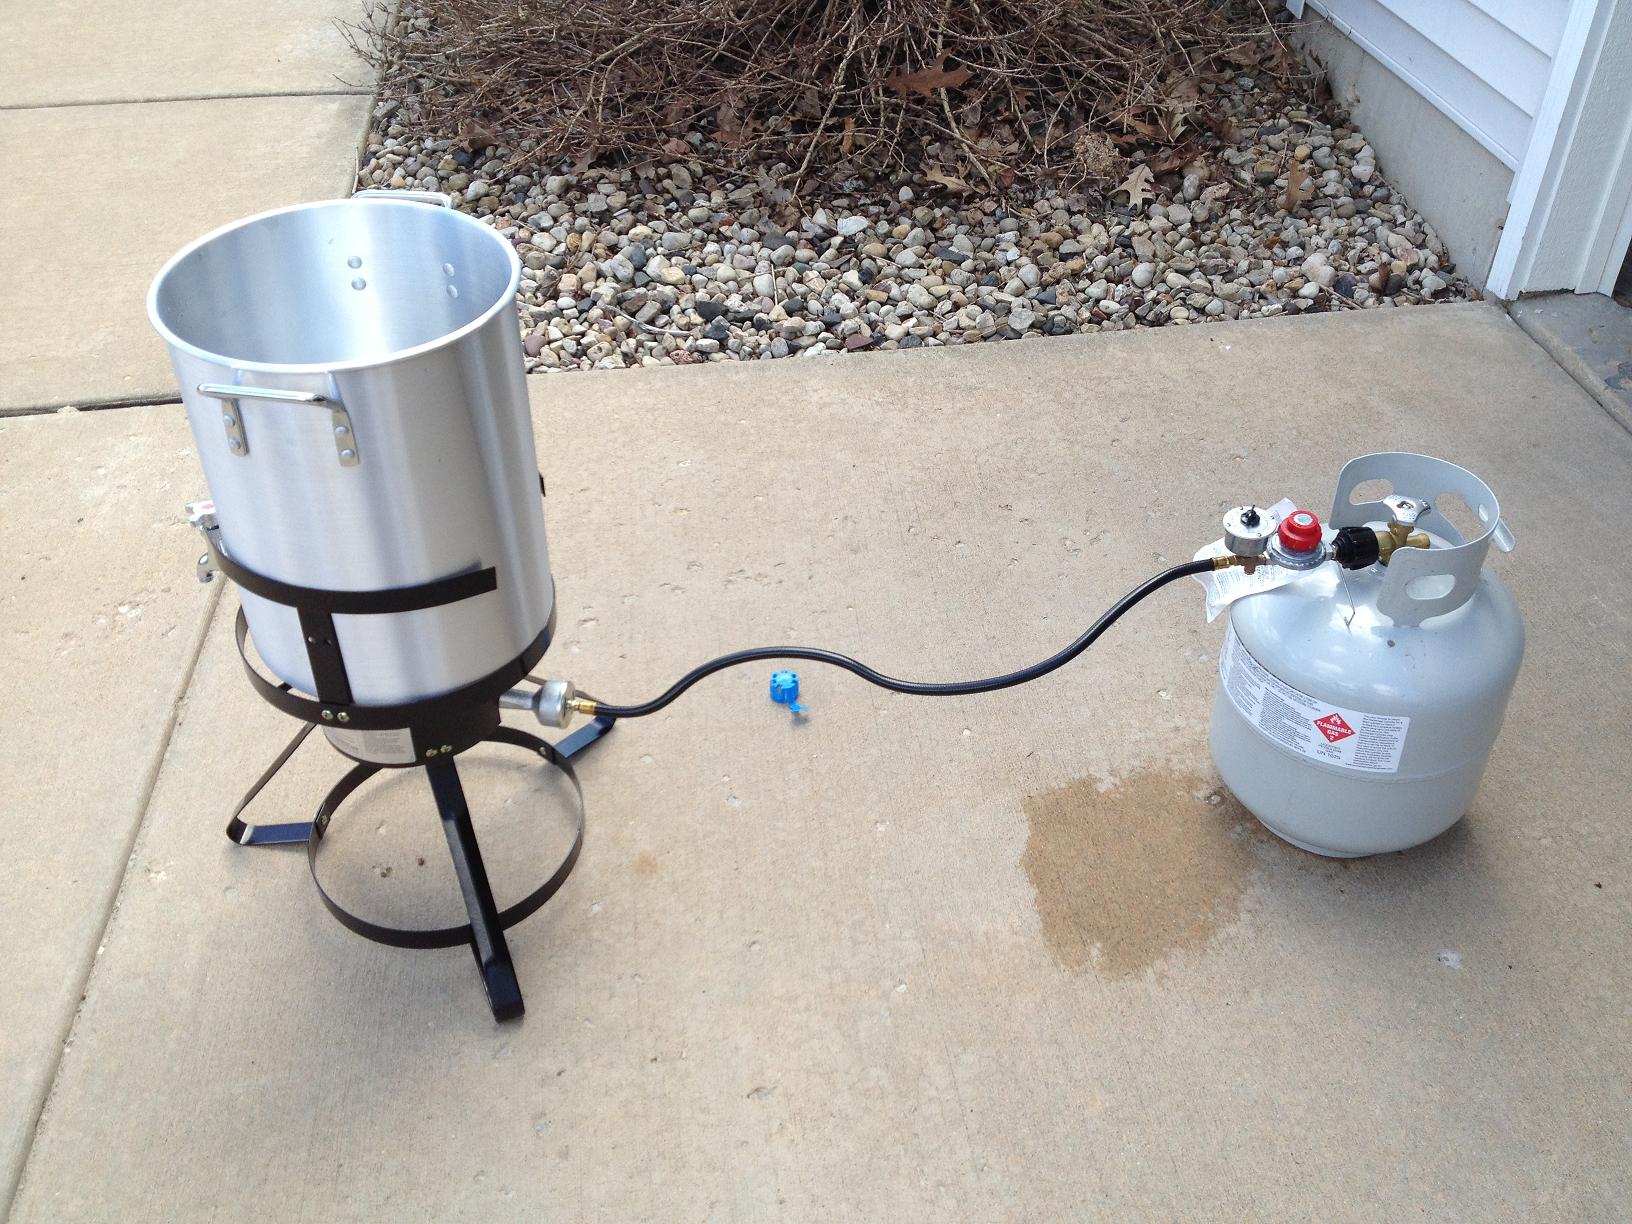
This way the stink was outside rather than inside with my wife!
It looks all shiny and new there. That lasted about 3 minutes until the flames started to cause the black paint on the turkey fryer stand to bubble, crack, and burn away! Yikes. And of course as the paint and the bolts were flaming my neighbor walked up and asked what I was up to.
Who wants to boil some Wort?
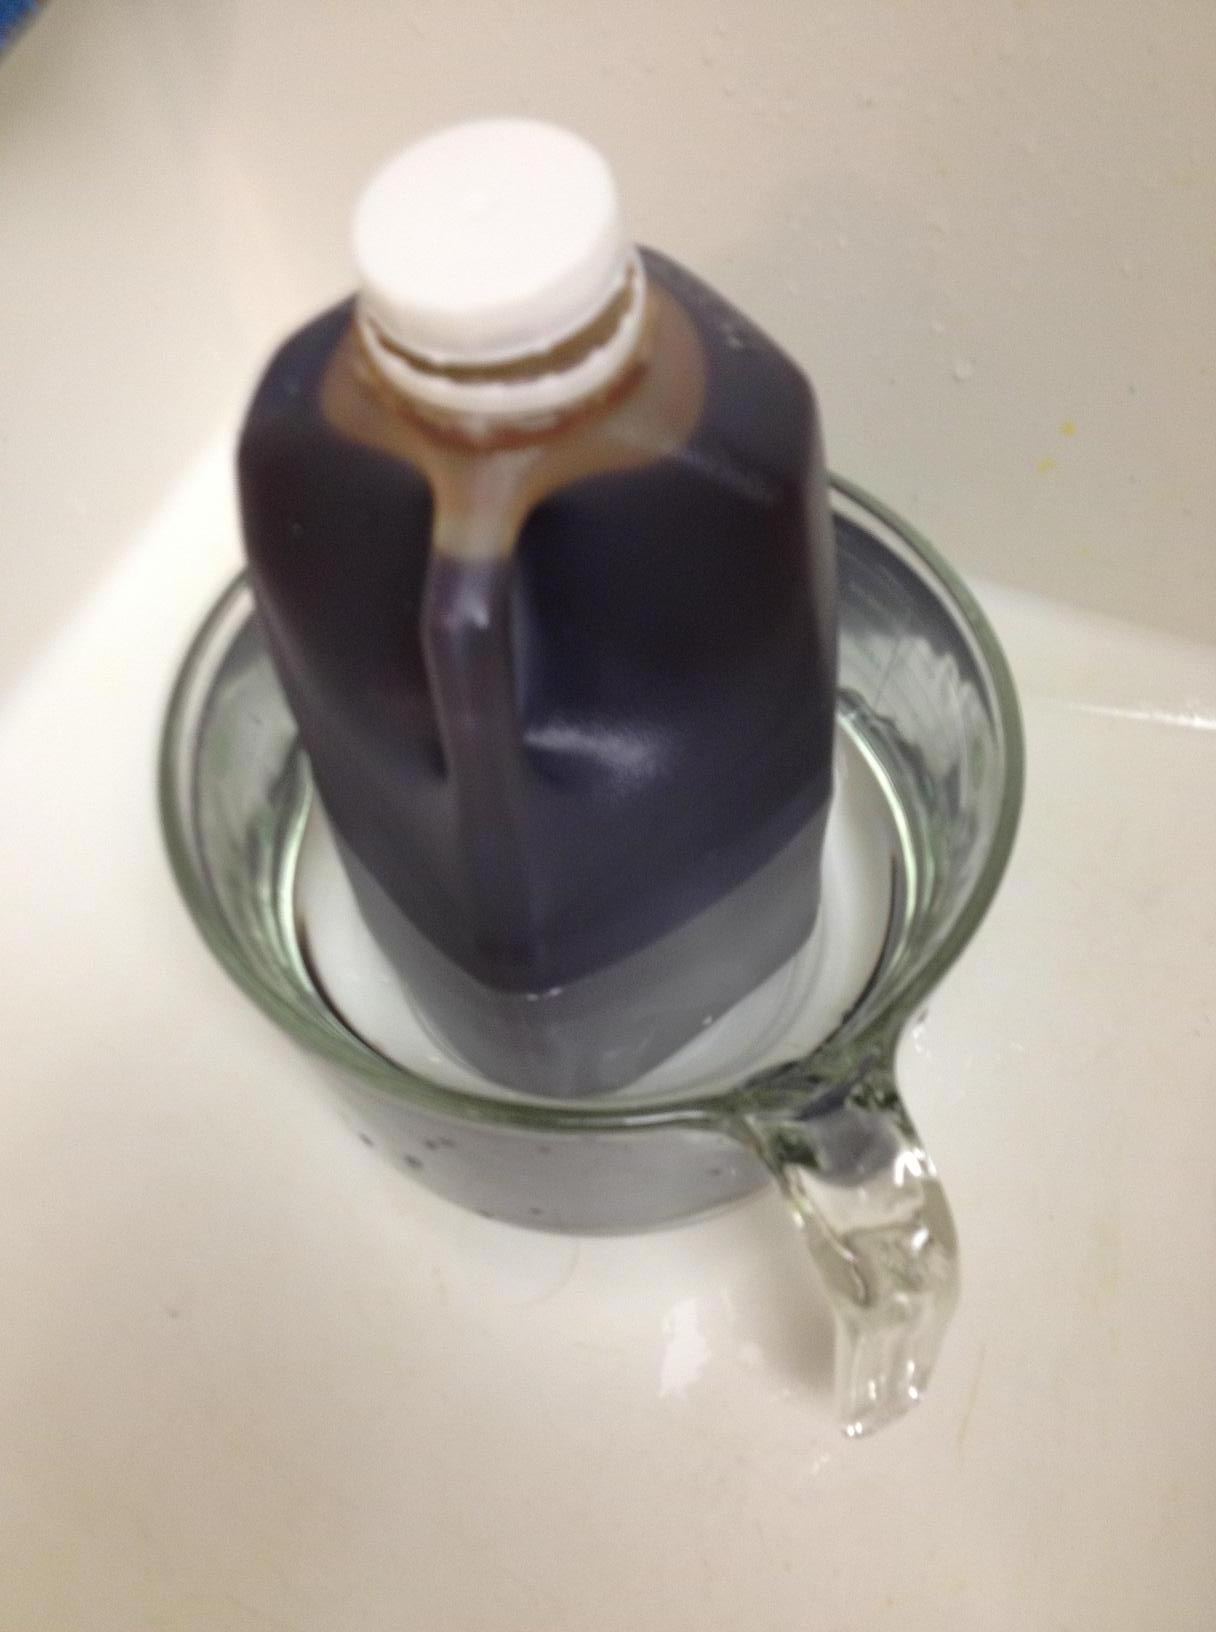
Pre-warming for precise Wort extraction!
For my first brew I wanted it to be as simple as possible. That means I was brewing with a pre-made extract. This is a liquid that comes in a half gallon jar. You can see it over there →
Brewing this way is pretty “easy.” You just boil the wort for about 40 minutes, then cool it, put it in the fermenter and add the yeast.
Eventually I will get to the point where I’ll be choosing the grains and hops that I use so that I can brew actual, legit home recipes. But as a first timer I think I made a good choice.
In some ways it relates to board game design. I could have chosen to go with a complicated all-grain brew and thrown a bunch of awesome stuff in there. But it probably wouldn’t have all worked together, especially on the first try.
In board game design it seems like it would make sense to put a bunch of awesome mechanics together and expect an awesome game. But what ends up happening is you get a game where things feel non-thematic, unrelated, and almost like they’re work. *Cough* Archipelago *Cough*
So I didn’t want to put a bunch of awesome stuff together and hope for the best. I took this first batch as an opportunity to learn a little bit!
Gettin’ Hot in the Pot

Beware of the “Foam Over”
With my wort warmed up and the water boiling I was ready to begin! I was pretty nervous about this part. Reading through the directions it was pretty clear that this part could involve a “foam over,” not to be mistaken with a comb over.
Fortunately my turkey fryer is a 7.5 gallon pot and I was only boiling 2 gallons of water and the wort. There were a few times that the foam rose up near the top. If I had been boiling it on the stove it definitely would have foamed over.
By using the knob on the turkey fryer it was pretty easy to control the heat to the pot. Therefore any time I saw the foam building I was able to turn down the heat just a bit and watch the foam dwindle. I was really thankful that I paid for the turkey fryer since it gave me so much peace of mind when boiling the wort.
Here a peek into the pot:
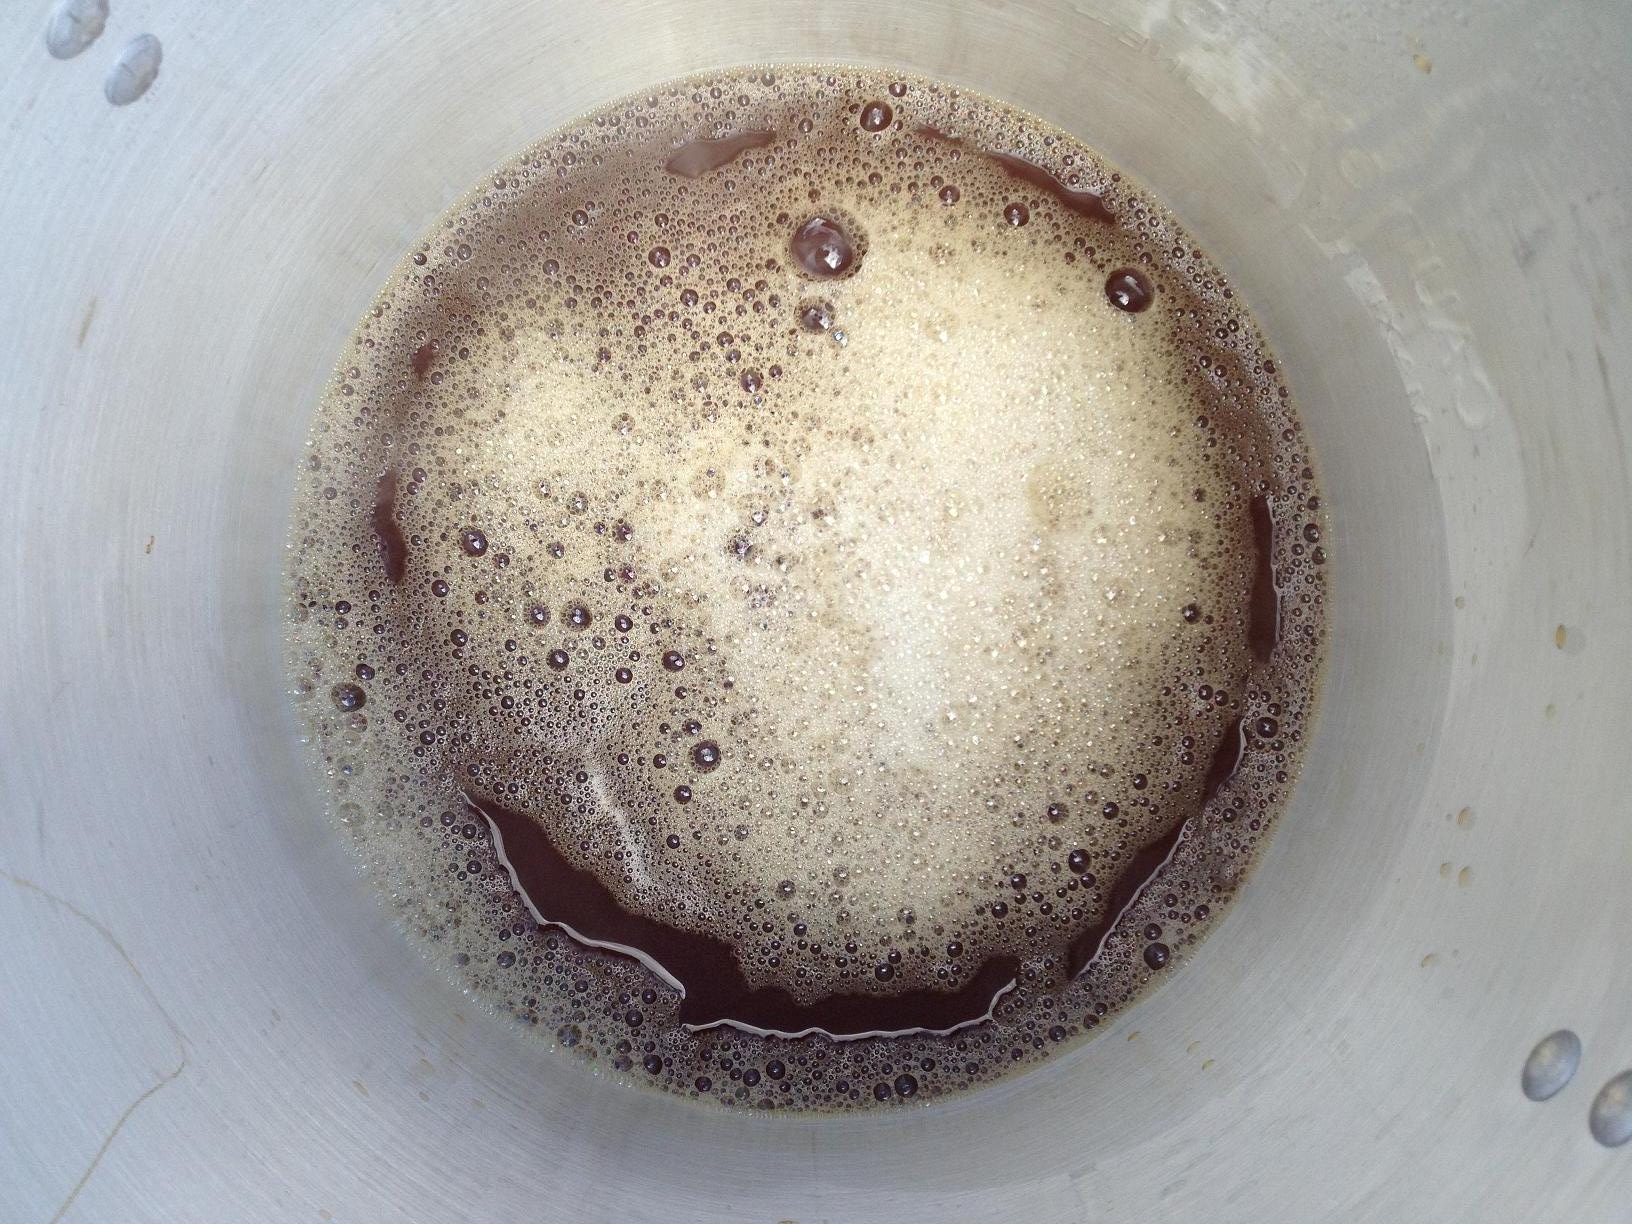
I wish I knew if this looked right!
When the wort started boiling I added the Willamette hops. After 30 minutes I added a half ounce of Kent Golding hops. And then after 8 more minutes I added another half ounce of the Kent Golding hops. And two minutes later it was done!
Am I a Brewer Yet?
Once the wort was boiled and the nervous part was over with it was time to cool the wort. I filled my utility sink full of ice water and placed the whole pot right in there on a metal trivet. With active stirring it cooled the wort pretty quickly. In a previous article I had mentioned making a wort chiller. I may still do that, but this cooled it down in about 12 minutes.
The next part was a little tricky too. It was time to transfer it over to the fermenter, which is a fancy word for plastic bucket. Without much hesitation I poured it right in. It felt really good to be done with the boiling portion of the brewing process.
Here’s what I left behind in the pot:
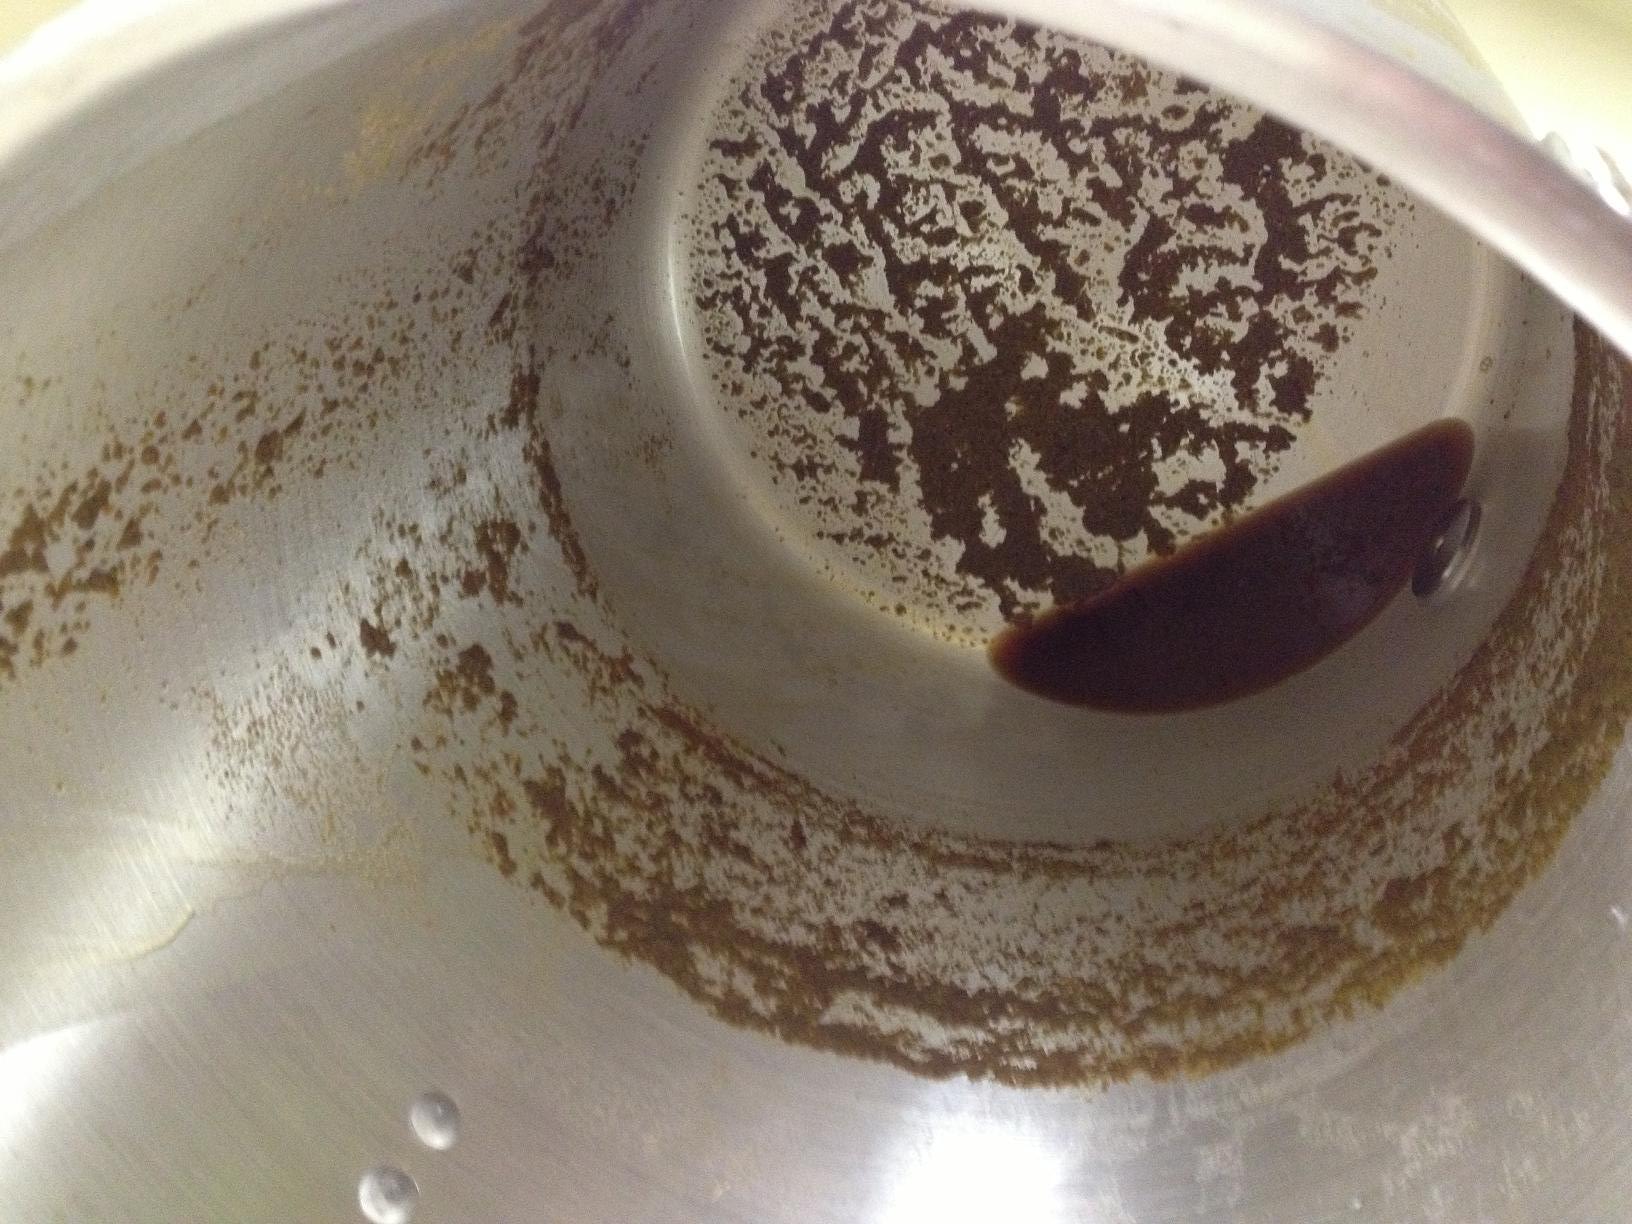
Some might call that “nutrition.” I call it grit!
So the beer was brewed. What’s next?
The Waiting Game
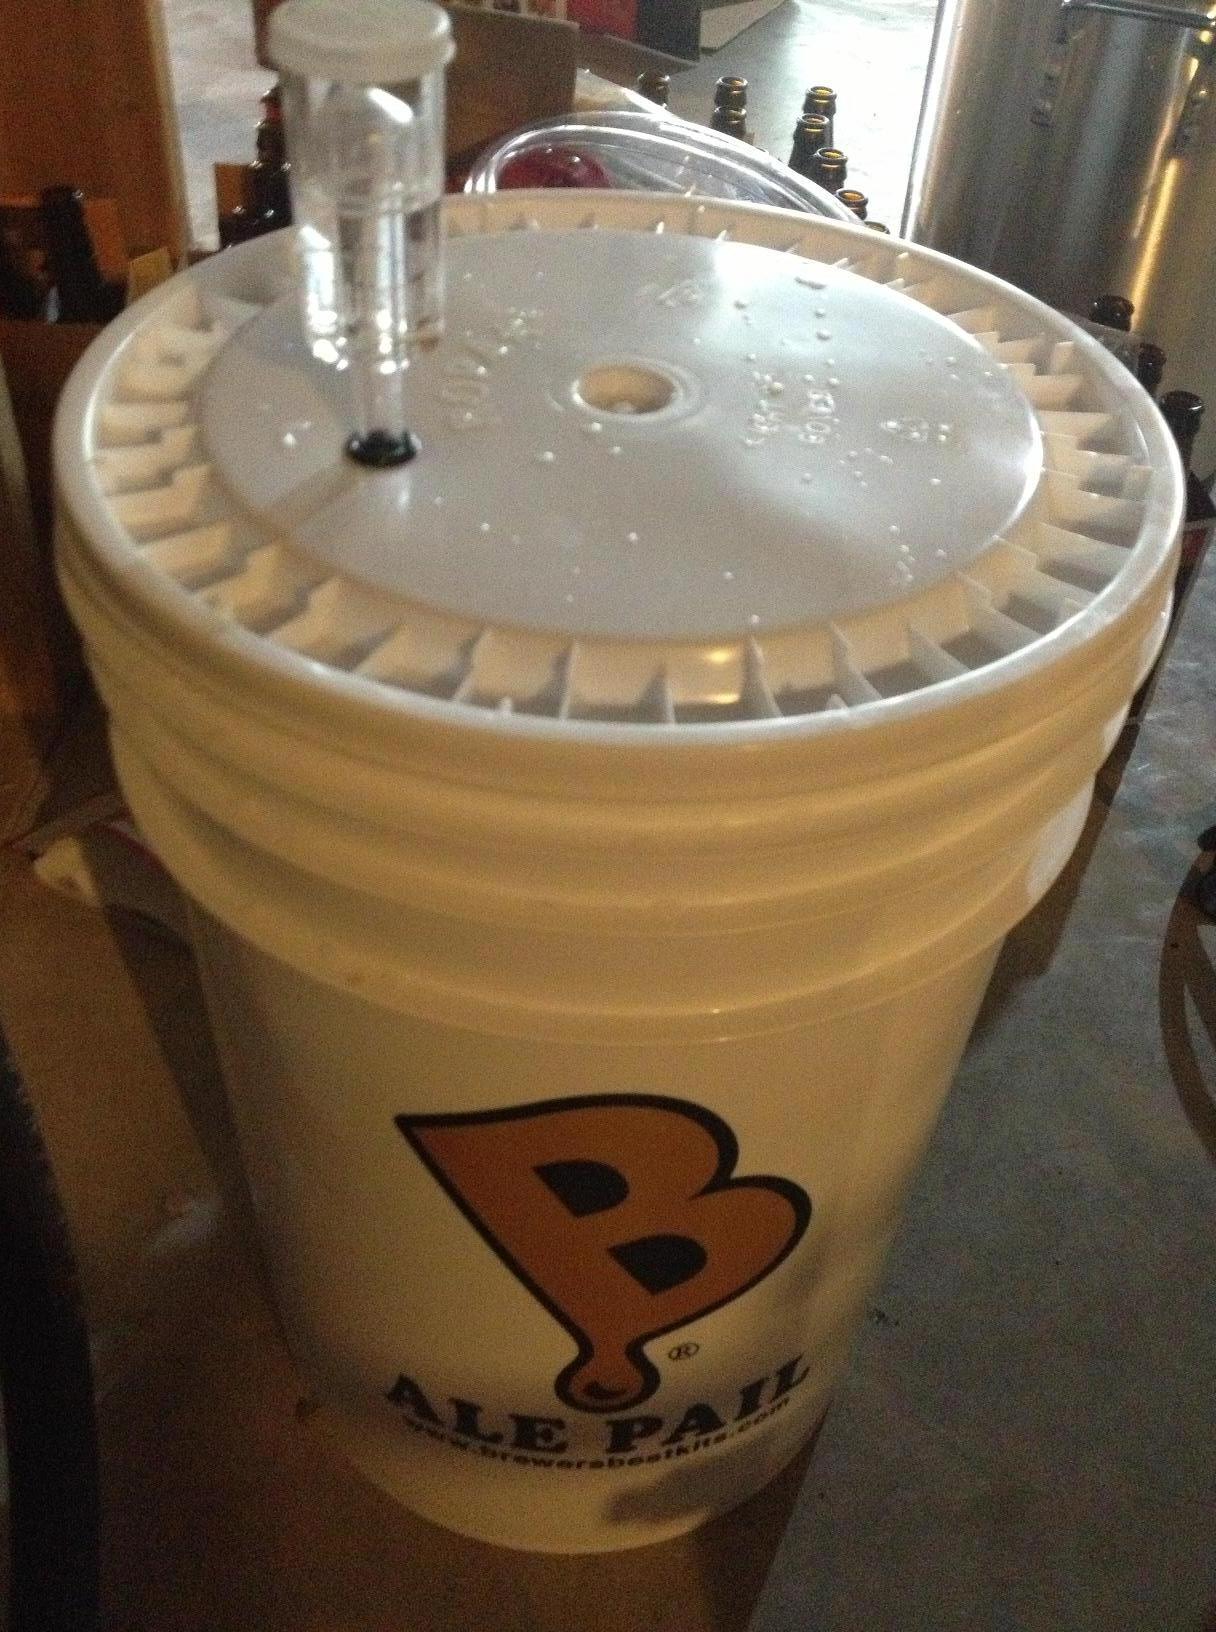
X-ray vision would have been great so I could see how my beer was doing!
With the boiled wort in the plastic bucket (I just can’t call it a fermenter) it was time to wait. I was super excited about the waiting game. I was really looking forward to seeing some bubbles coming through the fermentation lock.
I was prepared to see no bubbles. My confidence in my brewing ability was so high that I was expecting to fail.
Fortunately a day later I saw the first bubbles! It was a great moment in my life. I put it right up there with taking the ACT for the fourth time in high school and that moment in baseball practice when I got hit, well… you know where.
So the bubbles, while exciting, really weren’t much to look at. I figured they would happen. I was just slightly worried that it would foam over through the fermentation lock.
Thankfully it did not. And I was able to move onto the second stage of fermentation… the Carboy!
Carboy is a Cool Word
So the next step is to transfer the beer over to the glass carboy. This doesn’t have to be done, but all the books and experts make it sound like it’s the right thing to do. So I did it.
I had purchased an auto siphon, which really made the transfer pretty easy. I hoisted the bucket up on a box and cracked it open. It really smelled good! I put the siphon in the bucket, being careful to keep it off the bottom, and then pumped and let it do its work.
Here’s how it looked during siphoning and after all was said and done:

Siphoning (left) and fermenting (right)
I AM a Home Brewer! What’s with “Alberti?”
So at this point my beer has been in the carboy for about 4 days. It is a little cold in my basement where it is fermenting and I think that has caused it to ferment less than it perhaps should have. But the bottom line is that there are several gallons of my own beer sitting in my basement!
So the next step will be bottling at some point in the next week or so. That should be interesting. I bought a bottom up bottle filler, though. That should help the process a bit!

Like cracking a cipher, let’s crack an Alberti Amber!
So why did I name it “Alberti Amber?” This beer is named after Leon Battista Alberti, who was a 15th century Renaissance man. I like to consider myself sort of a Mediocre Renaissance Man and so it’s fun to name these beers after men I look up to. Alberti is a favorite renaissance man of mine due to his Alberti Cipher work in cryptography. I have a little man crush on unsolved ciphers and maybe my beer will help me solve some of them. Probably Not.
So it’s been a fun, if nerve-wracking, process brewing my first batch of beer. I think the second time will go much smoother. Or at least I’ll be more comfortable with it. All I have to do is figure out what style of beer I want to brew next! Helmholtz Honey Bock? Franklin Cream Ale? We shall see!
Designer Diary: Dam It!
Origins of Dam It

Current Reverse Art
Two summers ago I came up with a goofy game design. Last week I wrote about the game being rejected, and what I learned from that. I called the game “Dam It!” The goal of the game is to build a dam across the river before any of the other beavers build their dam. Since the game was recently rejected by a publisher it is now back in my hands. So today I bring you my “designer diary” about the game from concept to its current state.
When I came up with the game I had the idea that it would be really cool to play a card game where you stacked transparent cards so that an image was built up after a few cards were piled on. This fit with a dam theme since you could stack cards to complete a dam (logs, sticks, mud, etc.). The problem with that is that when using transparent cards you can always tell what the other players are holding unless the outlines are the same image. And if the outlines are the same, then there’s no point in stacking them. The only way to make transparent cards work is to have separate decks; one for playing and one for building. So I threw the transparent card idea out right away. But for some reason I still made a game about building dams.
So I came up with the idea to build a dam using Big Logs, Twig Filler, and Mud. Oh, you can also hire helpful beavers to build more efficiently. And you can damage your opponents dams by sending stones or weeds down the river.
Now I had a bunch of cards to make and I had what I thought was a good system for how those cards would be used. Big Logs, Twig Filler, and Mud would be the building materials. Weeds and Stone would be damage cards. And Angry Beavers, Eager Beavers, Mildly Eager Beavers, and Busy Beavers would be the hired help.
The First Play Test
I made a board for up to six players. I printed and cut out about 160 cards. And I got my friends to try it out at a board game day. Here is a hastily made reproduction of what the original board looked like:
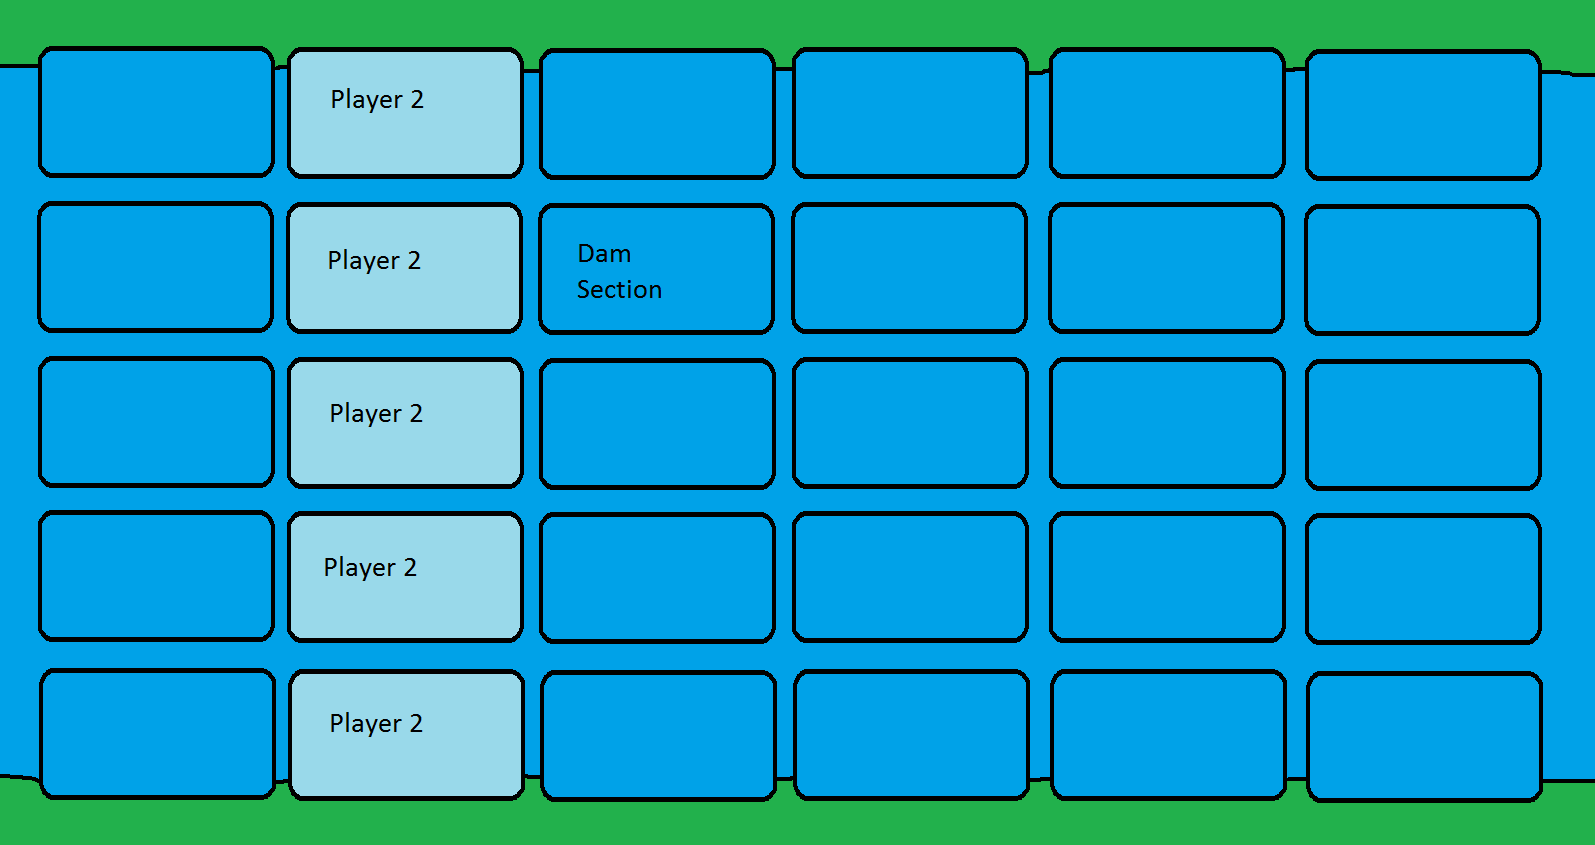
Each player has a column stretching across the river, composed of 5 dam sections.
On your turn you would draw two cards and then play any or all cards that you wanted to play. When you played sets of cards onto your dam you would remove the appropriate number of cubes from that dam section. When your turn was done you would draw back to five cards.
The first play did not work so well. We were able to play the game, but it was like driving a Yugo down the road with two flat tires. The first problem was that the game took forever. Early on players would have to gather a set of 4 Big Log cards just to get a dam section started. Those Big Log cards each had a percentage on them. When the set of four was played, the percentages were added together and that is how much the flow in that dam section would go down. But players would have to get sets of four for Big Logs, Twig Filler, and Mud. And they would have to do that for each of the 5 dam sections. Changes ensued!
Making it (Marginally) Better
To make the game better and to speed the game up I made the following changes:
- Decrease from 5 dam sections to 4.
- Remove the percentages of the flow decrease on the cards and standardize each set. (i.e., all Big Log sets would be worth a 30% flow decrease).
- Increase the number of cards in a player’s hand from 5 to 7. This would allow for better probability of getting the required building sets.
So with those changes the game played better. But there were still problems. The downtime was too great. The interaction was minimal. And the greatest problem was that the game depended too heavily on getting the right cards. Often there would be one or two players who would just never draw the Big Log cards. And you can’t start building until you get them. So they just sat there at the table unable to do anything fun in the game. That’s boring. So I made more changes.
One of the best ways to illustrate the changes in the game is to show the evolution of the Big Log cards. Note: the log artwork on these cards is from Microsoft (here) and another source that I must not have documented. For future prototypes I plan on using only original artwork or artwork from sites like Game Icons.

How the art, and characteristics, of the Big Log card changed over time.
In that image you can get an idea of the evolution of the game overall. One of the biggest changes was going from removing blue cubes which represented flow to adding brown cubes which represent the actual dam you are building. Another key change was to allow the Big Log cards to either be used individually or two at a time. Using them individually could help get you started faster. Using two at a time could help you build one section more quickly. But…
People Still Weren’t Having Fun
Can these beavers save my game?
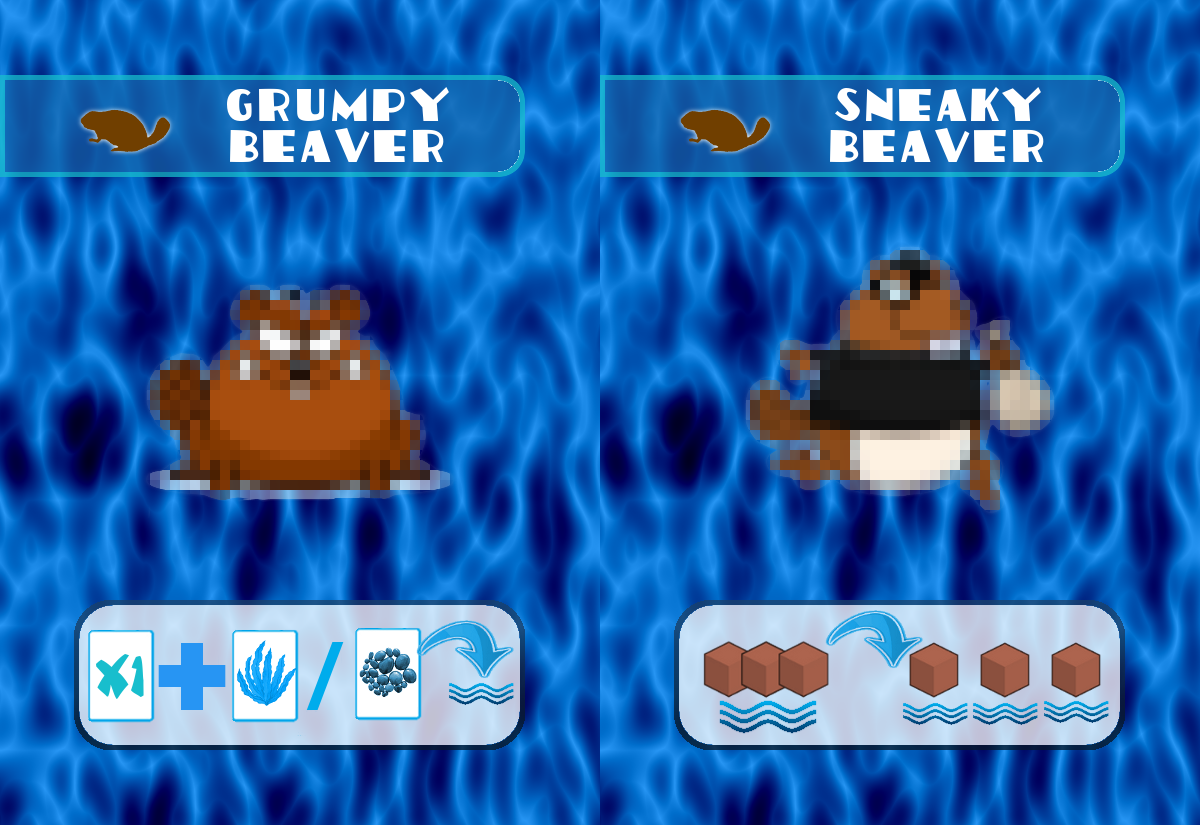
So during that playtest the night before potentially pitching to a publisher at GenCon one friend of mine pointed out that the game just wasn’t very fun. That’s a HUGE problem. The whole idea of designing board games is to create an environment where the players will be having fun. The comments were the same: minimal interaction, runaway leader, never getting the cards I want. So I made a change that added two new beavers: Sneaky and Grumpy.
The idea of the Grumpy beaver is to increase the interaction between players. Previously the weeds and stone could only be sent downstream. In the late game situations this basically meant you could only attack the player to your left. But if the player to your right is really close to winning, you’d probably rather attack them. So the grumpy beaver, when paired with stone or weeds, allows you to attack any other player, not just downstream.
The idea of the Sneaky beaver is to help prevent a runaway winner. When a sneaky beaver is played one player is attacked. The person playing the Sneaky beaver will remove three cubes from one dam section of the player being attacked. Those cubes are then given to other players and placed on three separate dam sections. This helped with the runaway leader problem.
So I had solved two major problems with the game through one revision. But was it any fun? Just the other night at our board game night the person who had never enjoyed Dam It mentioned that it was never any fun until these two beavers were added. That was music to my ears. So I had converted the hater. And I was now confident enough to send this game off to a publisher.
Rejection
Yep… the game was rejected. You can read about that in last week’s post: Lessons Learned From Rejection. However, I received some excellent feedback on how to improve the game. The two pieces of feedback I found most helpful were:
- Use the cubes for more than just visual notation of the current state of your dam. For example, be able to spend cubes for a special action.
- Mitigate the luck of the draw aspect by having several cards face up to draw from, a la Ticket to Ride.
Both of these will increase the options for your turn, and give a player more to think about. Good stuff!
In Hindsight…
One of the things that I thought was really important was the art of the prototype. I should mention that this was before I followed a ton of great people on Twitter, who know what they’re talking about. I thought that the art had to be really good. I didn’t want thin paper cards with minimal art and sketches and notes. I wanted a product that looked complete. I thought this was important for the publisher. Why did I think that? Well, it seems like an obvious thing because it’s the idea of making a good “first impression.”
This was a problem for me as a designer because I spent way too much time working on the art (in The Gimp) when I could have been play testing or designing other games. While I enjoyed working on the art, it just wasn’t important. What if the publisher chose to publish the game, but also chose to re-theme it? Then all that time would have been potentially wasted unless.
Another thing that I would have done differently is to send the game off for blind play-testing. One great program for this is Grant Rodiek’s Prototype Penpal Program. I think blind play-testing is critical so that you can test not only the game, but also the clarity of the rules, from people who are not biased towards you. I plan on utilizing the Prototype Penpal Program after attending Protospiel-Milwaukee in March.
In hindsight there are plenty of things to change about the process I went through with Dam It. I’ve learned tons but only because I made the mistakes that I made. Sometimes it’s better to learn by doing, even if the doing is filled with mistakes.
What’s in Store for Dam It?

Scoville – come play it at Protospiel-Milwaukee!
I will not currently pursue this game any longer. It is an appropriate time to shelve the project. I am currently heavily testing and revising my game, Scoville, so that it will be ready for demonstration and play-testing at Protospiel-Milwaukee in early March. Since Scoville has more potential than Dam It it means the beavers will have to take a back seat. I also have other game designs that I feel are more intriguing than Dam It that are not quite at the prototype phase yet.
If I were to pursue major revisions for Dam It I would start with play-testing the face up draw cards. That seems an obvious improvement to the game. I would also brainstorm the potential other uses for the cubes. I have added the face up draw to the rules, which should hopefully be up on BGG in the near future. If you want a copy of the rules, just let me know on Twitter.
Dam It has been a fun first game to work through the whole process of invent – prototype – play test – submit. I learned a ton and had a lot of fun. I think Scoville has definitely benefited from my experiences with Dam It! Want to find out? Come try it at Protospiel-Milwaukee!
